Huawei P8 Display with Frame Replacement
ID: 95043
Description: Use this guide to remove and replace the...
Steps:
- First switch off your phone.
- Remove the trays for the SD card and the SIM card.
- Remove the two Torx T2 screws located at the bottom next to the device's Micro USB port.
- If the screen is cracked you might want to use some tape to protect your eyes from glass shards and get a better grip to open the phone.
- Use an iSclack or a suction handle to separate the display unit from the rear panel.
- Remove the two Phillips #00 screws that secure the front camera and display/battery connector brackets
- Use a tweezer to remove the bracket covering the display and the battery flex connector.
- Unplug the battery flex connector with a Spudger.
- Remove the bracket covering the flex connector of the front camera.
- Unplug the headphone jack and the front camera flex connectors.
- Remove the front camera.
- Use a spudger to disconnect the power/volume cable and fold it out of the way.
- Remove the liquid contact indicator.
- Remove the five Phillips #00 screws that hold down the motherboard of your Huawei P8.
- Unplug the vibration motor flex connector.
- Disconnect the antenna cable.
- Unplug the display flex connector from the main board with a Spudger.
- Disconnect and remove the antenna cable with a tweezer.
- Remove the motherboard from the phone.
- Carefully peel up the flex cable of your loudspeaker.
- If the cable is difficult to peel, heat the loudspeaker assembly with an iOpener or a heat gun.
- Lift up the loudspeaker assembly with a spudger and remove it.
- Free the end of the first adhesive pull tab to get a good grip on it.
- Pull the adhesive tab in a slow constant movement to free the battery.
- Free the end of the second adhesive pull tab.
- Pull the adhesive tab in a slow constant movement.
- Should those adhesive tabs snap, you might want to use an iOpener to heat and soften them a little bit so you can pry out the battery with a spudger.
- Slowly lift the battery out.
- When reassembling your phone, replace old adhesive with stretch release adhesive strips, double-sided tape, or pre-cut adhesive strips.
- Remove the vibration motor gasket.
- Remove the vibration motor.
- There is some adhesive under the vibration motor and its gasket. If you are not able to remove them, use an iOpener to loosen the adhesive a little bit.
- Remove the power and volume button flex cable.
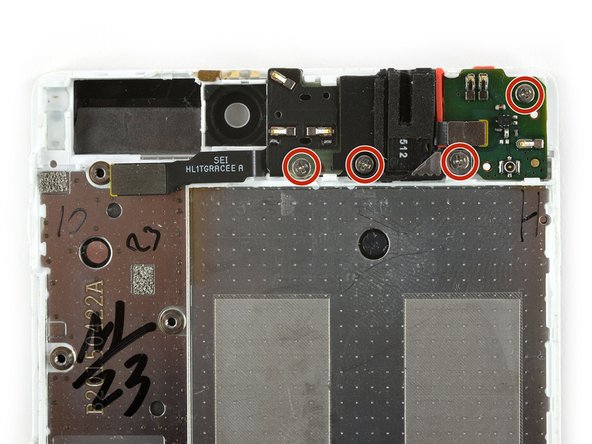
- Remove the four Phillips #00 screws.
- Use a tweezer to remove the plastic bracket which is covering the corner of the headphone jack.
- Use a spudger to disconnect the headphone jack flex cable.
- Use a tweezer to remove the first daughter board which was connected to the headphone jack.
- Remove the second daughter board including the headphone jack.
- Both daughterboards are clamped into the mid frame and a little bit tricky to remove. Try to grab them near the holes for the Phillips #00 screws to not damage any contacts.
- Remove the gasket which was placed under the daughterboard in the top right corner of your phone.
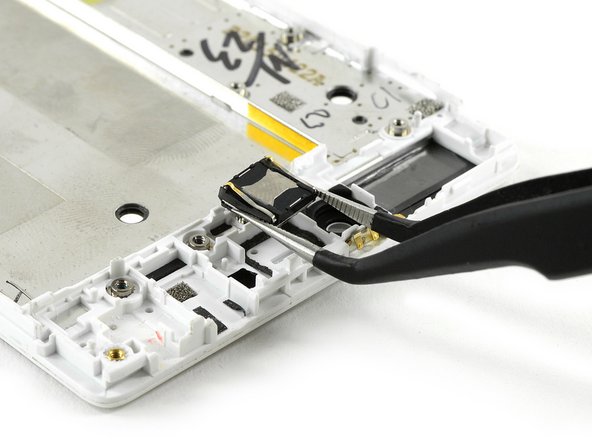
- Remove the earpiece speaker with a tweezer. Take care of its connectors while doing so.
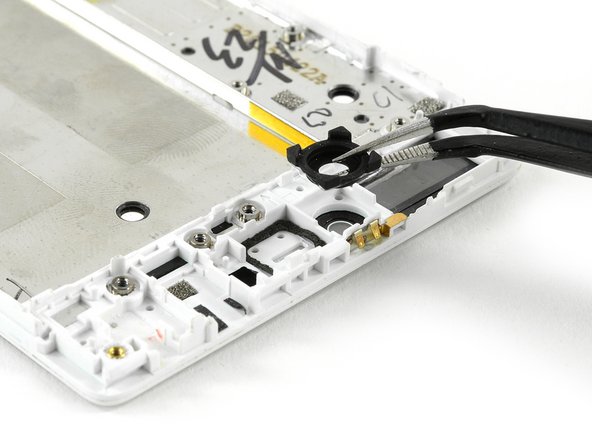
- Remove the front camera gasket.
- Before reassembly compare your new replacement part with the old one and check for any additional components that might need to be transferred.