LG V20 Secondary Rear-Facing Camera Replacement
ID: 96391
Description: Use this guide to replace the secondary...
Steps:
- Before disassembling your phone, discharge the battery below 25%. A charged lithium-ion battery can catch fire and/or explode if accidentally punctured.
- Insert a spudger or your fingernail under the battery at the small recess on the lower edge.
- Be careful not to deform or puncture the battery.
- Pry up and remove the battery.
- Remove the sixteen 4mm Phillips #00 screws attaching the back cover to the motherboard.
- The top and bottom frame section hold very tight to the mid frame. It is possible to pull them off with your hands. If you're not able to do so, use the following removal procedure:
- Use the flat end of a spudger and apply pressure to one of the corners of the frame section until you create a small gap.
- Flip the phone and insert an opening pick in the gap you created.
- Slide the opening pick along the gap until the frame section pops out of its plastic clamps.
- Remove the frame section.
- Repeat this procedure with the frame section on the other end of the phone.
- Within the top frame section there's a small silver grating that covers the speaker. This may fall out, so be careful not to lose it.
- The loudspeaker is attached to the cover of the motherboard. Use an opening pick to pry it up.
- The cover of the motherboard is held in its place by several plastic clamps.
- Use an opening pick to pry up the motherboard cover at the right corner at the bottom of your phone until it pops out of the plastic clamp.
- Slide the opening pick along the mid frame and flip it sideways to open the plastic clamps holding the motherboard cover in its place.
- Remove the motherboard cover.
- Use an iOpener to loosen the adhesive beneath the secondary rear facing camera.
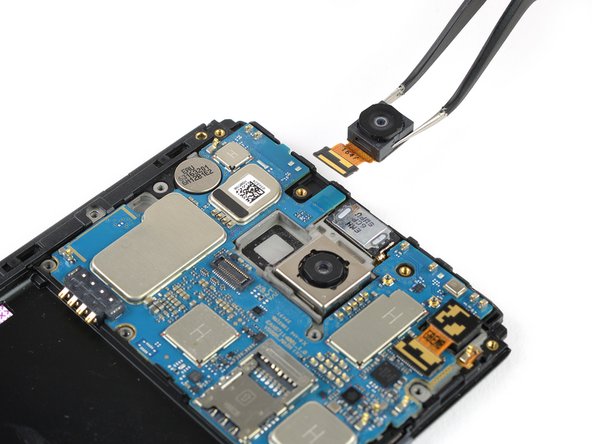
- Use the flat end of a spudger to disconnect the camera flex cable.
- Remove the camera with a pair of tweezers.
- If the camera still sits tight in its place, try to reuse the iOpener to loosen the adhesive.