Acer Chromebook C720-2848 Motherboard Replacement
ID: 99001
Description: Use this guide to replace the motherboard for...
Steps:
- Use a Phillips head screw driver to remove the 13 screws in these locations.
- Use a plastic spudger to pry up the bottom cover and remove it.
- Be sure to pry along other edges if necessary to avoid damaging the back cover.
- Unscrew the 2 battery screws.
- Make sure you keep these screws separate from the back cover screws; they are different!
- Use two fingers to unplug the battery-to-motherboard connection.
- Take out battery by lifting it up in the manner pictured.
- Unscrew screw holding SSD card in place.
- Slide out the SSD card towards you to remove it.
- The SSD card is the blue chip on the right connected to the motherboard.
- Be sure to store this screw apart from the others as it is a different length.
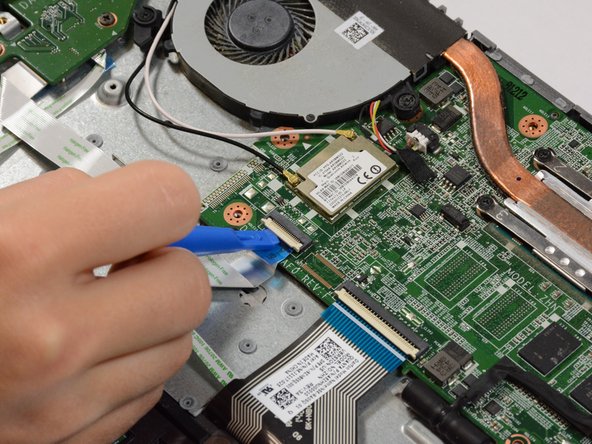
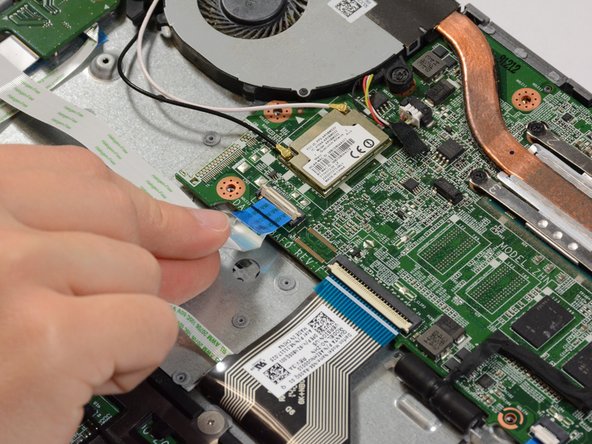
- Remove the three ribbon cables connected to the bottom of the motherboard.
- Use the plastic spudger to lift the white hinges from on top of the ribbon cables.
- Then gently pull the cables out.
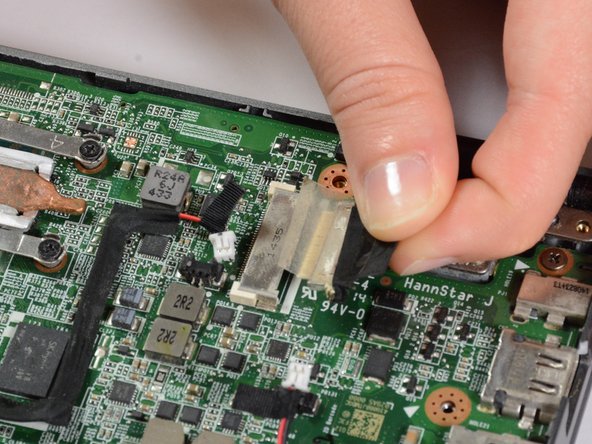
- Remove 4 connectors from the right side of the motherboard.
- All of these connectors release by simply pulling back.
- To disconnect the connector shown in the third picture, you will need to peel back some tape first.
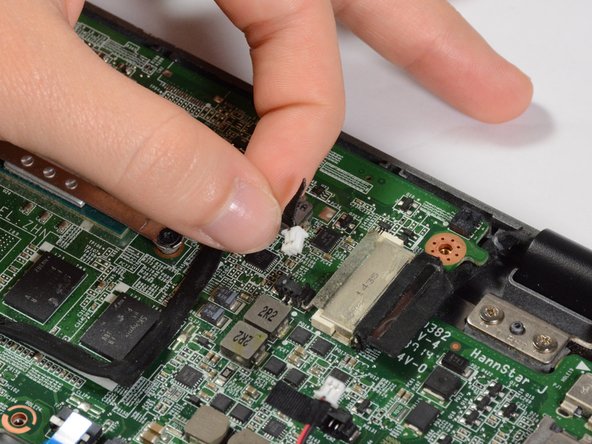
- On the left side of the motherboard, remove one more connector and two cables.
- To remove the cables, lift them up with a plastic spudger.
- Take note of which cable connects where.
- Remove the 2 fan screws and the 4 heat sink screws.
- The screws don't necessarily need to be removed from the component, but rather just loosened enough to remove the component from the motherboard.
- Now remove the fan/heat sink component.
- Once again, make sure to keep these screws separate from all others.
- Remove the 2 motherboard screws.
- Now you can remove the motherboard.
- Be careful not to damage any of the loose connectors and cables you disconnected in the previous steps.