Ninja Professional Blender BL660 LED Lights Replacement
ID: 99027
Description: If your power button panel doesn't light up,...
Steps:
- Using the Phillips #1 screwdriver, remove the 5 screws (13mm long, 6mm wide) holding the outer base.
- Lift the base up to remove it.
- Remove the midsection by pulling it up. If the section is stuck, use the iFixit plastic opening tool to pry it off.
- Pull the power cord through the mid-section opening.
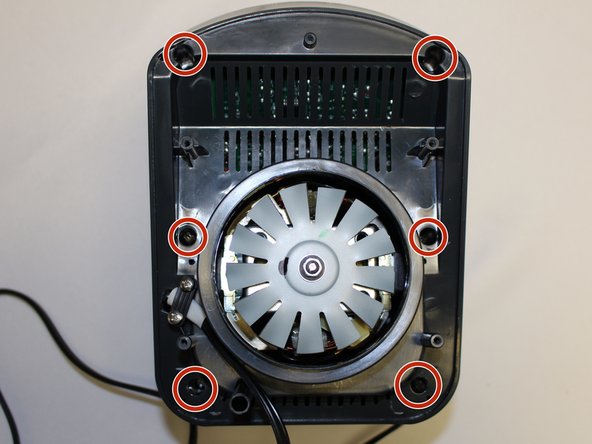
- Using the Phillips #1 screwdriver, remove the 6 screws (13 mm long, 6 mm wide).
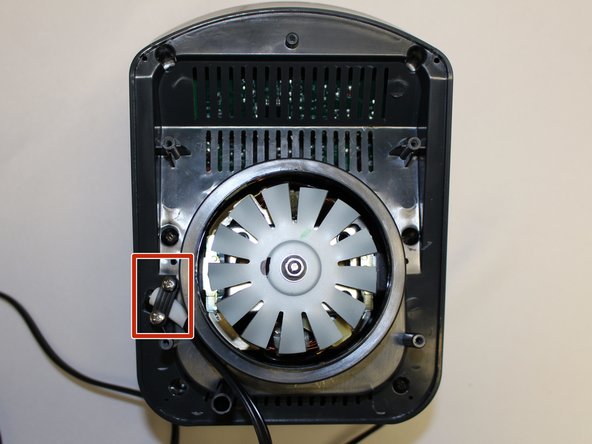
- Using the Phillips #1 screwdriver, remove the two screws (5 mm long, 3 mm wide) holding the power cord onto the motor cover.
- Using the iFixit plastic opening tool, pry the motor cover off the general housing. Once it is loose, lift it up to remove it off the base.
- Slide the cover all the way to the end of the power cord.
- Please note that the power cord does not completely come off the cover.
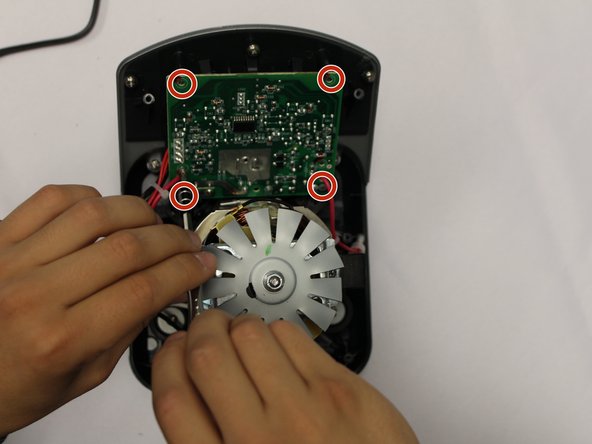
- Using the Phillips #2 screwdriver, remove the four screws (10mm long, 5mm wide) on the circuit board.
- To give the circuit board further range of motion, remove the pictured zip ties holding the cables.
- Locate the malfunctioning LED lights on the circuit board.
- Flip the circuit board to view the soldering connections of the LED lights and replace as needed.
- For instructions on sodering and desoldering reference iFixit's guide.