Lego Dimensions Starter Pack Motherboard Replacement
ID: 100530
Description: The motherboard connects all the components of...
Steps:
- Be careful not to crack the cover.
- Use the metal spudger to gently pry open the corners of the top cover.
- Be careful not to crack the top cover.
- Use the metal spudger to gently pry up the center of the top cover.
- Pull the top cover off.
- Lift up the circular illumination stand and remove it from the toy pad.
- Lift up the white L-shaped pieces and remove them from the toy pad.
- Pull the white connector away from the motherboard, keeping the white connector parallel to the board.
- You may need to use a plastic opening tool or spudger to help separate the connector. Avoid pulling firmly on the wires themselves.
- Remove the USB cable from the toy pad.
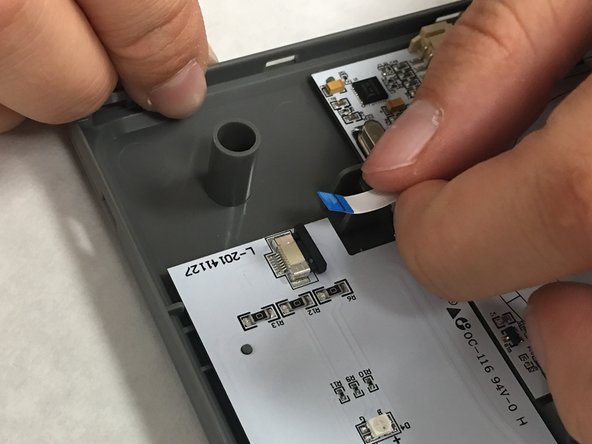
- Pull the black connector of the ribbon away from the LED chip, keeping the connector parallel to the board.
- Disconnect the connector on the other LED chip as well, if replacing both LED chips or the motherboard
- Pull the ribbon away from the black connector of the LED chips.
- Disconnect the ribbon from the other LED chip as well, if replacing both LED chips or the motherboard.
- Lift up both LED chips. As you are lifting, pull towards the motherboard to release it from the toy pad cover.
- Lift up the motherboard, and remove the motherboard and LED chips from the toy pad.
- Flip the motherboard and LED chips over.
- Desolder the LED chip from the motherboard.
- Desolder both LED chips, if replacing both LED chips or the motherboard
- Separate the LED chip(s) from the motherboard.
- Refer to this guide for soldering and desoldering tips.
- Separate the motherboard from both LED chips.