HP OfficeJet 4650 Scanner Light Motor Replacement
ID: 103073
Description: The scanner light motor is what allows the...
Steps:
- Open the cartridge access door by placing one hand on the grooves of each side and pulling up.
- Using the hex screwdriver, remove the 2.0 mm x 14 mm screw that binds the front cover to the printer body by turning the screw counterclockwise.
- Release the front panel from its internal hooks by applying a little force and sliding the front panel to the right.
- Push the panel upward to remove it from the printer.
- There is a connector attached to the back of the panel. Flip the front cover towards you gently and proceed to the next step.
- Remove the connector that is attached to the screen's circuit board by pinching the blue part of the connector with two fingers and pulling it away from the circuit board.
- Unhook the clip supporting the cartridge access door by using a plastic opening tool to get under the clip and using another hand to pull the clip from its hook.
- Release the clip by pushing the clip towards the inside of the printer and pulling the clip out.
- Remove the four 2.0 mm x 14 mm hex screws that bind the internal protective cover to the body by using a hex screwdriver and turning counterclockwise.
- Remove the two 2.0 mm x 11 mm hex screws that bind the internal protective cover to the body by using a hex screwdriver and turning counterclockwise.
- Detach the left-side panel by applying downward pressure on the internal protective cover with one hand and pulling the left-side cover with the other.
- Pull the left-side cover clip away from the internal protective cover to unhook it from the left-side cover.
- Detach the right-side panel by applying downward pressure on the internal protective cover with one hand and pulling the right-side cover with the other.
- Detach the right-side panel by pulling the right-side cover clip away from the internal protective cover.
- Use both hands to lift the whole internal protective cover.
- Gently flip the internal protective cover counterclockwise.
- Be careful when lifting the internal protective cover. There is a connector attached to the cover.
- Remove the connector that binds the internal protective cover to the motherboard by pinching the blue part of the connector with two fingers and pulling it away from the motherboard.
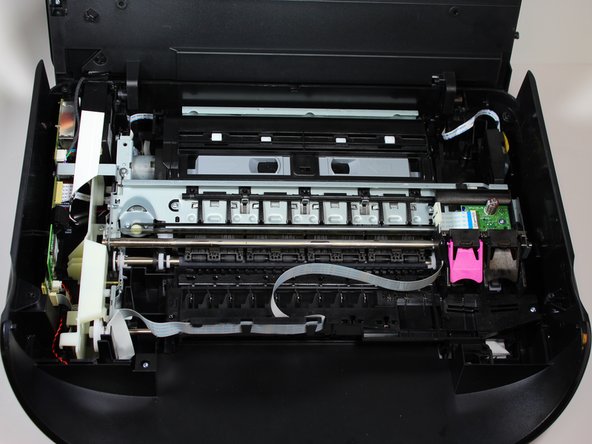
- Remove the protective cover by lifting it away from the printer with both hands.
- Remove the connector that binds the cartridge access door to the motherboard by pinching the blue part of the connector with two fingers and pulling it away from the motherboard.
- Remove the cables that connect the cartridge access door to the motherboard by pinching the front of the cable box with two fingers and pulling it away from the motherboard.
- Flip the cartridge access door with two hands so that the non-glass side of the cartridge access door is on top.
- Remove the eight 2.0 mm x 14 mm hex screws on the back of the cartridge access door by using the hex screwdriver and rotating counterclockwise.
- Wedge the plastic opening tool into the creases on the sides of the cartridge access door to help detach the glass side from the back side of the cartridge access door in the next steps.
- Use a plastic opening tool to snap off the right-side clip and push the clip outward.
- Use a plastic opening tool to snap off the left-side clip and push the clip outward.
- Pieces from the inside of the scanner glass may fall out.
- Detach the scanner glass by slowly moving the glass side away from the back side of the cartridge access door.
- Find the rectangular scanner piece that has a white light strip.
- Flip the whole rectangular scanner light piece.
- Remove the 2.0 mm screw by using a hex screwdriver and rotating the screw counterclockwise to detach the metal plate from the motor.
- Remove the metal plate by lifting it away from the motor.
- Remove the motor from its casing by holding the motor on both sides and pulling up.
- Remove the connector that is attached to the motor by pinching the blue part of the connector with two fingers and pulling it away from the circuit board.