Nintendo Wii Remote Teardown
ID: 106664
Description:
Steps:
- First remove the back part of the wii remote and the batteries. Then use the tri wing screw to unscrew the four small screws.
- You won't be able to open it yet, as the two halves of the Wii Remote are held in place by clips along the long side, slightly below where the the power button is. These tiny clips are extremely brittle and will be snapped off if the Wii Remote is opened carelessly, permanently damaging it.
- Place the Wii Remote face down. Optionally, use a hair dryer for about 30 seconds on both sides, near where the B button is. This will make the plastic less brittle which will help for the next step.
- Lift the two pieces apart from the bottom to give you an opening. With a pry tool, wedge the tool into one side, lined up with the top of the B button. Use the tool to pull the bottom half of the Wii remote outwards, bending the plastic away from the B button.
- Don't apply too much force pulling the two halves apart! This will break the clip. The two halves should come apart easy once the plastic is bent far enough to separate the clip.
- If done correctly, the clip should come undone and the two halves should separate, with the clip still intact. Repeat this step for the other side.
- You’re going to have two pieces and the sensor might be stuck on the motherboard side or the top side, but you still do the same thing no matter what side it’s on.
- All you have to do to remove the sensor is just grab it and pull a small bit and it should come right out.
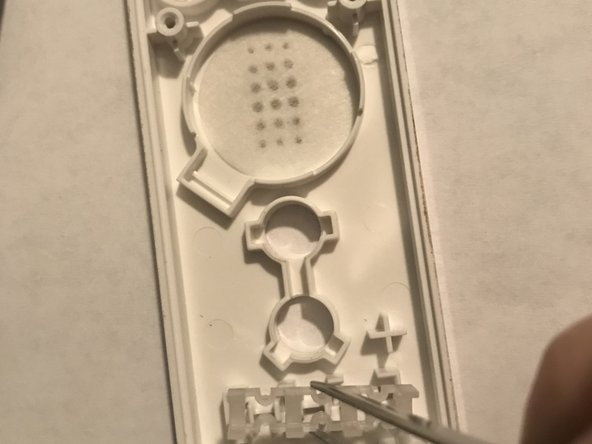
- Remove the “+” button covering. You also are going to want to do the same with all the other button coverings.
- Not a step, just extra info The way the buttons would work is that you’d press down on the buttons which would then send a signal through the motherboard, and either the lights at the bottom would turn on or signals would be sent to the sensor which would then sync up with the sensor you would have up by your tv
- Remove the coverings, all you have to do is just pick them up with your fingers or you can use tweezers as well to do this.
- Use tweezers to remove the speaker. To do this, grab the little tabs on the side and CAREFULLY start to pull it out of the slot so you don’t damage the tabs. After a couple of seconds of pulling, the speaker should pop right out.
- To remove the buttons all you have to do is get some tweezers and use the little ridges that pop up as something to grab and pop them out. You’ll want to take out the “1” “2” “-“ “+” the home button, the “A” button and the d-pad button
- Before moving on, make sure you have all your parts and that you haven’t dropped anything.
- To remove the motherboard, use some tweezers to grab one of the port walls and pull upward. Be careful to not damage the inside parts though!
- To remove the “B” button, just push upward on it so the little pegs can pop out from the wall. You can also just get tweezer and use it to pop the pegs out.
- To have this be a complete teardown, there’s also this small piece at the bottom where the four lights would light up telling you if you’re player 1,2,3 or 4. You don’t realllly need to remove this piece but if you want to be thorough then go ahead.
- All your pieces have been removed! If you would like to put the wii remote together just follow this guide in reverse.