iPhone XS Battery Replacement
ID: 117346
Description: iPhone batteries are rated to hold 80% of their...
Steps:
- Before you begin, discharge your iPhone battery below 25%. A charged lithium-ion battery can catch fire and/or explode if accidentally punctured.
- Power off your iPhone before beginning disassembly.
- Remove the two 6.9 mm-long pentalobe screws at the bottom edge of the iPhone.
- Opening the iPhone's display will compromise its waterproof seals. Have replacement seals ready before you proceed past this step, or take care to avoid liquid exposure if you reassemble your iPhone without replacing the seals.
- If inserted too far, an opening pick can damage your device. Follow this step to mark your pick and prevent damage.
- Measure 3 mm from the tip and mark the opening pick with a permanent marker.
- You can also mark the other corners of the pick with different measurements.
- Alternatively, tape a coin to a pick 3 mm from the tip.
- If your iPhone has a cracked screen, keep further breakage contained and prevent bodily harm during your repair by taping over the glass.
- Lay overlapping strips of clear packing tape over the iPhone's screen until the whole face is covered.
- Wear safety glasses to protect your eyes from any glass shaken free during the repair.
- If you can't get the suction cup to stick in the next few steps, fold a strong piece of tape (such as duct tape) into a handle and lift the screen with that instead.
- If all else fails, you can superglue the suction cup to the screen.
- To avoid damaging your screen in the next step, note the following:
- There's a plastic bezel on the underside of the screen. Your opening pick will go underneath this bezel.
- There's a seam between the plastic bezel and the display panel. Don't insert your pick here or you'll damage the screen.
- Sometimes the display panel separates from the bezel before you even get a chance to insert a pick. This may be unavoidable depending on the condition of the adhesive. In this case, you’ll most likely need to replace your entire screen.
- The next three steps demonstrate the Anti-Clamp, a tool we designed to make the opening procedure easier. If you aren't using the Anti-Clamp, skip down three steps for an alternate method.
- For complete instructions on how to use the Anti-Clamp, check out this guide.
- Pull the blue handle backwards to unlock the Anti-Clamp's arms.
- Slide the arms over either the left or right edge of your iPhone.
- Position the suction cups near the bottom edge of the iPhone—one on the front, and one on the back.
- Squeeze the cups together to apply suction to the desired area.
- If you find that the surface of your iPhone is too slippery for the Anti-Clamp to hold onto, you can use tape to create a grippier surface.
- Pull the blue handle forward to lock the arms.
- Turn the handle clockwise 360 degrees or until the cups start to stretch.
- Make sure the suction cups remain aligned with each other. If they begin to slip out of alignment, loosen the suction cups slightly and realign the arms.
- Heat an iOpener and thread it through the arms of the Anti-Clamp.
- You can also use a hair dryer, heat gun, or hot plate—but extreme heat can damage the display and/or internal battery, so proceed with care.
- Fold the iOpener so it lays on the bottom edge of the iPhone.
- Wait one minute to give the adhesive a chance to release and present an opening gap.
- Insert an opening pick into the gap under the screen and the plastic bezel, not the screen itself.
- If the Anti-Clamp doesn't create a sufficient gap, apply more heat to the area and rotate the handle a quarter turn.
- Don't crank more than a quarter turn at a time, and wait one minute between turns. Let the Anti-Clamp and time do the work for you.
- Skip the next three steps.
- Heating the lower edge of the iPhone helps soften the adhesive securing the display, making it easier to open.
- Use a hairdryer or heat gun or prepare an iOpener and apply it to the lower edge of the iPhone for about a minute in order to soften up the adhesive underneath.
- If you're using a single suction handle, apply it to the bottom edge of the phone, while avoiding the curved portion of the glass.
- Pull up on the suction cup with firm, constant pressure to create a slight gap between the front panel and rear case.
- Insert an opening pick into the gap under the screen and the plastic bezel, not the screen itself.
- The watertight adhesive holding the display in place is very strong; creating this initial gap takes a significant amount of force. If you're having a hard time opening a gap, apply more heat, and gently rock the screen up and down to weaken the adhesive until you create enough of a gap to insert your tool.
- Slide the opening pick around the lower left corner and up the left edge of the iPhone, slicing through the adhesive holding the display in place.
- Don't insert your pick more than 3 mm, as you may damage internal components.
- There are delicate cables along the right edge of your iPhone. Don't insert your pick here, as you may damage the cables.
- Re-insert your pick at the bottom edge of the iPhone, and slide it up the right side to continue separating the adhesive.
- Don't insert your pick more than 3 mm, as you may damage the display cables.
- The top edge of the display is secured with both glue and clips.
- Slide the opening pick around the top corner of the display, while gently pulling or wiggling the display down in the direction of the Lightning port.
- The clips will break if you use too much force. Work carefully and be patient.
- Don't insert your pick more than 3 mm, as you may damage the front panel sensor array.
- Slide the pick to the opposite corner and cut any remaining adhesive securing the display.
- Pull on the small nub on the suction cup to remove it from the front panel.
- Open the iPhone by swinging the display up from the left side, like the back cover of a book.
- Don't try to fully separate the display yet, as several fragile ribbon cables still connect it to the iPhone's logic board.
- Lean the display against something to keep it propped up while you're working on the phone.
- During reassembly, lay the display in position, align the clips along the top edge, and carefully press the top edge into place before snapping the rest of the display down. If it doesn't click easily into place, check the condition of the clips around the perimeter of the display and make sure they aren't bent.
- Remove five screws securing the logic board connector bracket, of the following lengths:
- Three 1.0 mm Y000 screws
- One 1.3 mm Y000 screw
- One 3.7 mm Phillips screw
- Throughout this repair, keep track of each screw and make sure it goes back exactly where it came from to avoid damaging your iPhone.
- Remove the bracket.
- The bracket may be lightly adhered in place. Lift gently but firmly to separate it.
- During reassembly, this is a good point to power on your iPhone and test all functions before you seal the display in place. Be sure to power your iPhone back down completely before you continue working.
- Use a spudger or a clean fingernail to pry the battery connector up from its socket on the logic board.
- Try not to damage the black silicone seal surrounding this and other board connections. These seals provide extra protection against water and dust intrusion.
- Bend the connector slightly away from the logic board to prevent it from accidentally making contact with the socket and providing power to the phone during your repair.
- Use a spudger or a fingernail to pry up and disconnect the front panel sensor assembly connector.
- Use a spudger or a fingernail to disconnect the OLED panel cable connector.
- To re-attach press connectors like this one, carefully align and press down on one side until it clicks into place, then repeat on the other side. Do not press down on the middle. If the connector is misaligned, the pins can bend, causing permanent damage.
- Use a spudger or fingernail to pry the digitizer cable connector up from its socket.
- This connector's recessed location makes it tricky to reconnect. Take your time and align it carefully, then gently press it into place with your fingertip—first one side, then the other. You should feel it click into place.
- If any part of your screen doesn't respond to touch after your repair, disconnect the battery and then re-seat this connector, making sure it clicks fully into place and that there's no dust or other obstruction in the socket.
- The front panel sensor assembly flex cable is lightly adhered in place.
- Carefully lift the cable until the adhesive separates.
- Remove the display assembly.
- During reassembly, pause here if you wish to replace the waterproof adhesive around the edges of the display.
- Remove the five screws securing the two brackets below the Taptic Engine and main speaker:
- One 1.0 mm tri-point Y000 screw
- Two 1.3 mm Phillips screws
- One 1.7 mm Phillips screw
- One 1.8 mm Phillips screw
- The brackets are lightly adhered in place.
- Gently lift to unstick and remove each bracket, being careful not to bend it.
- If necessary, apply a little heat with a hair dryer or heat gun to soften the adhesive. (Putting an iOpener on the brackets is not recommended, as this may bend the spring contacts along the top.)
- Remove the 1.9 mm Phillips screw securing the speaker connector cover.
- Remove the speaker connector cover.
- Use the tip of a spudger to pry up and disconnect the speaker connector.
- When prying up the speaker, take care not to damage the speaker flex cable you just disconnected. If necessary, bend the cable toward the battery so the speaker has room to come out.
- Insert a spudger under the top edge of the speaker, near the edge of the iPhone's case.
- Gently pry up and lift the top edge of the speaker slightly.
- When reinstalling the speaker, check the position of the flex cable and make sure it doesn't get trapped underneath the speaker.
- While prying up the speaker, use tweezers to peel away the plastic bumper strip from the top edge of the speaker.
- If necessary, apply a little heat to soften the adhesive and make the bumper strip easier to separate.
- Hold the speaker by its side edges and rock it side-to-side, separating the adhesive securing it to the bottom edge of the iPhone.
- Pull the speaker away from the bottom edge of the iPhone until the adhesive gasket separates.
- Remove the speaker.
- The speaker's adhesive gasket is not reusable. Peel away any remaining adhesive residue with tweezers.
- To help protect against water and dust intrusion, replace the adhesive gasket during reassembly. Prep the area by cleaning it with a bit of isopropyl alcohol and a lint-free cloth or coffee filter so that the gasket adheres properly. Install a new gasket onto the speaker, and then install the speaker.
- Use a spudger to disconnect the Taptic Engine flex cable by prying it straight up from its socket.
- Remove the two 1.9 mm Phillips screws securing the Taptic Engine.
- Grasp the plastic bumper strip and carefully lift it over the speaker connector.
- Remove the Taptic Engine assembly.
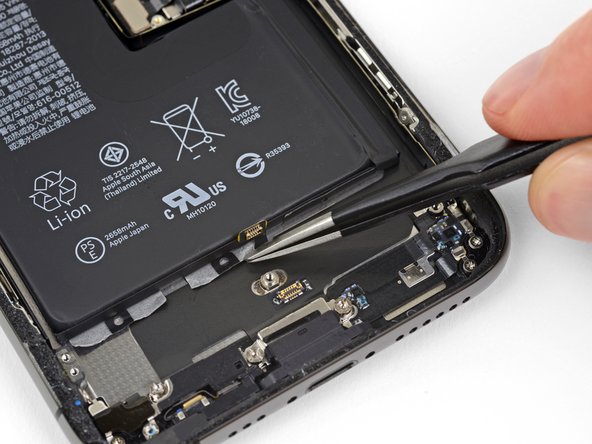
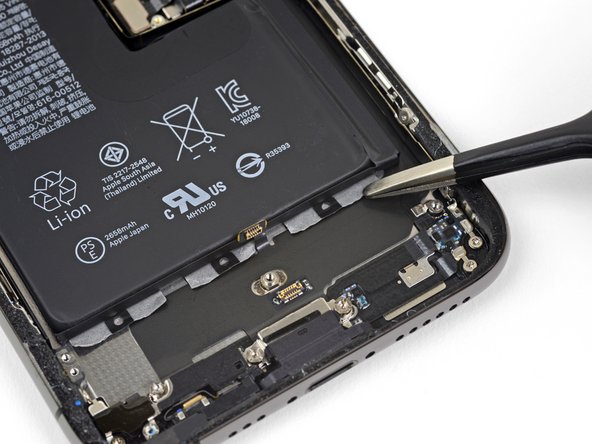
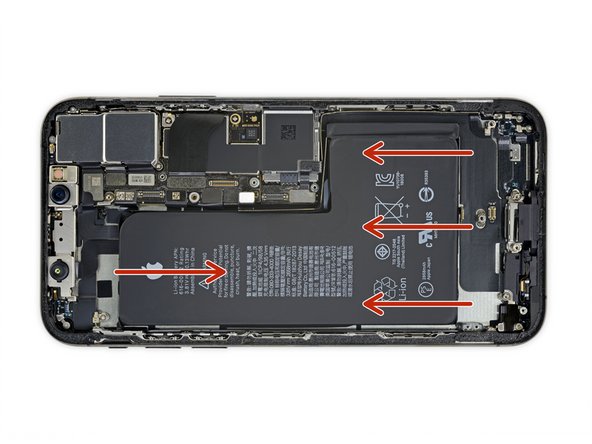
- The battery is secured to the rear case by four pieces of stretch-release adhesive—one under the upper area of the battery, and three under the lower area.
- Each piece of adhesive has a black pull-tab at the end, which is lightly adhered to the side edge of the battery.
- Separate the first battery adhesive tab from the bottom edge of the battery.
- Each tab has a small loop in the center; insert a tool through the loop if you're having trouble grabbing hold of the tab.
- Don't jab the battery with any sharp tools. A punctured battery may leak dangerous chemicals or catch fire.
- Repeat the above step to separate the remaining two adhesive tabs from the bottom edge of the battery.
- Take care not to damage the speaker cable connector, near the center adhesive tab.
- In the following steps, you'll pull each tab to slowly stretch out the adhesive underneath the battery. This special stretch-release adhesive loses its tack when stretched and then comes out in your hand, allowing you to lift out the battery with ease.
- If the strips break, don't panic! They don't always work as intended. Keep reading for some additional steps for removing broken strips.
- To increase your odds of success:
- Don't press down on the battery. Hold the iPhone firmly by its sides.
- Keep the strips flat and unwrinkled as you pull.
- Pull very slowly, giving the strip time to stretch and separate. It takes around 15-30 seconds of stretching to remove each strip.
- Pull at a low angle so the strip doesn't snag along the bottom edge of the battery.
- If a strip does break off underneath the battery and cannot be retrieved, move on to the other strips and then continue with the additional steps below.
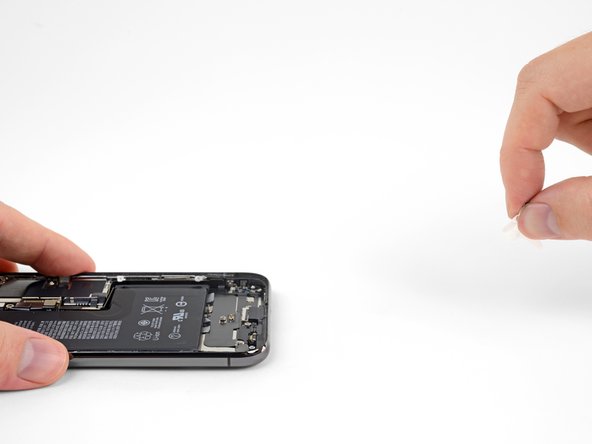
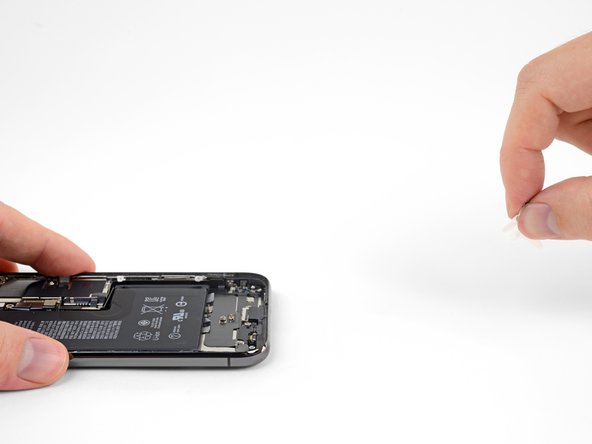
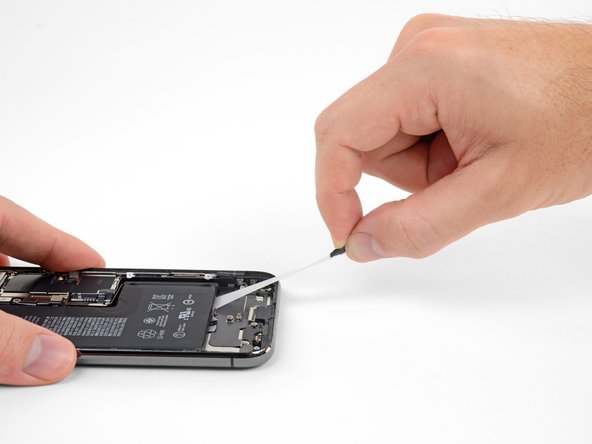
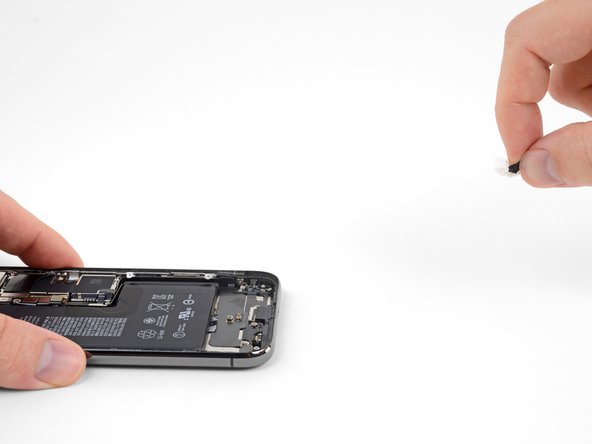
- Grab one of the outer battery adhesive tabs and slowly pull it away from the battery, toward the bottom of the iPhone.
- Pull steadily, maintaining constant tension on the strip until it slips out from between the battery and the rear case.
- The strip will stretch to many times its original length. Continue pulling and re-grab the strip near the battery if necessary.
- If the battery adhesive tabs break during the removal process, use your fingers or blunt tweezers to retrieve the remaining length of adhesive, and continue pulling.
- If any of the adhesive strips break underneath the battery and cannot be retrieved, try to remove the remaining strips, and then proceed as instructed below.
- Repeat the previous step to remove the strip on the opposite side, leaving the center strip for last.
- Remove the center strip, being careful not to snag it on the speaker flex cable.
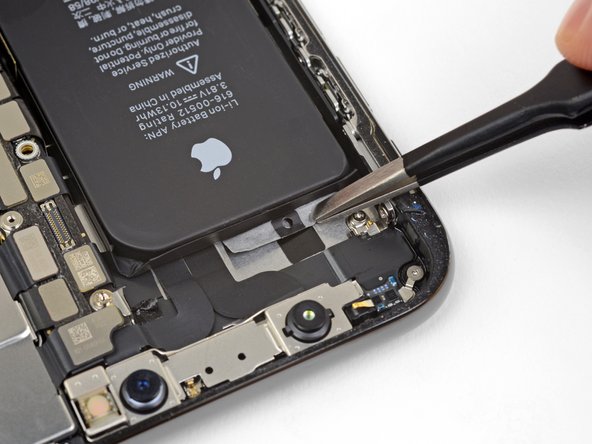
- The final pull tab lies very close to the Face ID hardware. If damaged, Face ID can only be repaired by Apple, so work with care.
- Peel and separate the pull tab on the final adhesive strip, on the top edge of the upper battery cell.
- Pull and remove the final adhesive strip.
- The strip may fling the battery when it separates from the iPhone, so hold your hand over the battery to secure it—but don't press down on the battery itself, or the added pressure may cause the adhesive strip to break off underneath the battery.
- If you removed all four adhesive strips successfully, skip the two next steps.
- Otherwise, if any of the adhesive strips broke off underneath the battery and could not be retrieved, continue with the next step below.
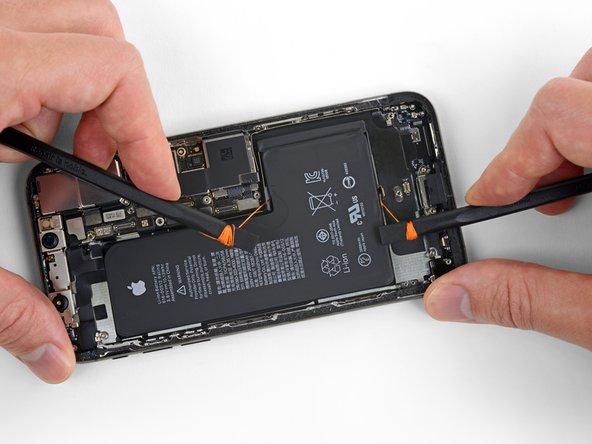
- If any of the adhesive strips broke off and the battery remains stuck to the rear case, remove it by adding a few drops of isopropyl alcohol (90% or greater) underneath the battery near the stuck strip(s).
- After about a minute, gently lift the battery.
- The battery should come free with minimal force. If not, add a little more isopropyl alcohol and try again. Do not bend or puncture the battery.
- Be careful not to damage the ribbon cables or the wireless charging coil directly underneath the battery.
- For an alternative method to unstick the battery, continue to the next step.
- If any of the adhesive strips broke off and the battery remains stuck to the rear case, prepare an iOpener or use a hair dryer to heat the rear case directly behind the battery.
- Heat the iPhone until the rear case is slightly too hot to comfortably touch. Don't overheat the iPhone, or you may accidentally ignite the battery.
- Flip the iPhone back over and thread a strong piece of string (such as dental floss or a length of thin guitar string) underneath the battery.
- Wear gloves to protect your fingers, or wrap each end of the string around a tool.
- Pull the string from side to side in a sawing motion to separate the adhesive. This can take some time since the adhesive is slow to deform, but with patience it will come free. Do not deform or damage the battery.
- Start from the top or bottom edge of the battery, and pull toward the middle. Don't pull the string through the middle third of the battery, or you may damage the ribbon cables or the wireless charging coil directly underneath.
- If you choose to use pry tools to lift the battery out of the iPhone, use extreme caution or you may damage the ribbon cables or the wireless charging coil directly underneath the battery.
- Grasp the battery from the bottom edge and remove it from the iPhone.
- If there's any alcohol solution remaining in the phone, carefully wipe it off or allow it to air dry before installing your new battery.
- Reinstall the Taptic Engine and speaker before installing a new battery. This helps keep the battery aligned correctly during installation.
- Before you adhere the replacement battery, temporarily reconnect the battery connector to the logic board socket. This ensures that the battery is properly aligned in its recess.
- Adhere the battery, disconnect it, and continue reassembling your device.
- If your new battery does not come with adhesive preinstalled, refer to this guide for help replacing the adhesive strips.
- Perform a force restart after reassembly. This can prevent several issues and simplify troubleshooting.