Nokia Lumia 2520 Charging connection Replacement
ID: 117378
Description:
Steps:
- Apply heat pad to each side of the device.
- When using any heat pad please use some form of padded gloves so you don't burn you fingers.
- Microwave the pad for 30 seconds so an ample amount of heat is given on all four sides. Do not microwave more than once every two minutes.
- Insert the pick between the glass to separate the glass from the device. You can also use the suction cups to help lift the glass.
- When pulling the screen off the chassis, be careful not to cut the ribbon cable that connects the screen to the logic board.
- Take your time to pry open the screen from the chassis as you can easily break the screen or crack it.
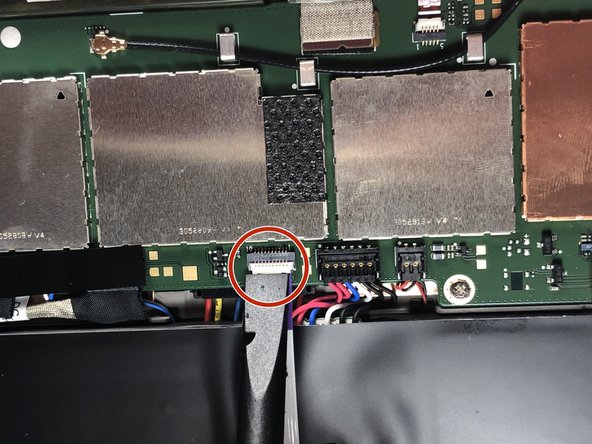
- Pull the ribbon cable out from the connection port on the board.
- Move on the step 4 to remove the ribbon connection from the screen.
- Use the plastic pry tool to remove both of the connections.
- Set aside the screen and the display assembly for repair.
- Before removing the battery from the device be sure not to puncture the battery. Since the battery is a form of acid.
- Using a plastic pry tool is better than a metal tool when working with wire and soft case battery case.
- Use a plastic pry tool to remove the battery connector from the logic board.
- Remove the ribbon located over the battery.
- Theres four screws that attach the battery to the chassis. Use a PH0 Phillips head screwdriver to loosen the screw.
- Since the tool using is sharp please use with caution, so that you don't puncture the battery.
- Take a plastic pry to to pry out the battery from its casing.
- The bottom of the battery has adhesive to hold the battery in place. So using enough pressure to pry the battery is ok .
- Using two tool different plastic pry to can help give you leverage on areas that are hard to get up.
- Take a pry tool and remove the connection.
- Take a pry tool and push away the charing connector from its housing.
- The adhesive is very strong so use a lot of force.