iPhone "L-Shaped" Battery Adhesive Strips Replacement
ID: 117505
Description: Use this guide to correctly apply replacement...
Steps:
- Before you begin, it's a good idea to test-fit your new battery in the iPhone.
- This works best after reinstalling the speaker and Taptic Engine. Refer to the guide you used to remove your old battery.
- Make sure the battery connector lines up correctly with its socket on the logic board.
- Be careful not to touch the Face ID camera and sensor hardware along the top edge of the iPhone (the "notch" area).
- If your test-fit looks good, take the battery back out and place it face-down on your work surface (with the connector contacts facing up).
- If your battery came with new adhesive strips already installed, skip to Step 7.
- If you have a two-cell battery, make sure the cells are aligned as they would be when installed in the iPhone.
- Peel off the blue plastic liner from your new set of adhesive strips, and discard it.
- Some strips have a single large blue liner, while others have a two-piece liner. Either way, peel it all off.
- Once the adhesive is exposed, be careful not to touch it.
- Once the adhesive sticks to the battery, you can't peel it off or reposition it—if you make a mistake, you'll have to start over with fresh adhesive strips.
- Double-check the orientation of the adhesive strips, and make sure your battery is still lying face-down (with the connector contacts facing up).
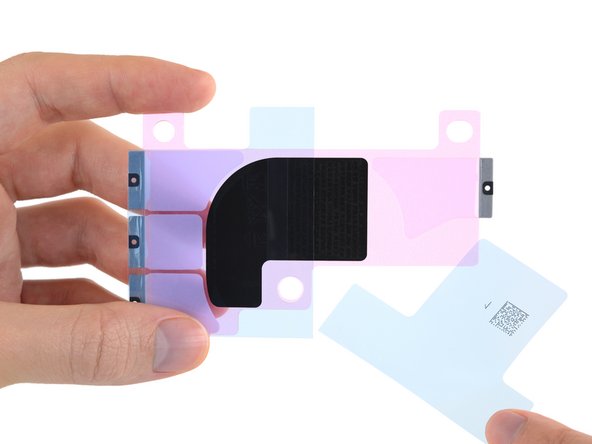
- Carefully position the adhesive strips over the battery, and stick them in place as shown.
- Place the strips slightly off-center, very close to the long edge of the battery.
- The black pull tabs at each end should protrude equally far over the top and bottom edges of the battery.
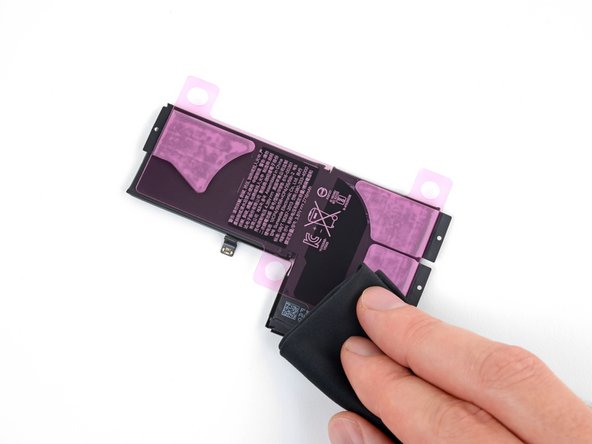
- Use your fingers or a cloth to press the strips firmly into place on the battery.
- Press in the center to adhere the black regulatory label to the battery as well.
- Roll your fingertip along the edges of the battery to stick down the black pull tab at the end of each adhesive strip.
- Be sure to get all four tabs—three on the bottom edge, and one on the top.
- Peel off and discard the pink liner, fully exposing the adhesive strips.
- When installing the battery, be careful not to touch the Face ID camera and sensor hardware along the top edge of the iPhone (the "notch" area).
- Carefully position the battery and set it into the iPhone.
- Make sure the battery connector lines up with its socket on the logic board.
- It's okay to temporarily connect the battery to make sure it lines up correctly, but make certain it's disconnected before reassembling your iPhone.
- Press the battery firmly onto the adhesive strips to secure it in place.
- If your battery came with an additional plastic liner on the top, peel it off and discard it before closing up your phone.