Dell Inspiron 13-7359 USB/SD Card Reader IO Circuit Board Replacement
ID: 121877
Description: Use this guide to replace your USB/SD Card...
Steps:
- First flip over the laptop to expose the back panel
- Use a Phillips #0 screwdriver to unscrew all ten 7mm Phillips head screws holding the back panel in place.
- With a plastic spudger, carefully remove the back panel by prying each corner off individually
- Slowly pick up the panel and set it aside
- The battery will be the largest black component in the device located near the bottom edge. Using a Phillips #0 screwdriver, unscrew the two 3mm Phillips head screws holding in the battery.
- To remove the old battery, slightly lift the bottom edge of the battery with your hands
- Now slowly pull the battery towards you to fully detach the battery
- Unscrew and remove the 2 of the 3mm Phillips head screws holding the hard drive in place.
- Lift and hold the hard drive in your left hand.
- Use your right hand to grab hold of the black wire connector attached on the right of the hard drive.
- Carefully pull the connector away from the hard drive to completely disconnect from the laptop.
- Unhook both of the wires attached to the WLAN adaptor.
- Remove the 3.9mm Phillips screw using Phillips #0 screwdriver.
- Once the screw is removed, one end of the WLAN adaptor will raise up.
- Gently remove the WLAN adaptor.
- Using the plastic opening tool, unhook the black cable as shown.
- Gently pull to unplug the speaker cable.
- Using the Phillips #0 screwdriver, remove the 3.9mm Phillips screw as shown.
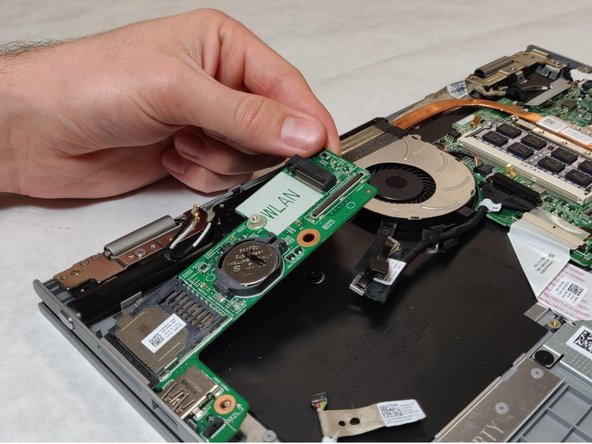
- Gently raise the USB/SD Card Reader IO Circuit Board and pull the part free from the device.