Quickmill 05000A Espresso Machine Grinder Revision
ID: 124922
Description: When the grinder gets dirty/sticky, the quality...
Steps:
- Never forget to unplug the power cord!
- Remove the water tank, pulp drawer and bean container.
- Remove two Phillips screws at the top.
- Remove four Phillips screws from the back panel. They are very deep and you need a screwdriver with a very long shaft.
- Remove three Phillips screws from the bottom of the back panel
- Unscrew the two Phillips screws on both sides of the back.
- Then pull the back part backwards. Watch out for the power cord.
- Open the front door.
- The front part is still attached with two Phillips screws. turn them out.
- The front part now only hangs with cables on the connection buttons of the control panel. In order to get better access to the brew group or the grinder, it is sufficient to push the front part forward about 10 cm. If that's not enough, you have to free the control panel.
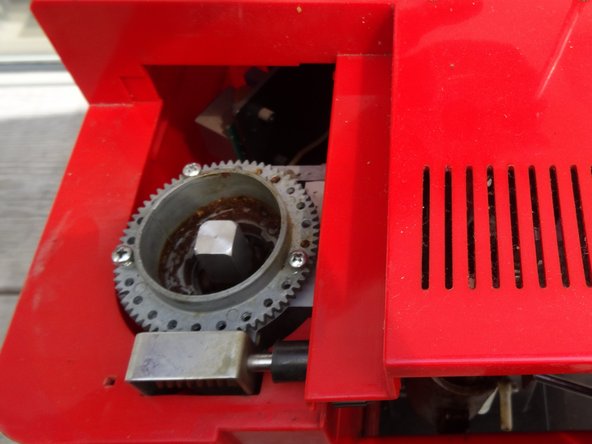
- Remove the Phillips screw from the grinder cover.
- Lift the grinder cover off.
- Open the front flap and pull the knob off the grinder adjuster.
- Use a marker to draw lines on the rotating and fixed parts so you can restore the setting later.
- Pull the front side forward about 10 cm to access the transmission of the grinder adjuster.
- The transmission is secured on both short sides with a Phillips screw. Remove them.
- Slide the transmission off so that the adjustment ring can turn freely.
- It is possible that the adjustment ring is very difficult to turn or will not turn at all. If so, you must very carefully place a piece of wood against the teeth or screws and gently tap it free with a small hammer.
- Clean the grinder very thoroughly, e.g., with a toothbrush. The threads of the adjustment ring must be very clean. They can be lubricated with a very thin layer of a suitable food-safe lubricant (e.g., Ballistol) to make them move smoothly.
- However, if you want to replace the grinding stones, the mounting screws are now easily accessible.
- Turn the ring back until it stops. Then turn it back about a quarter of a turn; your old mark should line up here. Check the coarseness of the ground product.