Stapler Spring Replacement
ID: 130379
Description: If your stapler isn’t stapling, then there’s a...
Steps:
- Open the stapler by gripping the handle to access the spring.
- Pry open the hook found on the pusher using the tweezers.
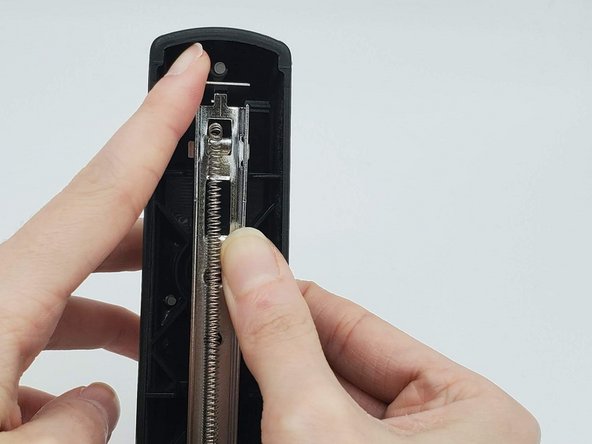
- Hold the handle firmly to prevent the stapler from snapping back.
- Unhook the end of the spring from the pusher.
- Pinch the spring firmly between your fingers to keep it from snapping back.
- Unhook the other end of the spring from the inside of the handle.
- The spring should be unthreaded from the holes on the handle's metal part.
- Press down on the metal part inside the handle with your thumbs until it will not go down anymore.
- Push the hammer, the rectangular piece, up and away from the metal part.
- Release the metal part inside the handle so it comes away from the hammer.
- Keep hold of the metal part to keep it from snapping closed.
- Hook one end of the new spring onto the pusher's hook.
- Clamp the pusher's hook closed using your thumb.
- Thread the other end of the new spring through the top rectangular hole toward the back.
- Thread the new spring through the bottom hole, bringing the end of spring toward you.
- The spring should create a loop when done threading.
- Hook the new spring to the hook on the inside of the handle's metal part.
- Press the metal part down with your thumbs until it aligns with the hammer's hole.
- Reattach the hammer back onto the metal part.
- Close the handle until it clicks back into place.
- Be careful not to staple your fingers when closing the stapler.