Samsung Galaxy A40 Display Replacement
ID: 139688
Description: To replace your display, you will need the...
Steps:
- Remove the SIM card
- Heat the edges of the rear panel until you can just hold the device without burning yourself. Use a hairdryer, heat gun, or oven (I set an oven to 80ºC [175ºF] top/bottom heat, after about 3 minutes the right temperature was reached). The heat will soften the glue between the back and the frame.
- Insert a flat plastic tool (e.g. pick or spudger) between the back and the frame.
- Slowly work your way along the entire edge until the back is detached and you can lift it off. Lift the back slowly, and press the fingerprint sensor against the frame so that it detaches from the back and does not tear out.
- Caution: Insert the tool of your choice into the device at as shallow an angle as possible and no deeper than 3mm, otherwise you might damage the motherboard connection cable.
- Next, the fingerprint sensor has to be removed from the device. To do this, use tweezers or a small metal spatula to carefully drive underneath this plastic part and pry it out.
- Be careful not to insert the tool too deeply into the device, otherwise, you could damage the mainboard.
- Next, the 13 Phillips screws must be loosened so that the frame can be removed.
- Now the frame can be removed with the help of a spudger.
- The best way to do this is to insert the spudger between the display and the frame from the SIM slot and then carefully pull it along the entire device.
- Here you will hear some clicking, which means that the clips are coming loose.
- Once all clips are released, the frame can be easily removed.
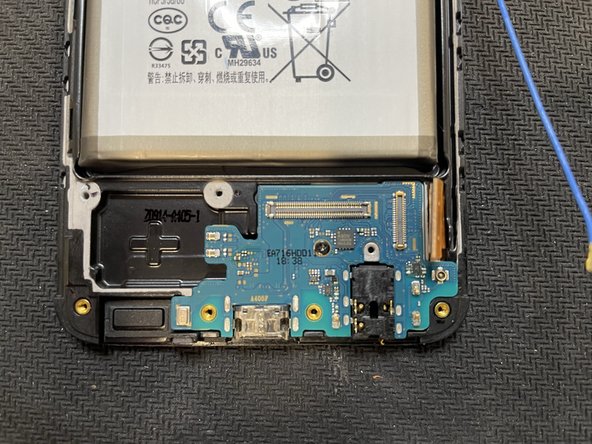
- First, the battery should be unplugged, as there is still voltage on the components even though the device is switched off.
- Next, all connections from the logic boards to the display and between the boards can be disconnected.
- To do this, disconnect the large "main-sub" cable, the antenna, and the display flex.
- Now the front camera has to be removed. This can be done with a spudger.
- Now, both boards can be removed from the device. To do this, another screw must be removed from each of the boards.
- Afterward, the battery has to be removed as well, unless you install a new one.
- This should be done using heat and alcohol, and the battery should be removed very carefully.
- Finally, the vibration motor and the earpiece have to be removed. You might need a bit of heat again to loosen the components.