Nintendo Switch Battery Replacement
ID: 139947
Description: Follow this guide to replace the battery in a...
Steps:
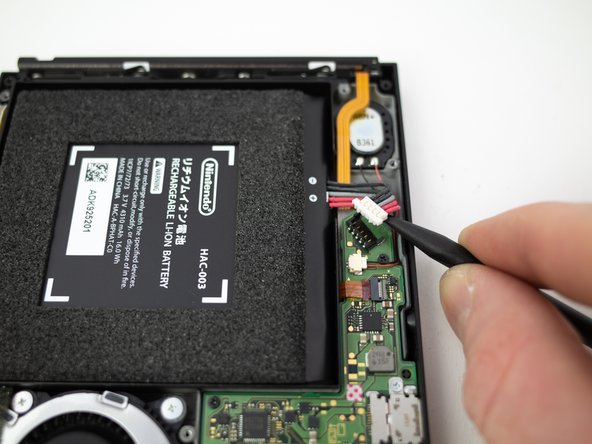
- Insert the pointed end of a spudger underneath the white connector and pry upwards to disconnect the battery from the motherboard.
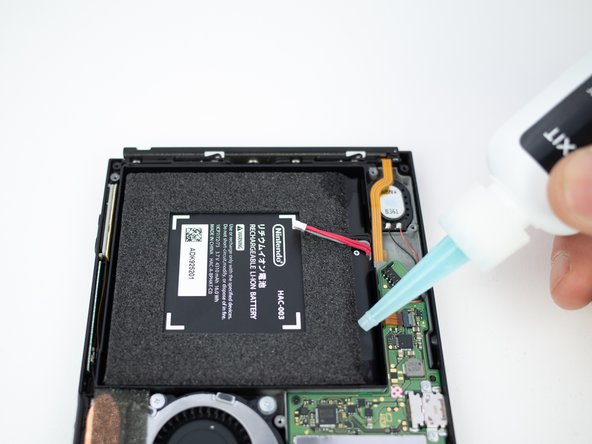
- The Nintendo Switch battery is glued in place. For best results, we recommend applying some high-concentration (90% or greater) isopropyl alcohol or our Adhesive Remover as shown in this step before attempting to remove the battery.
- Apply a small amount of adhesive remover or isopropyl alcohol (approximately 1 ml) evenly along one edge of the battery cell.
- Tilt the switch so the liquid solvent spreads underneath the battery.
- Wait 2-3 minutes for the solvent to break down the adhesive underneath the battery before you proceed to the next step.
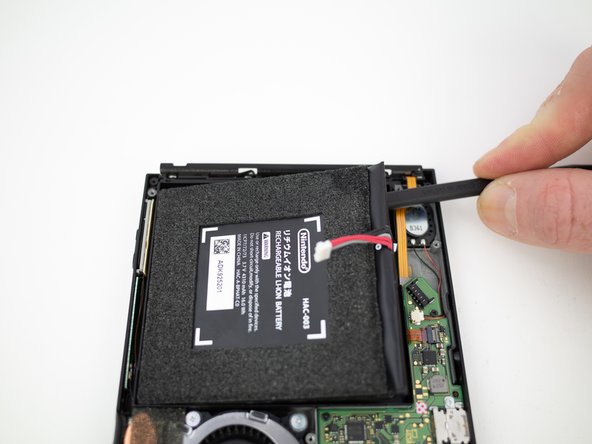
- Use a pry tool to lever the battery out.
- Don't use excessive force. A damaged lithium-ion battery can leak toxic chemicals and/or catch fire. If the battery doesn't lever out fairly easily, apply a little more solvent and try again.
- Remove the battery from the Switch console.
- Don't re-use the battery once it's removed.
- Use strips of double-sided adhesive tape to secure the new battery.