Fitbit Charge 2 Touch Screen Assembly Replacement
ID: 142158
Description: Use this guide to replace a cracked or broken...
Steps:
- Before starting, take your Fitbit Charge 2 off the charger and power it down.
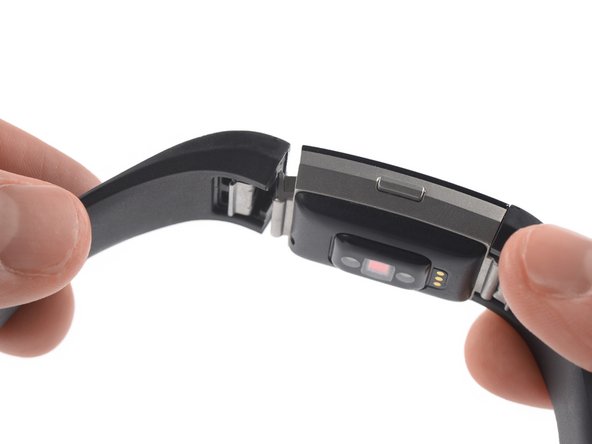
- Remove the watch band on both sides.
- Heat an iOpener and apply it to the touch screen for two minutes.
- The screen is not glued down, but the heat helps to loosen the touch screen assembly from your watch.
- Insert an iSesamo into the gap between the touch screen and the watch assembly on the top left corner.
- Slide the iSesamo along the left edge to the bottom left corner.
- Slide the iSesamo around the bottom left corner.
- Slide it along the edge to the bottom right corner.
- Slide the iSesamo around the bottom right corner.
- Keep sliding it along the right edge to the top right corner.
- Slide the iSesamo around the top right corner.
- Slide it along the top edge to the top left corner.
- Place the iSesamo under the top left corner.
- Feel free to reattach the watch band for this and the next step for a better grip.
- Pry up the touch screen assembly by twisting the iSesamo sideways to create a gap and unhinge the plastic clips which are holding the screen in place.
- Place the iSesamo under the top right corner.
- Pry up the touch screen assembly by twisting the iSesamo sideways to create a gap.
- Insert a spudger into the gap on the top edge of your Fitbit Charge 2.
- Use the spudger to pry up the touch screen assembly.
- Do not remove the touch screen assembly all the way yet—it's still connected to the motherboard.
- Carefully fold the touch screen assembly in the direction of the bottom edge.
- Use a pair of blunt nosed tweezers to remove the black sticker which covering the touch screen connector.
- Use the pointed end of a spudger to open the ZIF connector by pushing up the black flap.
- Pull the touch screen flex cable straight out its socket.
- Remove the touch screen assembly.