Fix Pop/Crackle When Adjusting Volume
ID: 142253
Description: As they age, Bose Companion speakers start...
Steps:
- With the control pod unplugged, flip over the base pod and peel off the grippy rubber pad.
- If you're careful, there will be enough glue left on the pad to stick if back on when reassembling. If not, you'll need to use double sided tape.
- A metal spudger may be helpful here.
- Use a Torx T5 screwdriver to remove both screws that attach the touch surface to the base.
- Remove the touch surface. It should just fall out.
- Reassembly Tip: The light tube highlighted in blue goes into the touch surface channel highlighted in orange. This directs the on/off status light on the control board to the surface of the pod.
- The rubber volume dial is glued onto the potentiometer, which acts as the dial's hub.
- Slowly and carefully drill through the center of the dial. You only need to drill down a few millimeters. Drill a couple of millimeters at a time, stopping along the way to try to jiggle the dial loose.
- Selecting a drill bit: I recommend a 1/4" drill bit, but a bit with a slightly larger diameter will allow you to be less precise about finding dead-center. However, if you go too big, you'll turn the "D" shape of the ring and potentiometer (second photo) into an "O". This will make re-attachment difficult.
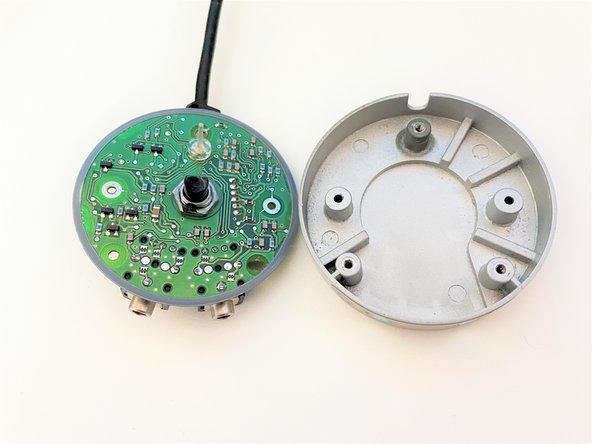
- Use a #1 Phillips screwdriver to remove the three screws attaching the control board to the pod's base.
- Lift the control board and wire out of the base.
- Lift off the light tube and place it with your screws, otherwise it may go flying off in the next step.
- Reassembly Tips: Make sure the light tower is back in place before reattaching the volume control knob. Also, ensure that the curved part of the wire's strain relief is facing the bottom of the puck.
- Spray the top and bottom of the potentiometer with an electrical contact cleaner. Apply a few short bursts on each side, then spin knob back and forth all the way a few times. Spray both sides again, then spin the knob again. This will help spread the cleaner around and dissolve the gunk.
- What to spray: I use WD-40 Specialist Contact Cleaner or DeoxIt D5 Contact Cleaner, but any electrical contact cleaner will work. (Do not use regular WD-40!)
- Where to spray: On the top (first photo), spray in between the plastic knob and the metal ring. On the bottom, spray the base and the sides. The cleaner will work its way in through holes in the case.
- Lubricating vs non-lubricating cleaner: The lubricant in DeoxIt D5 may attract dust and require more frequent cleaning. The WD-40 specialist spray is lubricant-free and seems to keep the pod crackle-free for longer. DeoxIt also makes a specialized cleaner for potentiometers (DeoxIT Fader), but I haven't tested it.