Klipper+Mainsail Install
ID: 146933
Description: This guide is still a WIP. The Arduino +...
Steps:
- Download and extract the latest version of Mainsail from their Github
- Open the Raspberry Pi Imager
- Select Operating System > Use custom > Select the Mainsail OS you downloaded.
- Select Storage > Select your SD.
- Bring up the Advanced Settings menu by pressing "Ctrl + Shift + X".
- Here you can setup your WiFi, locale, enable SSH and numerous other options.
- Write > Yes to confirm
- After imaging is complete the SD is automatically ejected. Insert it into the RPI and power it on.
- With the Raspberry Pi connected to the Duet 2 WiFi via USB, power on the RPI and SSH into the Pi.
- You can find the IP address of the Pi by looking at the connected client list in your router or by opening cmd.exe on your PC and running
- ping mainsailos.local -4
- In a webpage enter http://mainsailos.local or your printers IP address
- Navigate to the Machine tab on the left.
- Select Upgrade to update the RPI image and Update to install updates for Klipper, Mainsail and Moonraker. Once the updates are complete reboot the RPI
- Originally when I wrote this guide I saw many sources say you do not need to manually erase the firmware when you configure the Duet 2 WiFi for Klipper for the first time. However there's been many cases that has proven false.
- With the board powered off place a jumper on the erase pins.
- Connect the USB cable from the Duet 2 WiFi to a 5v power source(your PCs USB Port).
- Once the diag light comes on remove the jumper
- Any firmware saved to the Duet has been erased.
- Connect the Duet 2 WiFi to the Pi with a USB cable. Power on the Pi and SSH into it.
- cd klipper
- make clean
- make menuconfig
- Micro-Controller > SAM3/SAM4 (Due and Duet)
- Processor > SAM4e8e (Duet WiFi/Eth)
- Communication Interface > USB
- Press the escape key on your keyboard and enter Y to save the config
- Enter make
- Stop the Klipper service.
- sudo service klipper stop
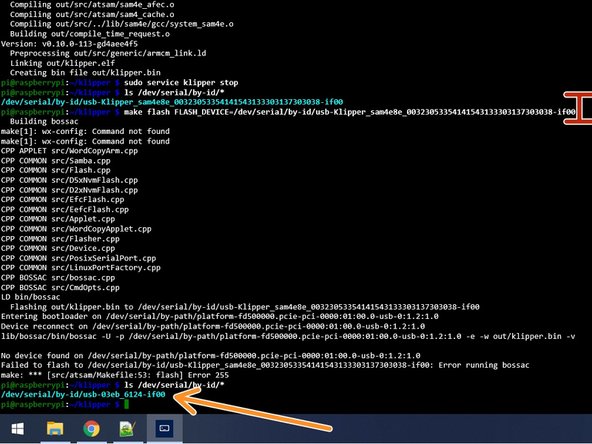
- Get the Duet's serial ID # and copy it down.
- ls /dev/serial/by-id/*
- Enter "make flash FLASH_DEVICE=" and paste your serial after the =
- If the flash fails usually this will place the board into a bootloader mode like original install does when you hit the erase pins. If this occurs please rerun ls /dev/serial/by-id/* so that you can get the correct serial
- Enter make "flash FLASH_DEVICE=" and paste your serial your new serial after the =
- Make sure you're in the klipper directory:
- cd ~/klipper/
- Enter the following commands:
- sudo cp ./scripts/klipper-mcu.service /etc/systemd/system/
- sudo systemctl enable klipper-mcu.service
- make clean
- make menuconfig
- Micro-Controller Architecture > Linux Process. Press esc than Y
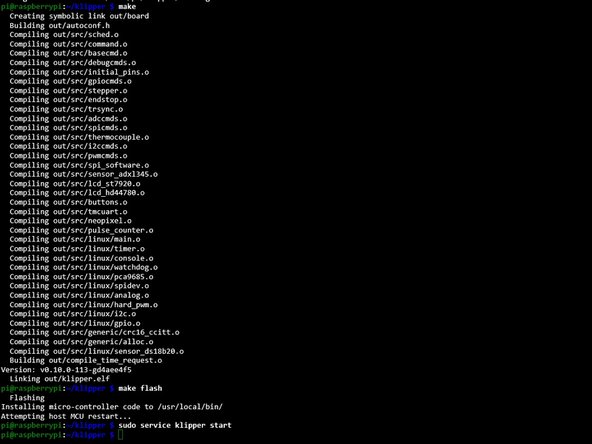
- make
- make flash
- sudo service klipper start
- Verify klipper_host_mcu is in the tmp directory with ls /tmp/*
- Add the pi to the TTY group
- sudo usermod -a -G tty pi
- sudo reboot -h now
- Next we will go to a Web browser to the Pi's IP address. You will see an error for "Unable to open config file /home/pi/klipper_config/printer.cfg"
- Download the printer.cfg file from github and upload it to the config directory
- Open your newly created "printer.cfg". Scroll down to line 169. Make sure you update the config with your serial ID you got from "ls /dev/serial/by-id/*"
- Double check the mcu rpi serial ID in line 181 maches "ls /tmp/*"
- Click SAVE and restart the printer
- If you use a separate 5v PSU for PS_ON You'll need to add the following lines
- [output_pin psupower] pin: PD15
- [gcode_macro M80] gcode: SET_PIN PIN=psupower VALUE=1
- [gcode_macro M81] gcode: SET_PIN PIN=psupower VALUE=0
- PanelDue is compatible with Klipper but only with v1.24. Instructions can be found here
- Connect the PanelDue to the RPI.
- 5v > 5v
- GND > GND
- UART0 TX > DIN
- UART0 RX > DOut
- SSH into the RPI.
- sudo nano /boot/config.txt
- At the bottom of the config file enter:
- dtoverlay=pi3-miniuart-bt
- Press Ctrl+X > Y to save > Enter to accept
- We need to disable the serial console
- sudo nano /boot/cmdline.txt
- Remove the following string
- console=serial0,115200
- Press Ctrl+X > Y to save > Enter to accept
- Disable serial console
- Sudo raspi-config
- 3 Interface Options > P6 Serial Port > No > Yes
- Yes to reboot the RPI
- Make sure you change the baud rate on the paneldue to 115200
- There's also a number of configs that need to be added to your moonraker.cfg. Those details can be found here.
- Download the file and extract.
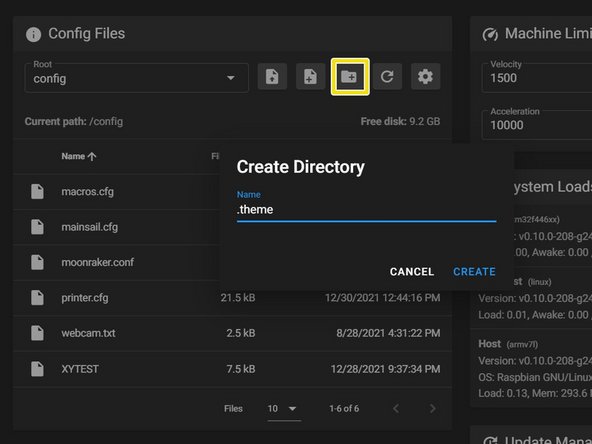
- Under "machine" menu, click on the Gear icon and select the checkbox for "show hidden files".
- Select "Create Directory".
- In the name field enter “.theme” and select CREATE.
- it has to be named as seen in the screenshot.
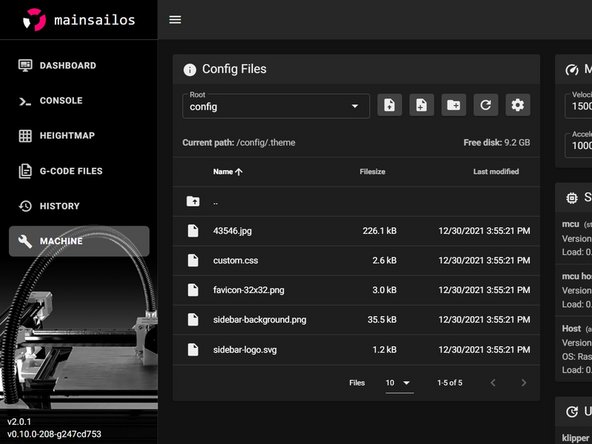
- Select the newly created ".theme" folder. Upload all the files from the zip archive into .theme folder.
- hit Ctrl+F5 and Enjoy.