Xiaomi Redmi Note 6 Pro Battery Replacement
ID: 147362
Description: Use this guide to replace a worn-out or dead...
Steps:
- Insert a SIM card eject tool, a SIM eject bit, or a straightened paper clip into the hole on the SIM tray located at the left edge of the phone.
- Press directly into the hole to eject the SIM card tray.
- Remove the SIM card tray.
- The back cover is held in place by plastic clips.
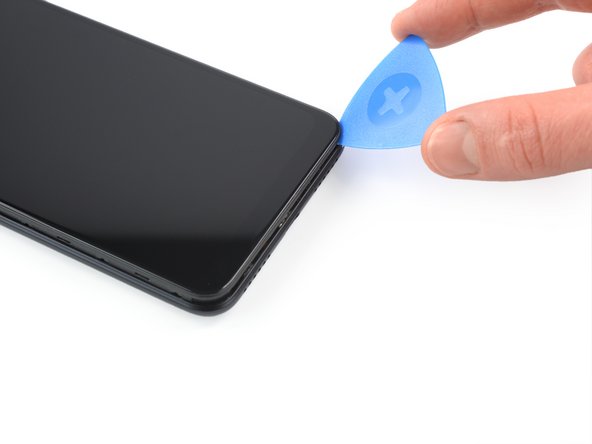
- Insert an opening pick between the screen and the back cover on the left edge of the phone where the SIM card tray was located.
- Slide the opening pick along the left edge to the bottom left corner to release the plastic clips.
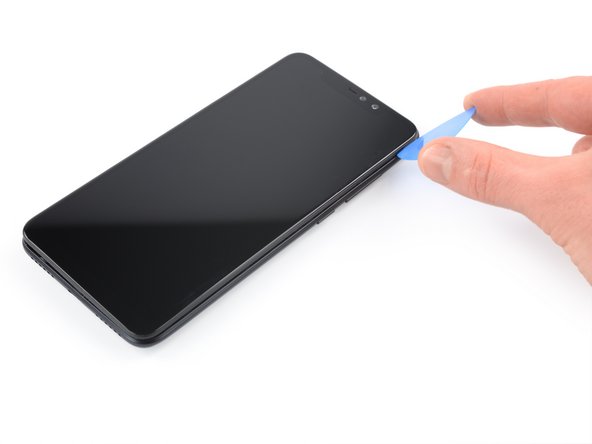
- Slide the opening pick along the bottom edge to the bottom right corner to release the plastic clips.
- Slide the opening pick along the right edge of your phone to the top right corner to release the plastic clips.
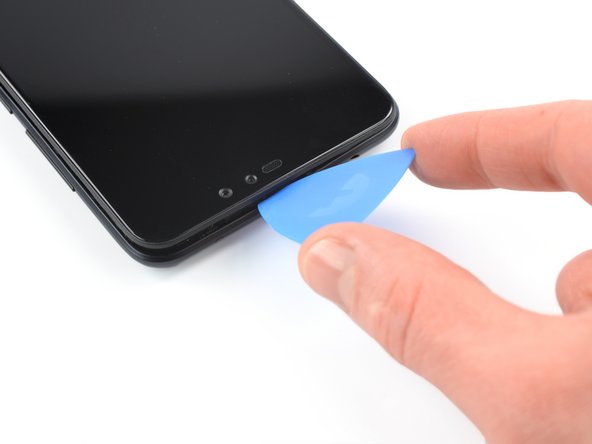
- Slide the opening pick along the top edge to release the remaining plastic clips.
- Don't try to remove the back cover all the way yet! It's still connected to the motherboard!
- Carefully fold the phone assembly to the left side of the back cover like you'd open a book.
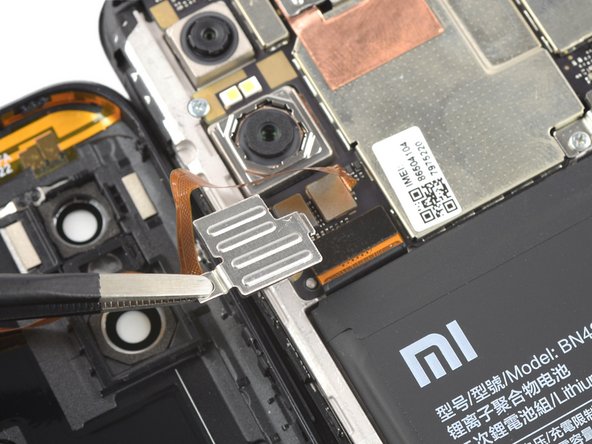
- Use a Phillips screwdriver to remove the 2.9 mm-long screw securing the fingerprint cable connector cover.
- Use a pair of blunt nose tweezers to remove the metal cover.
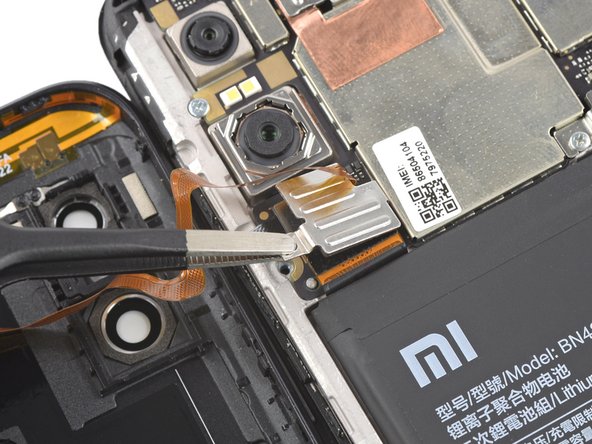
- Use the flat end of a spudger to disconnect the fingerprint sensor cable.
- Remove the back cover.
- Use a Phillips screwdriver to remove the two 3.0 mm-long screws securing the battery connector cover.
- Use a pair of blunt nose tweezers to remove the battery connector cover.
- Use a spudger to disconnect the battery cable by prying the connector straight up from its socket.
- The battery is secured to the rear case with two pieces of stretch-release adhesive.
- Use a pair of tweezers or a clean fingernail to peel down both battery adhesive pull-tabs to un-stick them from the bottom edge of the battery.
- Don't jab the battery with any sharp tools. A punctured battery may leak dangerous chemicals or catch fire.
- Grab the first pull-tab with a pair of tweezers or your fingers and slowly pull it away from the battery and towards the bottom edge of your phone.
- Pull hard enough to maintain tension on the strip, but don't force it. Give it plenty of time to stretch and un-stick from under the battery.
- Don't press down on the battery. Hold the Redmi firmly by its sides.
- Keep the strip flat and unwrinkled. Try to pull evenly on the whole strip, rather than pulling mainly in the middle or on one side.
- Pull at a low angle so the strip doesn't snag on the edge of the battery.
- If the adhesive strip breaks off, try to retrieve it using your fingers or blunt tweezers, and continue pulling—but do not pry under the battery.
- If the adhesive breaks off underneath the battery and can't be retrieved, continue with the next step.
- Repeat the previous pull-tab removal procedure on the second pull-tab.
- Follow the same procedure as with the previous strip: don't press down on the battery, keep the strip flat and unwrinkled, and pull at a low angle.
- If the adhesive breaks off underneath the battery and can't be retrieved, apply a few drops of high concentration (over 90%) isopropyl alcohol under the edge of the battery in the area of the broken adhesive strip(s).
- Wait about one minute for the alcohol solution to weaken the adhesive.
- Use the flat end of a spudger to gently lift the battery.
- Don't try to forcefully lever the battery out. If needed, apply a few more drops of alcohol to further weaken the adhesive. Never deform or puncture the battery with your pry tool.
- Remove the battery.
- Do not reinstall a damaged or deformed battery, as doing so is a potential safety hazard.
- Before installing a new battery remove any remaining adhesive, and clean the glued areas with isopropyl alcohol and a lint-free cloth.
- During reassembly, temporarily reconnect the battery to the motherboard to help align it correctly. Disconnect the battery after it is seated.