2012 Hyundai Accent Oxygen Sensor Replacement
ID: 149059
Description: One item that commonly breaks in modern cars is...
Steps:
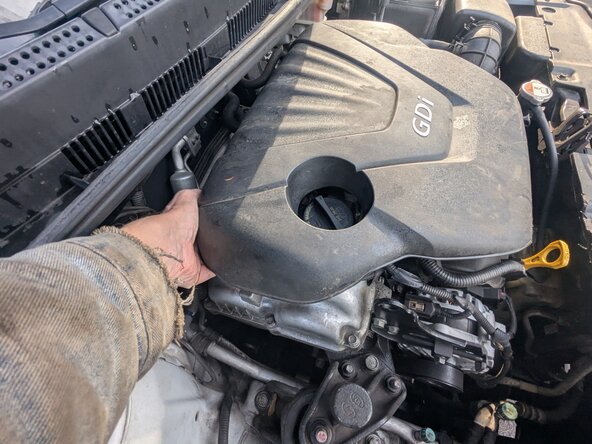
- Grasp the engine cover by the front edge.
- Give it a firm yank upward.
- Grab the rear edge of the cover.
- Yank it upward.
- The engine cover has been removed.
- Never work on a hot vehicle. Allow your car to cool for at least 4 hours before performing maintenance.
- Never work on any automotive electronics without first disconnecting the negative (-) terminal.
- Use a 10 mm wrench to loosen bolt on the battery's negative (-) cable, then slide it off the (-) negative post.
- Locate the sensor off the exhaust header and follow the wire up to the connector.
- Some of the pieces on the top-front of the engine are sharp; be careful what you lean on.
- Gently work the connector out of the bracket, then disconnect it by pressing the tab inward then pulling out.
- Plastic gets brittle over time. Be gentle and go slow. If it's not coming out, take a break and come back a little later. Be patient to avoid damage.
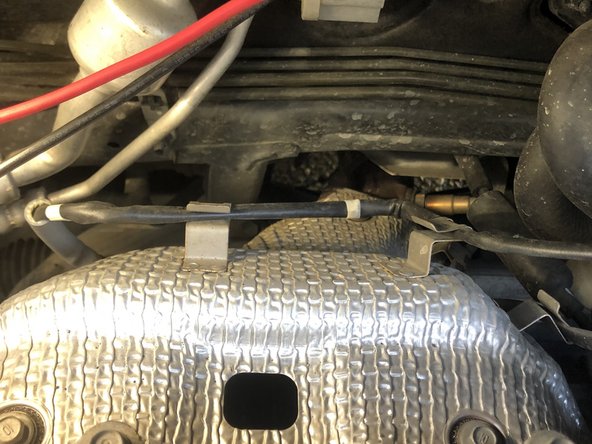
- Gently pull the wire out of its bracket.
- It will lift out of the bracket with minimal effort.
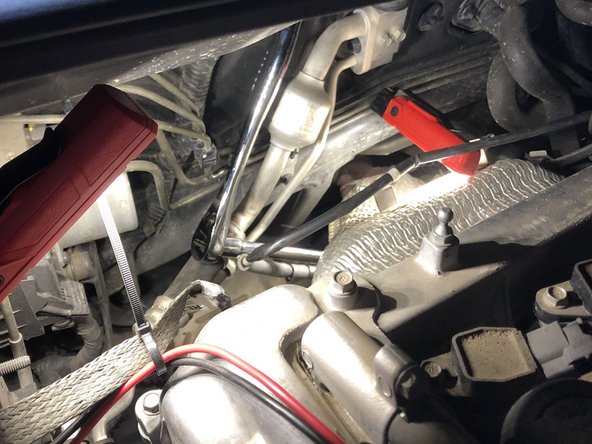
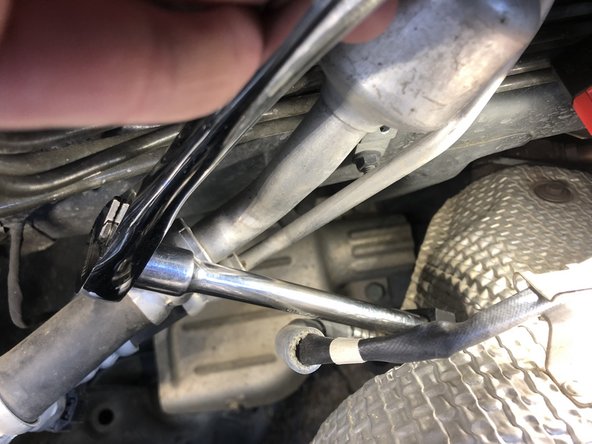
- Place the 7/8" (22 mm) socket around the O2 sensor. Use a ratchet and 6" extension to loosen and remove the sensor.
- Place the socket on the sensor without the ratchet in the way. Once the socket is in place, reattach the ratchet and loosen.
- The sensor is behind the exhaust, up against the firewall. Having a headlamp, or a friend who can hold a flashlight, is a big help. The red lights in these photos are cheap magnetic lights!
- The sensor can now be unthreaded by hand.
- When installing the new O2 sensor, if you feel extreme resistance, STOP. It means it is cross threaded. It should easily thread in by hand.
- Use the 7/8" (22 mm) socket to tighten the sensor firmly so it doesn't loosen from vibration.
- The last picture is what the whole sensor looks like out in the open.
- Reconnect the plug by firmly pushing the plugs together.
- Depending on the age of the plastic, you may or may not hear a click; just follow where the two plugs meet. There should be almost no gap.
- Push the connector back into its bracket.
- You may need to slightly wiggle the connector as you seat it into its bracket. It will be a tight fit by design.
- Push the wires back into the metal brackets.
- Reattach the negative (-) battery cable.
- Be sure to push/seat the terminal as far down as possible before tightening the 10 mm bolt.