Acer Chromebook CP5-471-C0EX Motherboard Replacement
ID: 149686
Description: If the motherboard in your Acer Chromebook...
Steps:
- Carefully detach the ribbon cable connecting the battery and the motherboard.
- Use your hands to lift the battery out of the device.
- Disconnect the wide black ribbon cable from the motherboard using an iFixit opening tool.
- Disconnect the blue-tipped ribbon from the motherboard.
- Be careful not to damage the motherboard while removing the ribbon cables.
- Remove the golden tape connecting the trackpad to the plastic divider using an iFixit opening tool.
- Peel back the black plastic divider that separates the motherboard and trackpad.
- Remove four 3 mm screws from the trackpad using a Phillips #1 screwdriver.
- Carefully remove the trackpad from the device.
- Gently pull the black and white cables up to disconnect them from the Wi-Fi card.
- Remove the single 3 mm screw using a Phillips #1 screwdriver.
- Gently pull the wireless card away from the motherboard to remove it.
- Gently pull the black and white cables up to disconnect them from the Wi-Fi card.
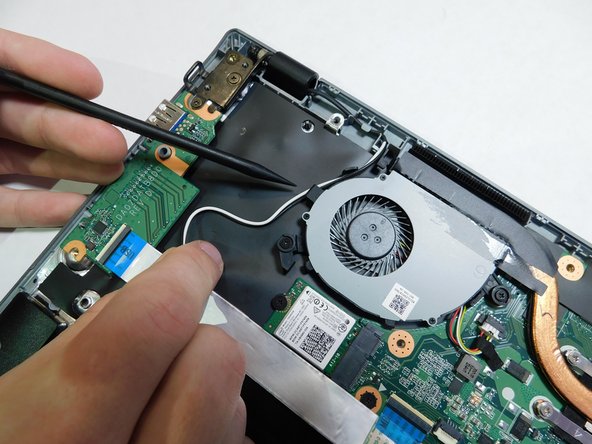
- Unwind the Wi-Fi card wires from the side of the fan.
- The wires need to be pulled down and around the first hook, as seen in image two.
- Pull the black and white cables under the second hook and away from the fan.
- Pull wires so they are out the way.
- Loosen the six screws from the fan and heat sink.
- The two screws closest to the fan cannot be removed from the fan, but will still loosen from the case.
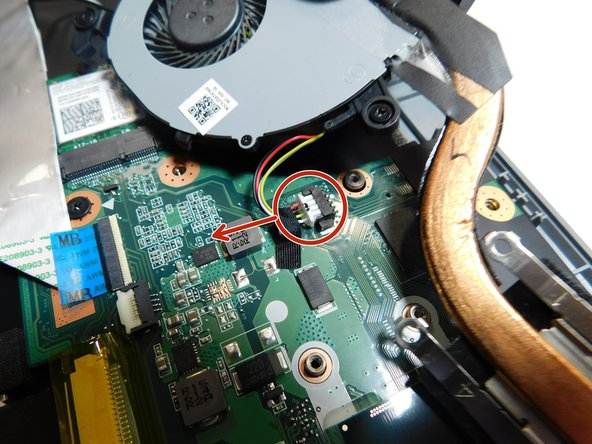
- Gently lift the fan out of the case, but do not remove it fully; there is still one more cable attached.
- Pull the cable out of its socket on the motherboard.
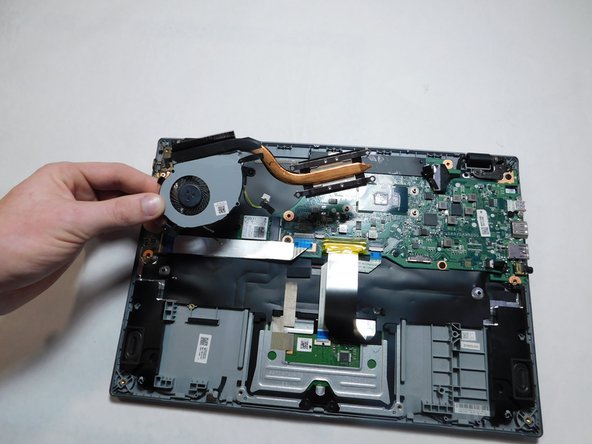
- Remove the fan from the laptop.
- Push on the sides of the connector to gently disconnect the speaker cable from the motherboard.
- Use an iFixit opening tool to pry the display cable up from the motherboard.
- Remove seven 3 mm screws from the motherboard using a Phillips #1 screwdriver.
- Remove the motherboard from the laptop.