2018 Dodge Charger Headlight Bulb Replacement
ID: 149693
Description: Learn how to replace the headlight bulbs for a...
Steps:
- Before you begin, make sure the vehicle is turned off and placed in park with the parking brake engaged.
- Open the hood by pulling the release lever inside the vehicle, located on the driver's side by the parking brake.
- Once pulled, you will hear the sound of the hood pop open.
- Carefully place your hands under the hood, towards the middle of the car.
- When you feel the lever, push it to the left using your left hand and slowly push the hood up with your right hand.
- If your Charger has or requires a stand, prop it up.
- This model of Charger does not require a stand to hold the hood. It will automatically hold on its own.
- On the passenger side of the car, unscrew the cap covering the headlight compartment.
- Remove the cap from the headlight.
- Use gloves to protect your hands.
- Once you remove the cap, you will see the current bulb that is installed.
- Slowly twist the bulb clockwise, and remove it from the compartment.
- Unplug the bulb from the adapter.
- Lift the lever and carefully detach it.
- Place the bulb in a safe area away from the vehicle.
- Connect a new light bulb to the adapter.
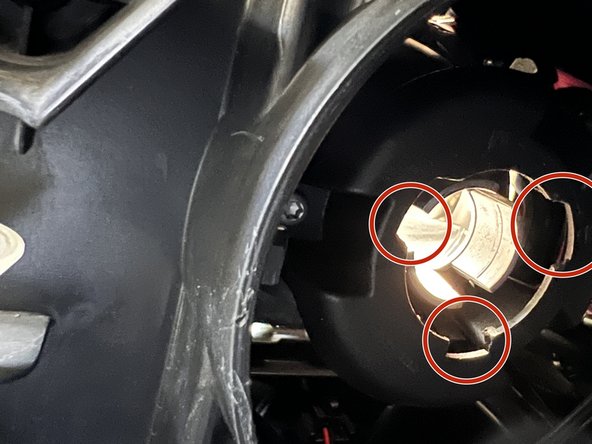
- Align the bulb to the shape of the hole and turn clockwise to safely lock.
- After installation, you will see cables sticking out. You can manage this by fitting it in the compartment.
- Place the cap back on the compartment and tightly seal it.
- To access the driver's side lightbulb, you have to remove the air intake from under the hood.
- Loosen two bolts using a 1/4 ratchet with a 5/16 inch socket.
- Gently loosen the bolt. Loosening it too quickly may result in the screw falling into the engine compartment.
- Once the screw is loosened, use your hand to continue the process.
- Loosen the screw attached to the ring.
- Detach the tube from the intake.
- Do not remove the ring from the tube.
- Grab the intake with both hands and gently lift upwards.
- Place the intake safely on top of the main engine block.
- Once the intake is safely removed, you can access the headlight compartment.
- Remove the light bulb by lifting on the small lever.
- Connect the new headlight bulb and firmly align the bulb to the compartment.
- Double check that the bulb is properly installed and connected. If it is not installed properly, you will have to remove the intake again.
- Place the intake back in its original place.
- Align the bottom of the intake to its original spot as seen in the picture.
- Place the bolt and ring back on the intake.
- Tighten the screw with your hands and finish securing the screw using the 1/4 ratchet and the 5/16 in socket.
- Firmly attach the tube to the intake.
- Tighten the screw using the 1/4 ratchet with the 5/16 inch socket.
- Close the hood of the vehicle.
- Before closing the hood, make sure the engine compartment is clear of obstruction.
- Power on the vehicle to ensure the new headlight bulbs are successfully working.