Asus ROG FX60VM Hard Drive Replacement
ID: 151584
Description: This guide will show you how to replace the...
Steps:
- Before disassembling the laptop, turn the laptop off and make sure it's unplugged from the power supply.
- Flip the laptop over so the back case is facing up.
- Remove the ten 2.5 mm screws from the back case using a Phillips #0 screwdriver.
- Use a plastic opening tool and picks to pry the back panel off of the device.
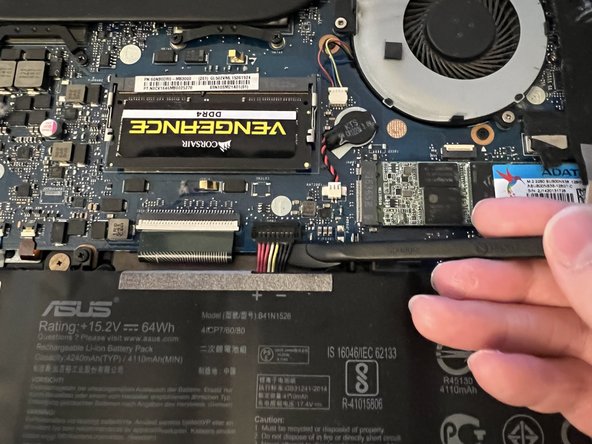
- Put the tip of Halberd spudger under the battery connector and lift it gently to disconnect it from the motherboard.
- You may need to wiggle the spudger up and down in order to disconnect the battery connector.
- Remove the four 3.0 mm screws from the HDD case using a Phillips #1 screwdriver.
- Do not lift the HDD up, as you may damage the connector highlighted in red.
- Hold the back of the HDD , and slide it out of the port to disconnect it from the motherboard.
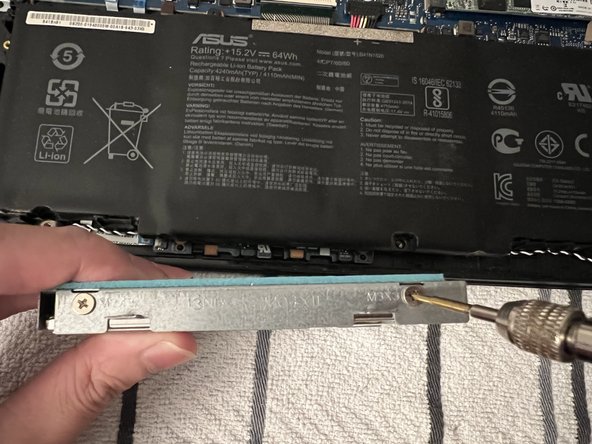
- Remove the two 3.0 mm screws on each side of the HDD mounting bracket using a Phillips #1 screwdriver.
- Lift the HDD out of the mounting bracket, and install a new HDD or SSD to the mounting bracket.