Soundcore Liberty Air 2 charging case Teardown
ID: 152159
Description: Because of a recent problem of my earbuds no...
Steps:
- Jimmy a pick between the inner and outer casing as depicted on the picture. Carefully use it as a bit of a lever to lift the inner casing a little. A sturdier item is required.
- There are no wires or other components (besides the magnets) between inner and outer casing, so do not worry if you jam it in too deep.
- Once loosened a little, you can use the holes (as marked on the image) next to the magnets and the outer case as a lever to lift the inner case out of the outer case. You should be able to to fully seperate outer and inner case.
- Be careful around the magnets as they can loosen when wedging a pick in the case. They can easily be glued back on however.
- Remove the two screws of the bottom print plate using a phillips #00 screwdriver
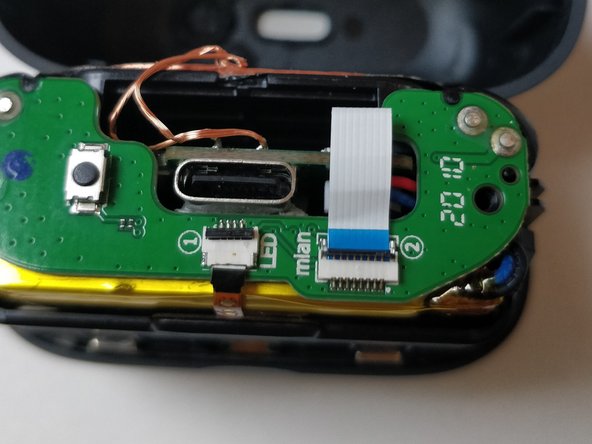
- Lift the black plates and remove the connection to the LED (small one with black end) and the connection to the main circuit (big one with blue end) using tweezers
- Remove the circuit board by placing a spudger or pick between the circuit board and casing and lifting the circuit board free from the case
- In this step, it is easy to lose the rubber filling where the charging pins to charge the earbuds penetrate the case
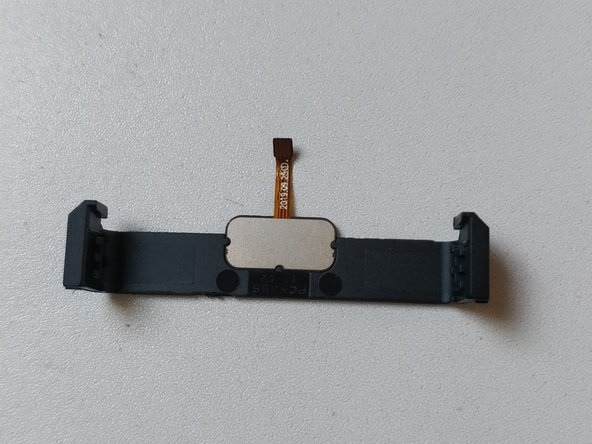
- You can easily remove the LED strip by wedging a pick between one of the sides of the strip and lift it out of the case
- This one easily slides downwards. Just apply some gentle lever action with a pick, tweezer or spudger
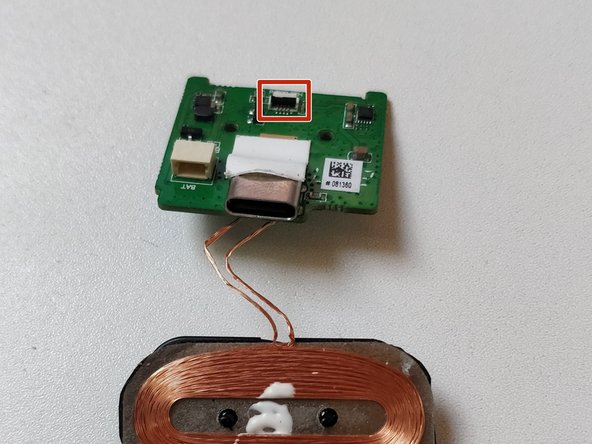
- When removing, be carefull not to remove it too far outwards, as the copper wires connecting the coil to the main circuit are not too long. You might damage the copper wires.
- Remove the battery connector from the main circuit board using a spudger or a pick
- You can loosen it by alternately lifting the connector head at the left and right side.
- Remove the two phillips #00 screws from the main circuit board
- There is a connector cable that needs to be removed from the print plate. This can be removed by gently pulling out the main circuit board from the inner case
- When putting the main circuit board back in the case, it might be little tricky to connect to the print plate due to limited space. Do not forget to lift the black plate at the connector port and closing the black plate after it is connected.
- I did not remove the battery. It was connected to the case with adhesive tape
- To put the phone back together, simply follow the steps in the reverse order.