ZTE Maven 2 Screen Replacement
ID: 155331
Description: This guide will show you how to remove and...
Steps:
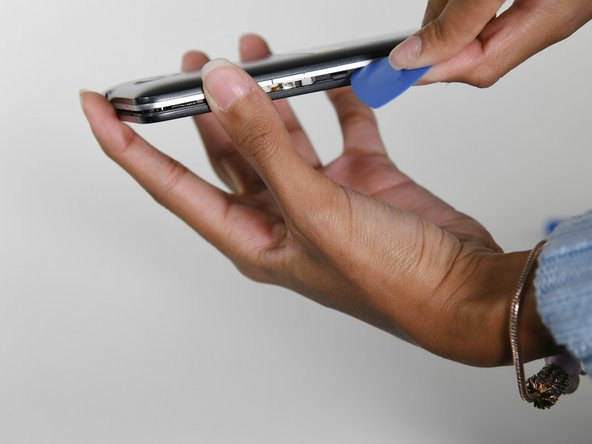
- Pry off the back cover by inserting an opening tool into the small space on the bottom left between the phone's cover and body.
- Work your way around the phone with an opening pick to loosen the rest of the back cover.
- Remove the cover.
- Push in and then up on the bottom of the battery to free it from its compartment.
- Pull the battery out.
- Using your fingers or blunt tweezers, carefully pull the memory card out of the slot.
- A SIM card is used to demonstrate the process for removing the MicroSD card in these images.
- Remove the twelve 3 mm screws with a Phillips #00 screwdriver.
- Wedge the opening tool between the front and side panel to create a gap.
- Slide the opening pick around the device to detach the midframe.
- Peel the sticker off the battery compartment, as some of the motherboard components are hidden under it.
- Remove the six 3 mm screws with a Phillips #00 screwdriver.
- Using a pair of blunt tweezers, carefully remove the black wire that's attached to the gold plates on the left side of the device.
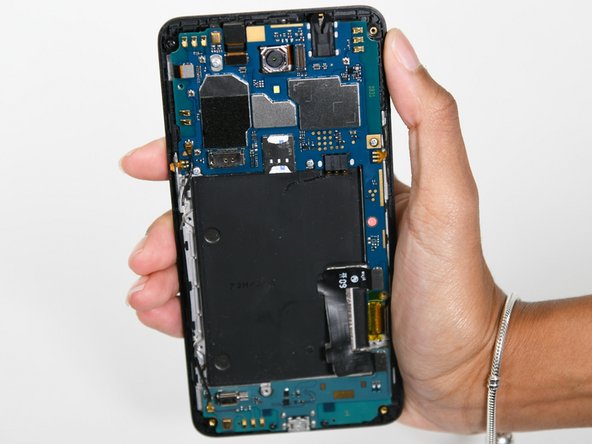
- Using the opening tool, carefully detach the ribbon cables connected to the motherboard.
- Work the opening pick around the edges of the motherboard to loosen it up.
- The motherboard is glued down with adhesive. Pushing firmly with the pick will help to loosen the components and remove them.
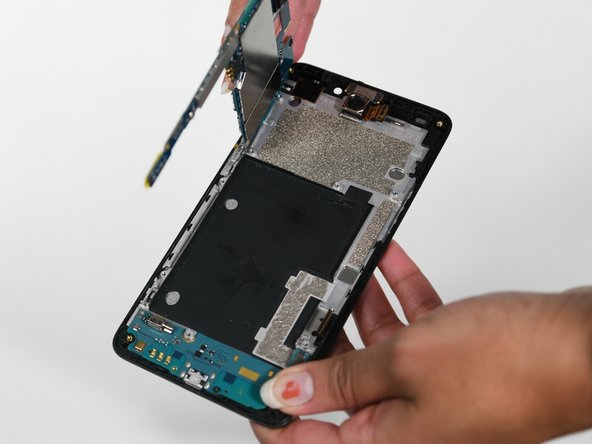
- Pull the motherboard out of the device.
- Remove the daughterboard containing the charging port.
- Detach the ribbon cable connecting the camera to the device.
- Use blunt tweezers to pull the camera off.
- What's left in your hands after removing the camera is the screen component. This is what gets replaced.
- The screw holes for the midframe and motherboard overlap. Plan out which screws will go where.