Microsoft Surface Laptop 5 (15-inch) Upper Case Replacement
ID: 157367
Description: Follow this guide to replace the upper case in...
Steps:
- Allow your laptop's battery to drain below 25% before starting this repair. A charged battery may catch fire if damaged.
- Unplug all cables and fully shut down your laptop.
- Close the screen and lay your laptop down with the rear case facing up to access the four rubber feet.
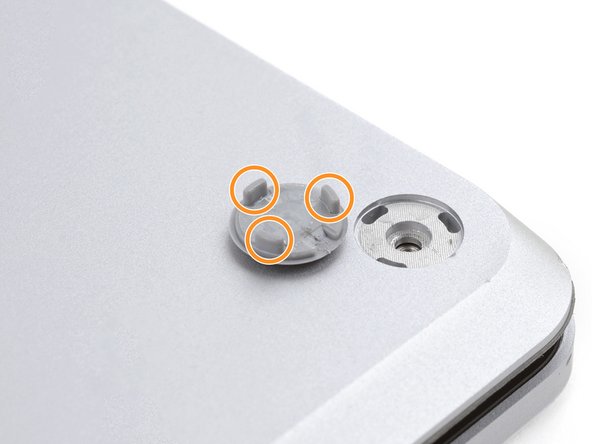
- Each foot has a recess to help pry it from the laptop:
- The back feet recesses are closest to the back edge of the laptop.
- The front feet recesses are closest to the front edge of the laptop.
- Insert one arm of your tweezers into the recess of one of the feet.
- Twist your tweezers and pry up to separate the adhesive and unclip the foot from the laptop.
- The feet eject very quickly—be careful not to lose them.
- Remove the foot.
- Repeat this process on the remaining feet.
- This laptop has two different types of feet. During reassembly, make sure the feet go in their correct recesses.
- The rear feet have a single center clip.
- The front feet have three clips and can only be reinserted one way.
- Press the feet into their recesses to secure them to the frame.
- If the existing feet no longer adhere to the frame, remove the old adhesive and apply a small amount of Tesa Tape where the old adhesive was.
- If the feet are damaged or worn out, use 8 mm rubber furniture pads:
- Peel a pad away from its backing.
- Align the pad over a foot cavity and press down to secure it.
- These screws strip easily. Apply constant, downward force to prevent stripping.
- Use a T5 Torx driver to remove the four 3 mm screws securing the upper case.
- Throughout this repair, keep track of each screw and make sure it goes back exactly where it came from.
- Flip your laptop over and fully open the screen.
- The upper case is secured by magnets.
- Grip the top edge of the upper case above the keyboard and lift straight up to release it.
- Don't try to completely remove the upper case, as it's still connected to the laptop by a cable.
- Lift the bottom edge of the upper case up and away from the laptop, taking care to not strain the ribbon cable underneath.
- During reassembly, lower the upper case onto the lower case until the magnets snap into place and it lays flat.
- Check that the upper case sits flush around the entire perimeter. Any gaps between the upper and lower case near the screen could damage the screen as it closes.
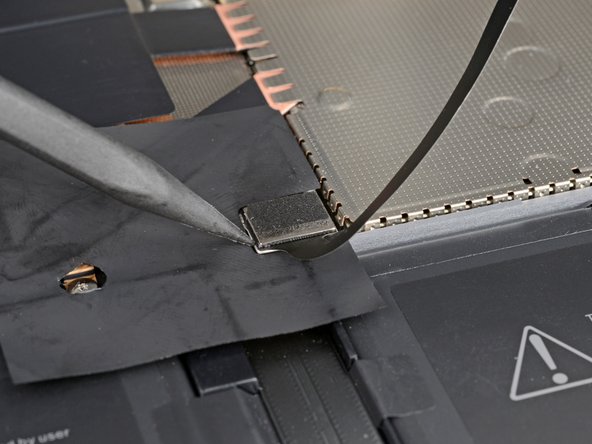
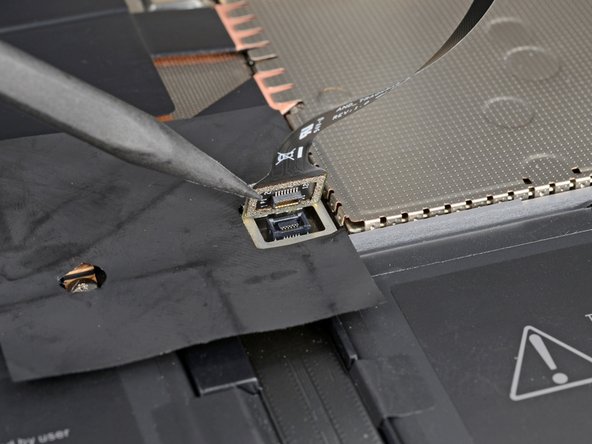
- The keyboard and touchpad cable connects the upper case to the laptop.
- Insert the pointed end of a spudger under one edge of the magnet connector and pry up to disconnect it.
- To reconnect the cable, align the magnet connector over its socket with the cable facing the bottom of the laptop. Press down on the connector to secure it.
- Remove the upper case and set it keyboard-side down on a clean surface.
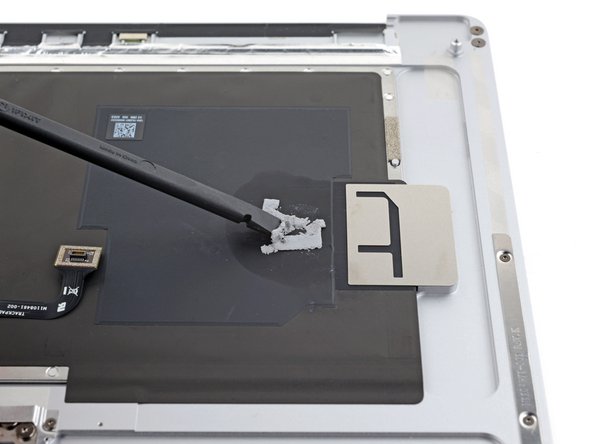
- Your SSD has thermal paste that forms a bond to the upper case.
- During reassembly:
- Use the flat end of your spudger to scrape away old thermal paste from the top of the SSD and the underside of the upper case.
- Apply a few drops of highly-concentrated isopropyl alcohol (over 90%) to the SSD and upper case. Wipe away the residue using a lint-free or microfiber cloth.
- Replace the thermal pad with one that's the same size as the SSD sticker.
- Alternatively, you can apply a bead of thermal paste directly to the SSD's label. Use the dot method with a bead slightly larger than the screw head securing the SSD.