JBL Flip 6 Battery Replacement
ID: 158210
Description: Use this guide to replace a worn-out or dead...
Steps:
- Before starting repairs, turn off your device and unplug any cables.
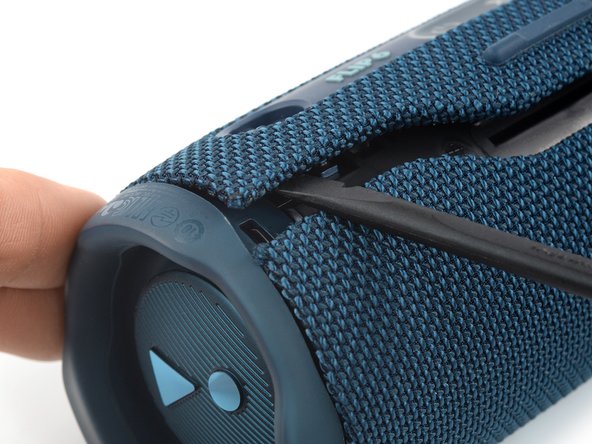
- The fabric cover of the JBL Flip 6 is secured by plastic clips.
- Insert the flat end of a spudger into the seam between the two halves of the fabric cover.
- Push the spudger underneath the edge of the fabric cover without the control panel and pry upwards to release its plastic clips.
- Repeat the previous step, using your spudger to work your way along the entire seam to release the remaining plastic clips.
- Insert the flat end of a spudger underneath the opposite edge of the fabric cover—the side with the control panel.
- Pry upwards to release the plastic clip.
- Repeat the previous step to release the last plastic clip on the other end of the fabric cover.
- Use one hand to spread the edges of the fabric cover apart and your other hand to pull the speaker assembly away from the cover.
- Remove the fabric cover.
- During reassembly, this is a good point to power on your device and test your repair before reinstalling the fabric cover.
- The right passive radiator is secured by plastic clips and labeled R.
- Insert the flat end of a spudger underneath the passive radiator housing near one of the plastic clips.
- Pry upwards to release the first plastic clip holding the passive radiator housing in place.
- Repeat the previous step to release all of the plastic clips holding the housing in place.
- Remove the right passive radiator.
- Use a Phillips screwdriver to remove the two 9.5 mm-long screws securing the safety bracket.
- Use a pair of tweezers or your fingers to remove the safety bracket.
- Use a Phillips screwdriver to remove the four 9.5 mm-long screws securing the woofer.
- Don't try to remove the woofer all the way yet, as it‘s still connected to the motherboard.
- The woofer cables are long enough to allow placing the woofer outside the speaker assembly, but avoid straining or sharply folding the cables when doing so.
- When handling the woofer, grab it by its edges to avoid damaging the fragile center material.
- Lift the woofer out of its recess and place it next to the speaker assembly.
- The woofer is connected to the motherboard with a JST connector.
- Use a pair of tweezers to grasp the sides of the woofer connector.
- Slide the connector out of its socket, gently wiggling it left and right to loosen the clips securing it.
- Remove the woofer.
- Use a Phillips screwdriver to remove the two 9.5 mm-long screws securing the tweeter.
- There are different versions of the JBL Flip 6 with different tweeter connectors. Both require a slightly different disconnection procedure.
- A connector next to the woofer connector, which can be disconnected just like the woofer's.
- A spade connector with contact springs, which can be disconnected by simply prying up the tweeter.
- To pry up the tweeter, insert the tip of a spudger between the battery connector and the connector stem of the tweeter and gently press the tweeter upwards to push the stems out of their contact springs.
- To reconnect the spade connector, just press the contacts back into the springs.
- Use a spudger to pry up the tweeter.
- Remove the tweeter.
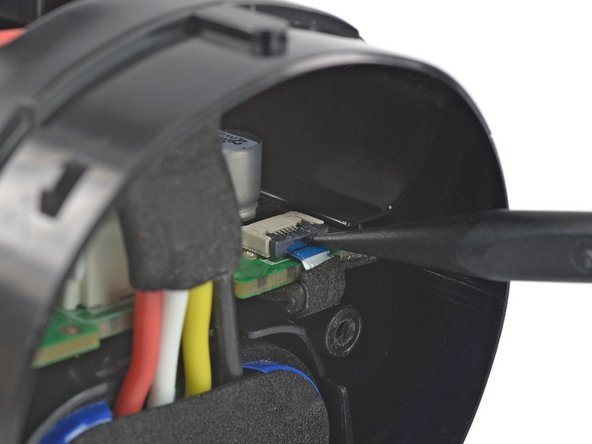
- Use the tip of a spudger or your fingernail to flip up the small, hinged locking flap on the power button cable ZIF connector.
- Use a pair of tweezers to pull the power button cable out of the ZIF connector.
- Use the tip of a spudger or your fingernail to flip up the small, hinged locking flap on the charging cable ZIF connector.
- Use a pair of tweezers to pull the charging cable out of the ZIF connector.
- Use the tip of a spudger or your fingernail to flip up the small, hinged locking flap on the volume button cable ZIF connector.
- Use a pair of tweezers to pull the volume button cable out of the ZIF connector.
- Insert a finger into the woofer cutout and press against the left edge of the motherboard.
- Push the motherboard out of the speaker assembly just until you get free access to the battery connector. You don't need to push it out all the way.
- The battery is connected to the motherboard with a power cable connector that has a small tab on the side that locks it in place.
- Squeeze the tab against the connector, and pull the connector straight up from its socket to disconnect the battery.
- Pull the battery out of the speaker assembly to remove it.