ThinkPad X1 Carbon (3rd Gen) RTC Battery Replacement
ID: 158693
Description: "If the computer cannot retain date and time,...
Steps:
- Loosen the seven cover screws. They will not come out.
- Use spudger to pop loose cover and slide off.
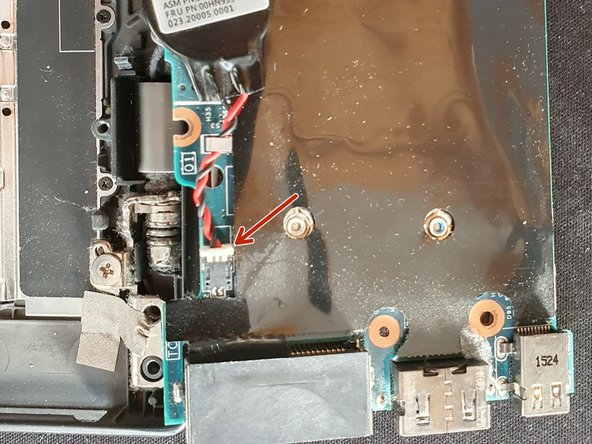
- Only use plastic to remove battery connector
- Gently remove battery connector by pushing with the spudger in the direction of the arrow.
- Remove five screws holding battery in place and remove battery.
- Firstly go through separate battery removal guide. insert straightend paper clip into SIM card holder (arrow) and eject and remove it.
- remove 8 screws shown, incl, metal plate over charging connector and the sim card holder.
- Wireless LAN RF cables can be left in place.
- disconnect all other connectors from mainboard (and tape that fixes the connectors and Flex connectors)
- Tip : Take note of magnet location (square) and orientation in case it dislodges. use marker if needed.
- Pry up main board gently by lifting the Fan end of the motherboard.
- pull board gently toward the fan end to dislodge the connectors from the case and release the main board.
- when released, turn over the board to view backside of mainboard.
- RTC battery can now be replaced.
- Functional RTC voltage is above 3,1V.
- Brand new RTC voltage is 3,3V
- recommend to tape down loose connectors away from main board while assembling the main board.