Guide 5: NESPRESSO coffee maker does not hold the capsule, it falls directly into the container when inserted - DIY repair.
ID: 160324
Description:
Steps:
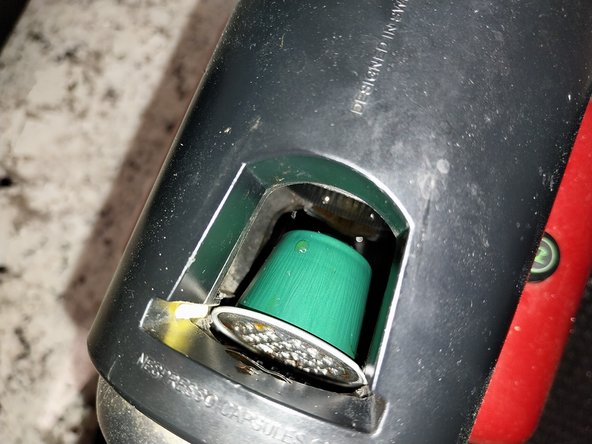
- How to fix a problem where a CAPSULE drops directly into the bin upon insertion, a VERY COMMON failure after a period of heavy use in NESPRESSO coffee machines. This is due to wear on the 2 side rails; with use, a small protrusion at the bottom where the capsule is held and tilted at about 30º wears down.
- Due to use, that plastic protrusion wears out and stops holding the capsule, forcing us to remove the bin and reach into the cavity from below to hold the capsule in place when releasing it, while operating the lever.
- It is a recurring problem in several Nespresso models. I have tried to fix it in various ways without success, but it seems that, on this occasion, by chance while performing other maintenance on the one we use at work, I have found the solution. I have given it several weeks to see if it would fail again,
- This repair is extremely simple; it does not involve the teardown of any parts.
- 1st Modification: Using a small, thin utility knife, we must make a few slight grooves or marks at an angle of approximately 45º on the 2 sides of the capsule slot, where the wide part of the capsule is inserted; these grooves will act as a slight brake for the capsule as it falls.
- Although only the ones on the right side will be visible, we will also do it on the left side so that the heat-shrink tubing we will glue on later adheres better to the track.
- Here we see the rail; we cut a 45º groove on the top part. On the bottom, where the capsule tends to tilt, it is not necessary to cut them. These grooves will help improve the adhesive bond between the plastic and the yellow tube.
- I used a 3 mm O yellow heat-shrink tube, although I could have used any other color (with black, the repair would not be visible), simply so that it is easier to see in the photos.
- Top view showing where to make the two splines. In these photos, you can see the tube already installed, as I took them afterwards; since it was an experimental project, I had to run tests before considering it valid.
- I did not record a video as I often do, because it is somewhat complicated to film due to the varying distances of each element.
- ATTENTION, A CORRECTION IS BEING MADE TO THE DOCUMENT: The heat-shrink tube must be placed on both sides, on both rails, using a 3 mm diameter tube on one side and a 4 mm tube on the other for better retention of the capsule; see video in step 12.
- What material did I use to make the thickness of the rail? 3 mm DIAMETER HEAT SHRINK TUBING, and 4 mm tubing for the other side. HEAT SHRINK IS USED BECAUSE IT IS A SOFT AND FLEXIBLE TUBE.
- This tubing is called something different in every country; as you can see on the box where I store them in various sizes, I have collected different names from various countries. This one was bought on AliExpress.
- Which size should you use? Although it is not 100% critical, the following sizes have worked well for me; please note that these may not be useful in your case.
- Diameter: 3 mm on one side and 4 mm on the other side.
- Length: Approximately between 10 and 13 mm; I used 13 mm.
- Tubing color: It is completely indifferent; I used yellow so that it can be seen better in the photos.
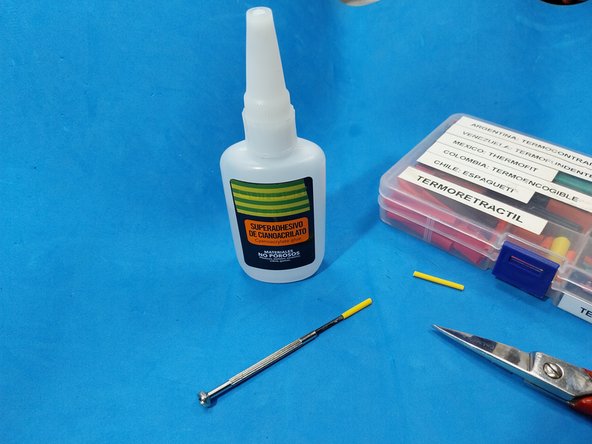
- To position the tube once the grooves have been made, hold it with the help of a thin watchmaker's screwdriver and apply a little superglue (fast-setting cyanoacrylate adhesive) to one side of the small tube's body.
- Carefully insert it into the recess and glue it into the track, WITHOUT BLOCKING THE LOWER PART WHERE THE CAPSULE TENDS TO FLIP.
- If you hold it for 30 seconds with the screwdriver pressed against it, you will improve the adhesive's bond.
- I apologize for not having photos of this part of the step-by-step process, as I did not take any, but it is not complicated at all.
- Let the glue dry for 1 hour so it sets completely before testing with a capsule.
- View of cyanoacrylate, cyano-lite, or instant adhesive.
- View of a miniature watchmaker's screwdriver.
- Views of how the assembly looks with the little tube glued on the left side.
- CAUTION, I CLEARLY STATE THAT THIS METHOD IS EXPERIMENTAL; IT IS NOT AN OFFICIAL REPAIR, SO DEPENDING ON LUCK AND THE SKILL EACH OF YOU HAS, IT MAY TURN OUT BETTER OR WORSE. It worked for me and that is why I am sharing it; if it helps anyone, great, that is the intention of this document.
- After modifying the capsule guide rail, the capsule remains held in place, more or less positioned in the correct spot, in 95% of cases.
- If it still doesn't work, as a final touch, you might need to trim a millimeter off the little tube if the capsule sits too high, or you may need to remove it and start over, gluing a slightly wider tube if the capsule still isn't being held in place; every machine and its particular wear is different.
- Testing the capsule holder. The capsule drops and tends to get caught slightly tilted, just as it did originally.
- I hope this helps you and that you are able to solve your problem of the capsule falling directly into the container when you insert it.
- Testing with various capsules.
- Edit to the document: Two pieces of heat shrink tubing must be placed, one on each side. It is preferable for one to be 3 mm and the other slightly thicker, 4 mm; with this, the capsule is retained perfectly.
- Video of the machine in use, with the 2 pieces of heat shrink tubing; it hasn't caused any more problems.
- VIDEO OF THE MACHINE WORKING https://www.youtube.com/watch?v=uPM2MYWv... as soon as I have the complete video of another one repaired in the same way, I will attach it here.
- VIDEO OF THE EXPLANATION AND A HOMEMADE https://www.youtube.com/watch?v=a9NRWe1B... that will help us with the repair, made with a car windshield wiper rod.