iFixit Precision Bit Driver Magnet Replacement
ID: 164884
Description: This guide will help you replace the magnet at ...
Steps:
- Follow the Cap Replacement guide in reverse.
- I found doing a few loops around the handle first helped tighten the floss around the cap
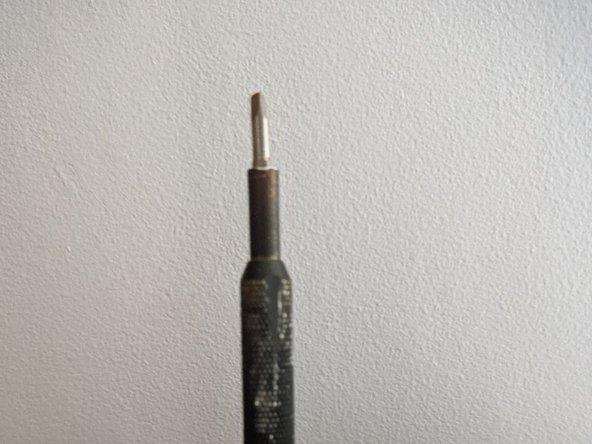
- Place the screwdriver vertically, bit shaft down on a hard surface.
- You will be hammering against that surface. Make sure it's either resistant, or that damage to it doesn't matter
- Insert a 3mm allen key all the way down.
- The allen key's 90° should not touch the end of the driver. It needs to be able to be pushed further.
- Use a hammer to dislodge the old magnet. You may need to hit hard and a few times
- Once the magnet is dislodged, you can blow through the driver or use a long pokey thing to remove it completely
- Attach the new magnet (in this case 2x 2mm*4mm disc magnets, original was a 4*4mm) to one of your useless bits. I used the triangle one
- You may want to add a dab of glue to the back of your magnets. I didn't feel the need, a press fit was all that was needed
- Insert the bit. It may not go all the way to the required depth
- Place the screwdriver, cap side down, on your makeshift anvil/surface
- Give it a good few hits with the hammer, to push it back in.
- Hits sound different when you're all the way in. When that's the case, you can't go further
- Follow the Cap Replacement guide to re attaching the cap to put it back on
- I couldn't tighten mine back all the way, I may have damaged some threads whilst hammering the allen key.
- You've done it. You've fixed your IFixit driver that you bought to fix things. The fixer is fixed.
- Maybe this wasn't worth it, and a replacement screwdriver was just an email to support away, but why do that, when you can fix it