Asus ROG Zephyrus G14 Battery Replacement
ID: 165021
Description: This is a comprehensive guide on replacing the...
Steps:
- Flip laptop so the back cover faces up.
- Remove the ten (M2x10) screws.
- Remove the three (M2x5) screw.
- Loosen (M2.5x6) pop-open screw without removing screw from the cover.
- Pop-open screw CANNOT be removed. Do NOT try and remove it with any other tool. This can damage the screw and/or back cover.
- Place iFixit opening tool at the pop-open screw (bottom right screw), there will be a gap there to place your tool.
- Pry your way around the perimeter of the laptop.
- Plastic clips holding the back cover will pop free as you pry. You will hear popping noises. This is normal.
- During reassembly push down around the perimeter of the back cover to snap the plastic clips into place.
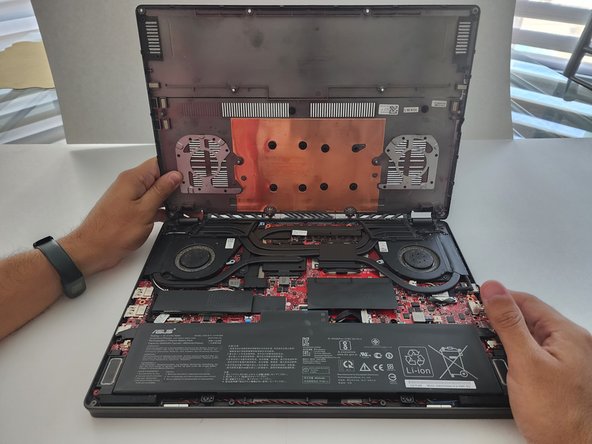
- Gently lift the back cover open and remove it.
- Plastic clips in the center of the cover will pop free when lifting the cover. Hearing popping noises and feeling some resistance is normal.
- During reassembly, push down at the center of the cover with your hands and the hooks will snap back into place.
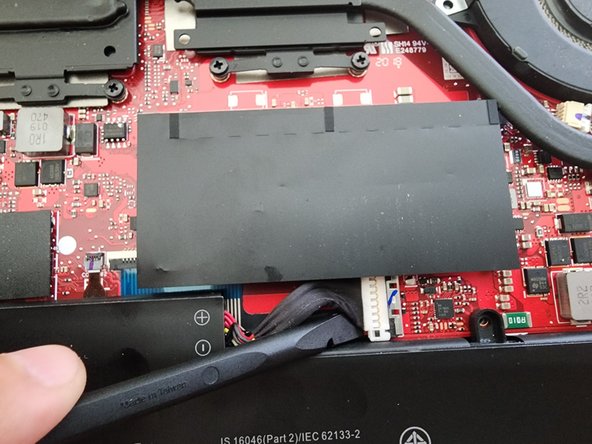
- Use the plastic spudger to gently slide back the metal retaining clasp from the connector.
- Place your spudger under the connector and carefully pry each side up.
- DO NOT use any metal tool for this step. Doing so may cause sparks and a short circuit to occur damaging your laptop.
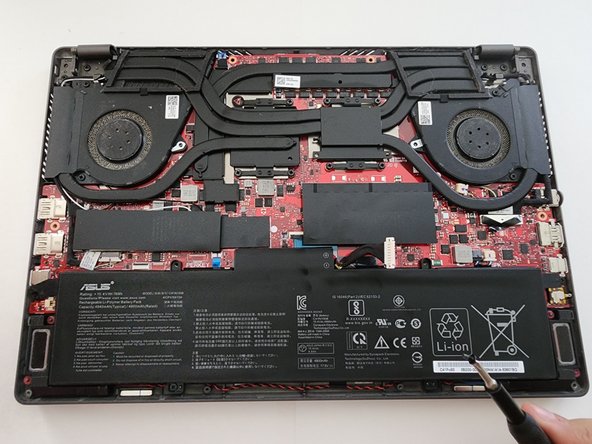
- Remove the four (M2x4.5) screws securing the battery.
- Lift the battery and remove it.