Dell Latitude 7410 Display Assembly Replacement
ID: 165070
Description: Use this guide to replace a broken display...
Steps:
- Allow your laptop's battery to drain below 25% before starting this repair—a charged battery may catch fire if damaged.
- Unplug all cables, fully shut down your laptop, and close the lid.
- Use a Phillips screwdriver to loosen the eight captive screws securing the back cover.
- Insert an opening pick between the right edge of the back cover and the frame, just below the middle right screw.
- Slide your pick along the right edge to release the clips securing the back cover.
- Insert your pick between the left edge of the back cover and the frame, next to the speaker cutout.
- Slide your pick along the left edge to release the clips.
- Insert your pick between the back cover and the right display-hinge to release the first clip along the back edge.
- Slide your pick toward the left hinge until the second clip releases.
- Insert your pick between the front edge of the back cover and the frame, just to the right of the bottom left screw.
- Slide your pick toward the right edge until the front edge releases from the frame.
- Remove the back cover.
- Grab the black pull tab on the head of the battery connector and pull straight up to disconnect it.
- If your laptop doesn't come with a WWAN card, skip the next two steps.
- Use the flat end of a spudger to pry up the WWAN card cover from its clips on the I/O board.
- Remove the cover.
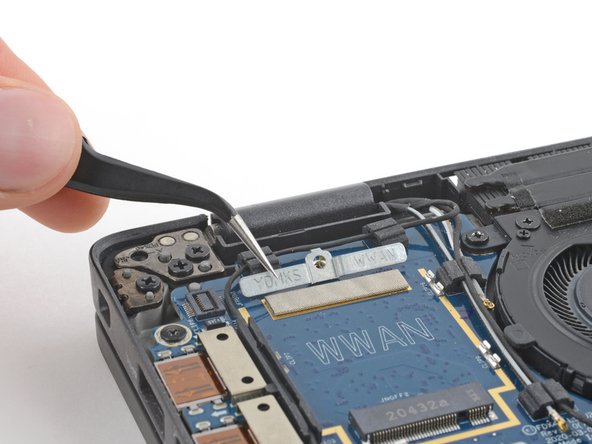
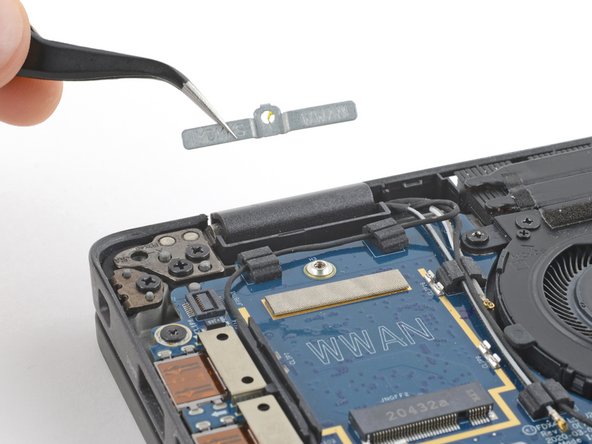
- Use your Phillips screwdriver to remove the 3 mm screw securing the WWAN cable bracket.
- Remove the cable bracket.
- Use your Phillips screwdriver to remove the 3 mm screw securing the antenna cable bracket.
- Remove the antenna cable bracket.
- Use your spudger to disconnect the antenna press connectors labeled 1 and 2 by prying the heads of their connectors straight up.
- To re-attach press connectors, carefully align and press down on one side until it clicks into place, then repeat on the other side. Don't press down in the middle. If the connector is misaligned, the pins can bend and cause permanent damage.
- This step shows a laptop that didn't come with a WWAN card. If yours has one, disconnect and remove it now.
- Lift the antenna cables out from their cable routing on the I/O board and move them away from the board.
- Use your Phillips screwdriver to remove the two 2.7 mm screws securing the display cable bracket.
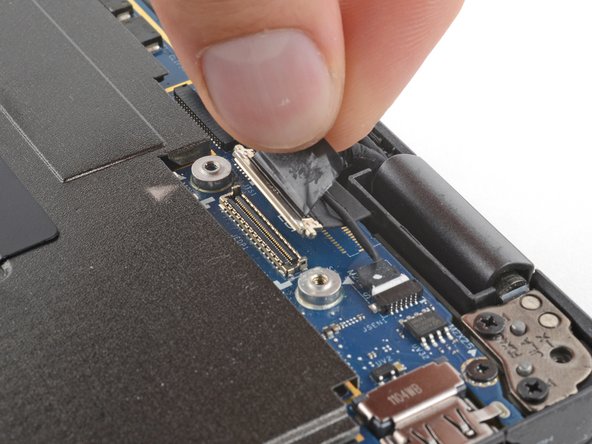
- Use tweezers or your fingers to disconnect the leftmost wide connector by pulling it straight out of its socket.
- Use tweezers or your fingers to disconnect the narrow connector, just to the right of the previous connector, by pulling it straight out of its socket.
- Use your fingers to grab the display connector pull tab and pull straight up to disconnect the display.
- During reassembly, reconnect this cable before the two leftmost connectors.
- Use tweezers or your fingers to disconnect the camera connector by pulling it straight out of its socket.
- Grab the body of the laptop and open it 90 degrees.
- Lay the laptop keyboard-side-down over the edge of a table with the display hanging below.
- Use your Phillips screwdriver to remove the four 5.7 mm screws securing the hinges—two on each hinge.
- Be careful not to catch on any cables hanging off the display assembly.
- Grab the display near the hinges and lift it straight up to free the hinges from the frame.
- Remove the display assembly.