Repairing a Misaligned Fence Gate Handle and Rod
ID: 165108
Description: If your wooden fence gate handle and rod are...
Steps:
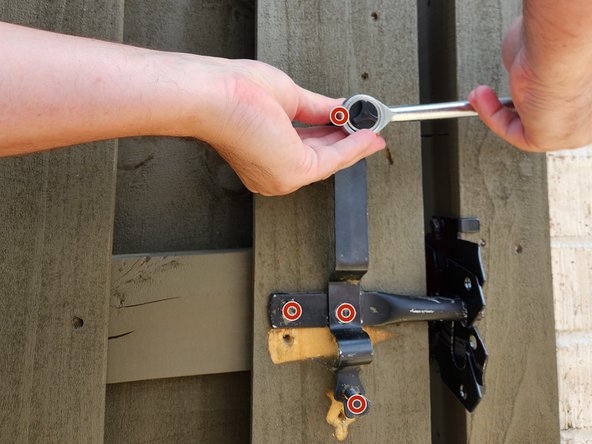
- Place the ratcheting socket wrench opening on one of the 13mm hexagonal bolts, then turn counter clockwise to loosen and remove the bolt.
- Do this step for each of the two (2) bolts holding the rod in place.
- Once the bolts are removed, slide the rod out from behind the handle.
- Place the ratcheting socket wrench opening on one of the 13mm hexagonal bolts on the gate handle, then turn counter clockwise to loosen and remove the bolt.
- Do this step for each of the two (2) bolts to disconnect the handle from the wooden gate.
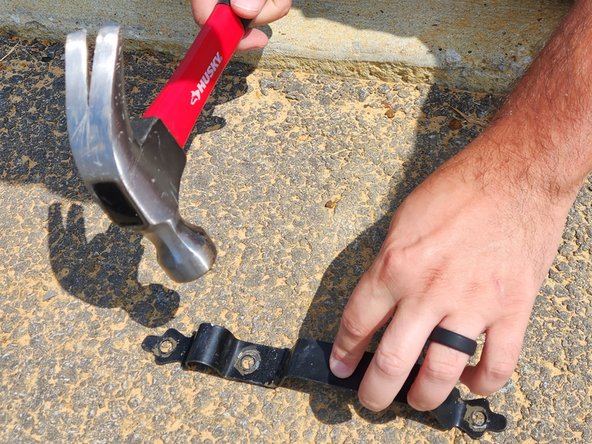
- If the rod and/or handle are bent from previous damage, gently hammer the bent area(s) to straighten.
- This will help with better alignment at reassembly.
- Place the gate handle and rod in the newly aligned position.
- You can check alignment by fitting the rod into the latching mechanism and ensuring it closes properly.
- Use one hand to continue holding the gate handle and rod in place while you mark each of the four (4) bolt holes with a marker.
- Use the power drill to create guide holes by drilling the entire length of the 3/16" drill bit into the wood at each of the four (4) previously marked locations.
- Be careful not to splinter the wood on the gate while drilling!
- As in step 4, you will align the gate handle and rod with the latching mechanism and guide holes.
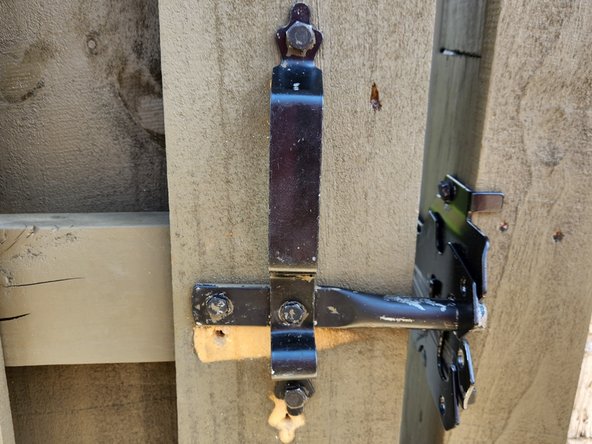
- Place the ratcheting socket wrench opening on one of the 13mm hexagonal bolts, then turn clockwise to tighten the bolt.
- Do this step for each of the four (4) bolts until both the gate handle and rod are securely in place.
- It is recommended to first replace the center bolt that connects the gate handle to the rod and gate. This frees up your hand from holding the parts in place and makes it easier to use the ratcheting socket wrench to tighten the bolts.