Sony Cyber-Shot DSC-W170 Top Panel Replacement
ID: 167124
Description: This guide will help you to replace the top...
Steps:
- Be sure to remove the battery before performing this task.
- Remove the five 4 mm screws with a Phillips #000 screwdriver.
- Use an opening pick to pry the LCD panel open.
- Gently remove the LCD panel from the rest of the camera.
- Remove the three 4 mm screws with a Phillips #000 screwdriver.
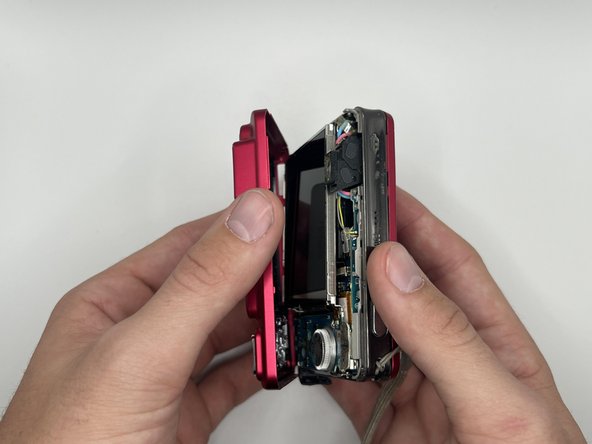
- Gently open the front panel and remove it from the rest of the camera.
- Remove the first side panel to the left of the LCD.
- Remove the 4 mm screw from the other side panel to the right of the LCD with a Phillips #000 screwdriver.
- Gently, lift the LCD and carefully open the camera to disconnect the LCD ribbon cable from the motherboard.
- Gently push the connector through the hole to separate the LCD from the metal casing.
- Lift up the black bar on the top flat ribbon cable with tweezers.
- Gently pull the flat ribbon cable until it disconnects from the lens assembly.
- Be gentle when dealing with the flat ribbon cable.
- Remove the six 4 mm screws from the lens assembly with a Phillips #000 screwdriver.
- Lift the two flat ribbon cables with tweezers.
- Peel back the flash assembly on the back of the lens.
- Remove the two 4 mm screws with a Phillips #000 screwdriver.
- Pull out the battery from the side and remove the white tape from the battery assembly with tweezers.
- Disconnect the flat ribbon cable that connects the motherboard to the lens assembly with tweezers.
- Push out the lens assembly very gently.
- Remove the 4 mm screw from the bottom side of the top panel with a Phillips #000 screwdriver.
- Remove the silver 4 mm screw with a Phillips #000 screwdriver from the silver bracket connected to the motherboard.
- Pull the top panel off gently.