How to Make an Affordable Soldering Fume Extractor
ID: 170836
Description: Soldering creates fumes that are better left...
Steps:
- This fume extractor is composed of three main parts: a 12V computer fan, cardboard box enclosure, and activated carbon filter.
- Solder often contains rosin flux. When vaporized during soldering, it's a respiratory and eye irritant and can cause health issues when inhaled long term.
- This extractor pulls the harmful fumes into the charcoal filter trapping volatile compounds, removing them from the air.
- Position the fan over the box so that an exhaust cutout can be made.
- Use a pointy object like a screwdriver to poke four fan mounting holes into the box.
- Use a pen or pencil to mark the inside diameter of the fan onto the box.
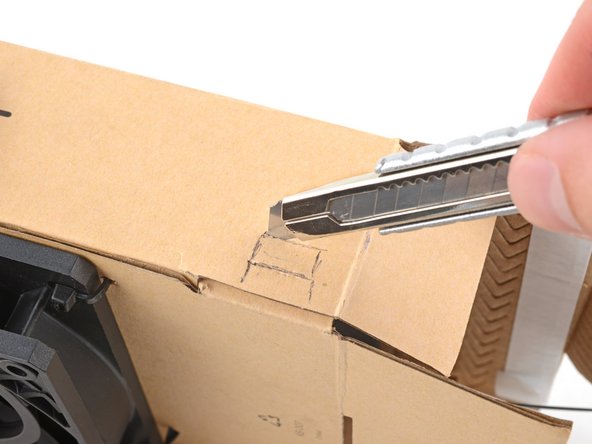
- Use a razor blade to cut out the fan exhaust port.
- Poke four more holes about 1 cm out from the ones you made earlier.
- Flip the box over.
- Use a pen or a pencil and a straight edge to mark out the intake port.
- Leave a lip so the filter material won't fall out when placed inside the box.
- Use a razor blade to cut out the intake port in the box.
- Thread four zip ties through the fan mounting holes.
- Activated carbon filters come in all shapes and sizes. You may need to cut and modify the filter to fit your enclosure.
- Cut the filter so it will fit snugly in the intake port.
- Insert the filter into the intake port.
- If your filter doesn't span the intake port, you can use glue or tape to connect multiple filter sections together.
- Thread the zip ties through the fan's mounting holes.
- Make sure the fan's intake side is placed against the box hole, or you'll end up with a soldering fume blower.
- Secure the fan to the exhaust port by tightening the zip ties.
- Clip the excess zip tie strap.
- Note and remember the power and ground pins on the fan connector.
- Cut off the fan connector.
- Use a pointy object like a screwdriver to poke a hole in the box for the fan cable.
- Thread the fan cable into the box.
- Use a pen or pencil to mark the outline of the switch.
- Choose a convenient and easily accessible location.
- Cut out a hole for the switch.
- Pull the fan cable through the switch hole.
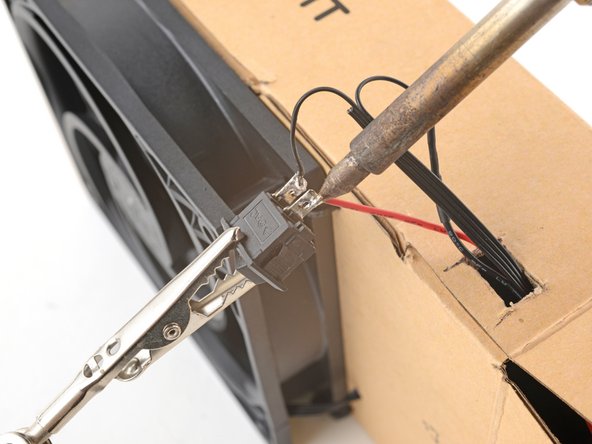
- Before soldering, make sure the fan is wired up correctly. If the positive and negative wires are switched, the fan might burn out.
- Solder the switch between the fan's positive wire and the battery's positive wire.
- Solder the negative fan wire to the negative battery wire.
- Pull the excess cable back through and mount the switch to the box.
- Place the loose wires in the box.
- Secure the 9V battery to the interior of the box using double sided tape.
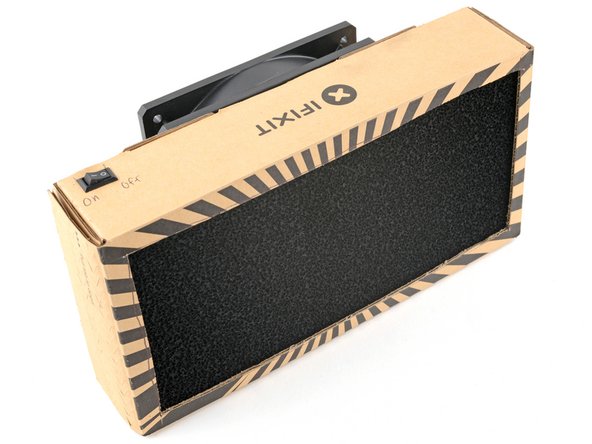
- Rejoice! The days of holding your breath or inhaling solder fumes are over.
- If your solder fumes are especially potent and are visible in the exhaust, you can stack additional filter material to trap them.