Ninja Foodi SP101 / FT102A Cooling Fan Replacement
ID: 170992
Description: In the Ninja Foodi SP101 / FT102A, the cooling...
Steps:
- Use a TR10 screwdriver to remove the four 11mm screws holding the black lever bar in place.
- Remove the black lever bar.
- Use a Phillips #1 screwdriver to remove the three 8mm screws on each side of the back panel.
- Flip the device upside down and open the bottom panel.
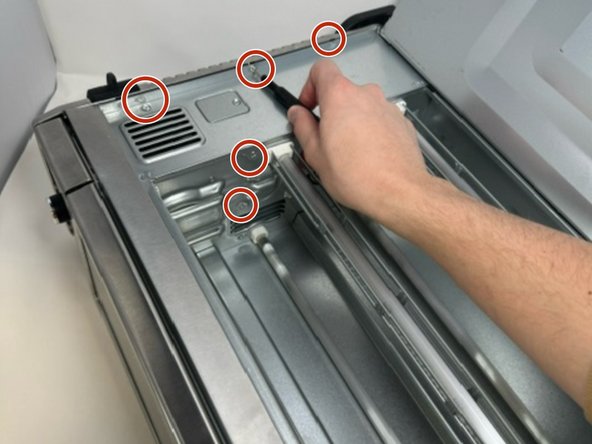
- Remove the 3 x philips #1 screws along the top edge of the interior using a screwdriver. The Bottom 2 do not have to be removed.
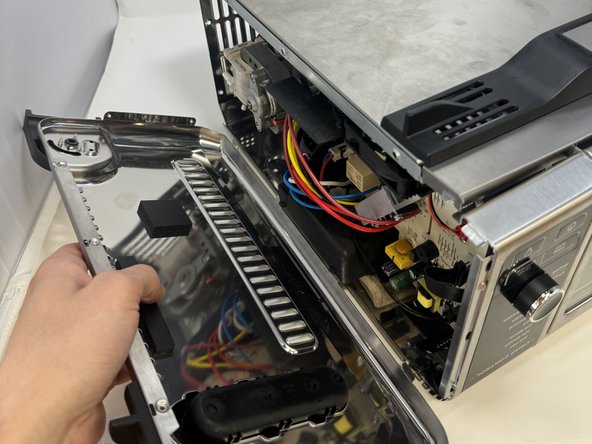
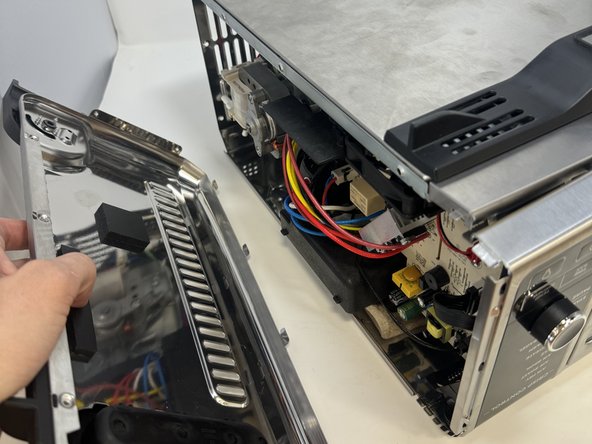
- Remove the control side panel. To remove it, push forward towards then front control panel to release the tabs out of the main body. Fold away the side panel when the tabs have visually released from their slots in the main body.
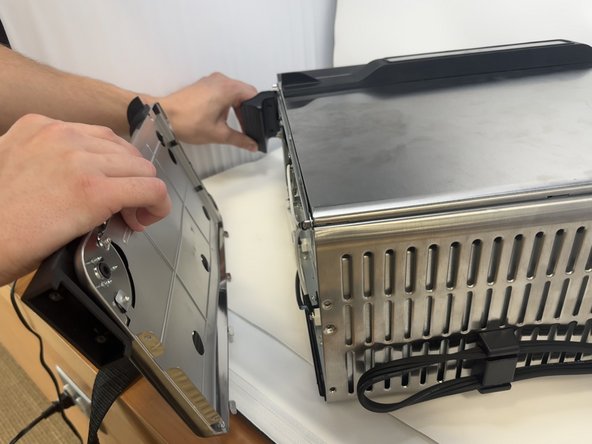
- Lift the handle and pull the side panel out.
- Remove the handle side panel.
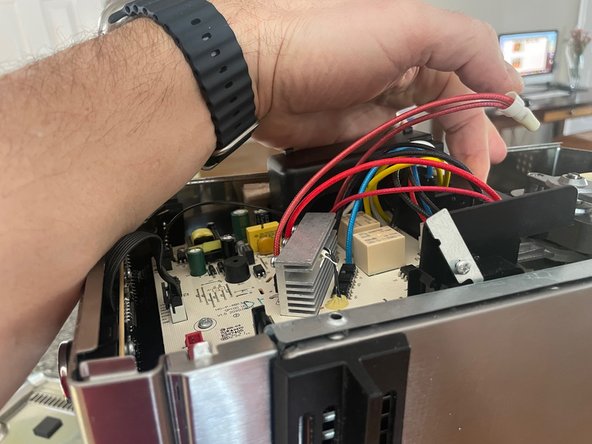
- Remove the screw from the electronics assembly plastic frame as shown. Don't drop the screw upon removal!
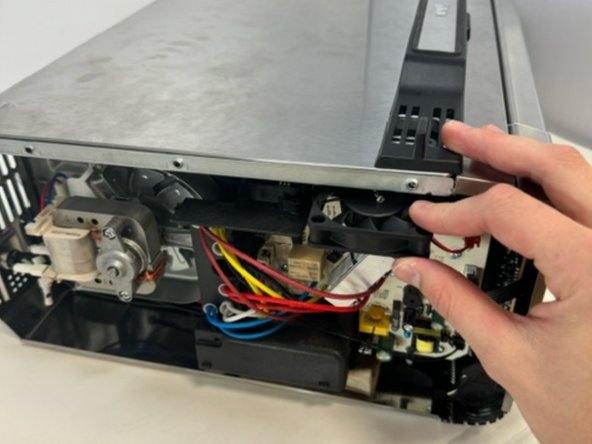
- Lift the assembly slightly such that the screw to the metal tab that holds the fan in place can be accessed. Remove it with a Philips screw driver. Do not drop it. Use help holding up the assembly if so needed. Do not bend the tab.
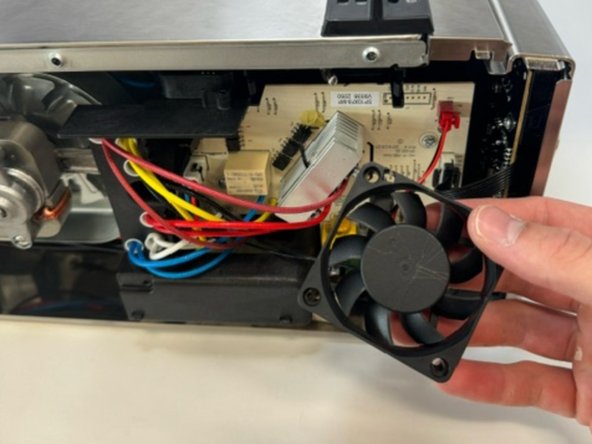
- Remove the black cooling fan by sliding it out. There are retaining tabs on the sides that need to be lifted to release the fan.
- Remove the red cable that attaches the cooling fan to the motherboard. Squeeze the tab on the red connector and pull slightly at the same time to release it.
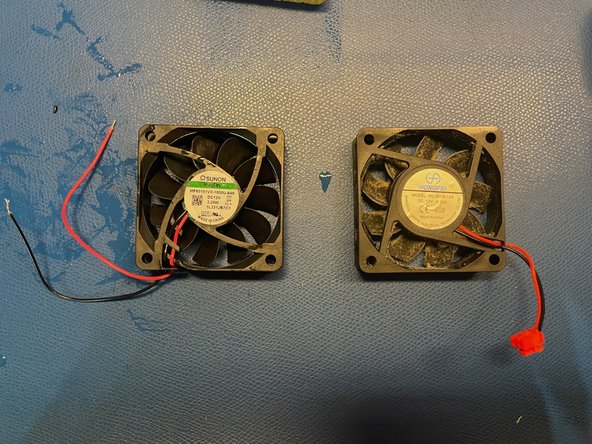
- Remove the cooling fan and replace it with a new fan of equal size and type: 60 x 60 x 15 mm, 12V DC. Carefully compare for fitment.
- When the fan comes without a connector or the wrong connector, cut the connector off the old fan, leaving enough wire-length on the connector side of the harness. Strip the ends with a stripping tool or the like.
- Solder the wires together and apply appropriate insulation. Red to red (+), black to black (-) Shrink wrap works well.
- Ensure that the replacement fan is an INTAKE fan, pulling air into the box. (A prior version of this guide had the direction reversed).
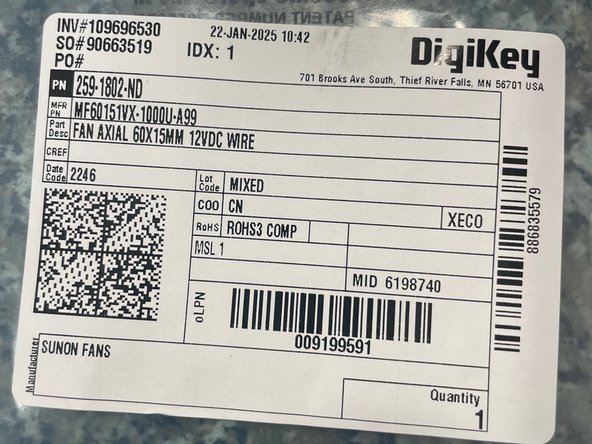
- A good replacement candidate of the fan can be bought from www.digikey.com. Part number 259-1802-ND. It is a Sunon fan of higher quality than the Hongfei HD-6015L12R fan that is replaced. This fan is confirmed to blow air into the same direction as the old fan.
- Insert the new Sunon fan with the label facing into the control electronics compartment. The wires need to exit the fan housing on the top when inserted. Dress the wires to ensure that they do not touch the (hot) metal housing or heatsink. Use tie wraps if needed.
- Reassemble oven in the reverse order as in the first steps.
- Test the oven for good functionality. The fan will come on after a few minutes of (pre-)heating so wait until that occur. Ensure the fan air is being pulled into the unit. If installed backwards, the Foodi will stop after about 10 minutes with ERROR 1. A good test is to run a complete cycle for 15 minutes on Air Fry at 425F.