Dell Vostro 5510 Motherboard Replacement
ID: 171099
Description: This guide will show you how to replace the...
Steps:
- Power off your laptop before beginning disassembly.
- Place the laptop so the bottom cover is facing upwards.
- Remove the remaining (M2x4mm) screws with the screwdriver.
- Loosen the two captive (M2x7.5mm) corner screws with the screwdriver.
- Pry open the top left corner of the cover with the opening tool.
- Pry open the top right corner of the cover with the opening tool.
- Pry the rest of the cover with the opening tool, working in a clockwise motion until it is completely loosened.
- Lift the cover to remove it from the rest of the laptop.
- Disconnect the fan cable from the system board.
- Remove the two (M2x3mm) screws from the fan using the screwdriver.
- Lift the fan to remove it.
- Locate the wireless card.
- Remove the screw (M2x3mm) from the wireless card with the screwdriver.
- Lift the card without removing it completely.
- Disconnect the antenna cables from the wireless card.
- Locate the SSD card.
- Remove the screw (M2x3mm) with the screwdriver.
- Grab the elevated side of the card.
- Remove the card from the card slot.
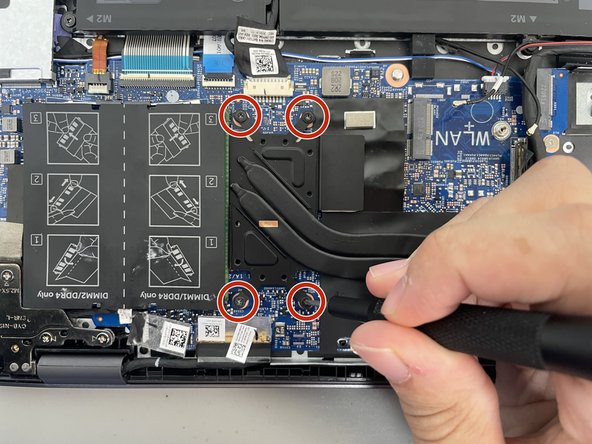
- Loosen the four 2.9 mm screws from the heat pipe with the Phillips #0 screwdriver.
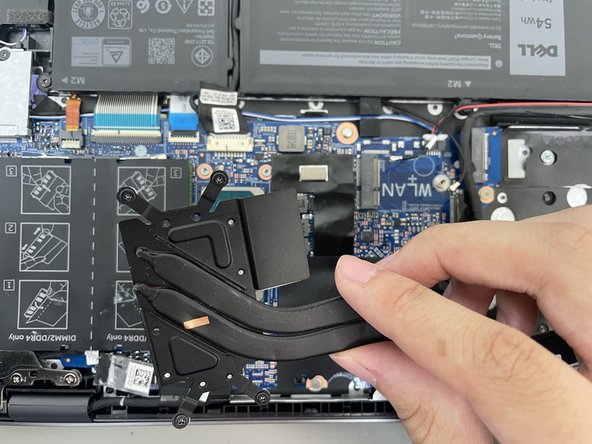
- Remove the heat pipe with your fingers.
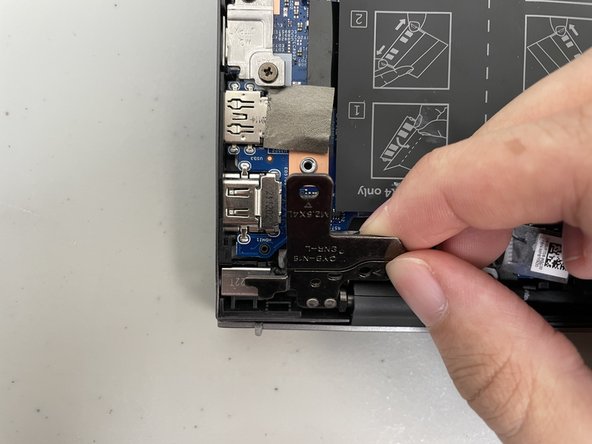
- Remove the three 4.9 mm screws from the hinge on the left with the Phillips #0 screwdriver.
- Lift the hinge up from the motherboard.
- Remove the two 4.7 mm screws from the metal plate on the left of the motherboard with the Phillips #0 screwdriver.
- Remove the metal plate with your fingers.
- Remove the 3.7 mm screw from the flat plate at the top of the motherboard with the Phillips #0 screwdriver.
- Remove the flat plate with your fingers.
- Remove the three 2.2 mm screws from the motherboard with a Phillips #0 screwdriver.
- Detach the four connectors at the top of the motherboard with your fingers.
- Disconnect the white plug from the top of the motherboard with your fingers.
- Disconnect the thick cord from the bottom of the motherboard.
- Disconnect the white plug from the bottom of the motherboard.
- Remove the entire part the plug is attached to with your fingers.
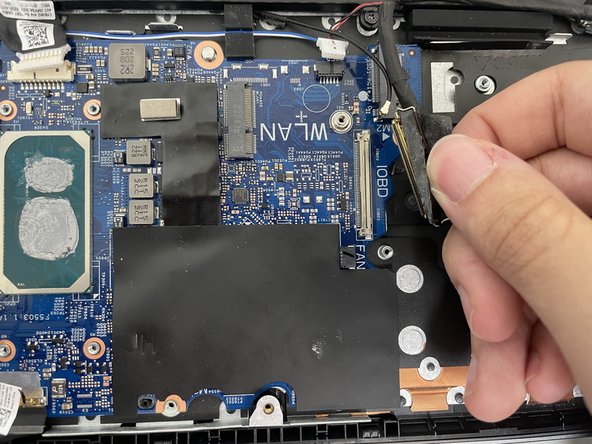
- Disconnect the thick cord from the right of the motherboard with your fingers.
- Lift the motherboard gently using your hands.


