EasySMX ESM-9110 Backplate Replacement
ID: 171952
Description: This guide will teach you how to replace the...
Steps:
- Use a Phillips #000 screwdriver to remove the two 10 mm screws from the back of controller.
- Insert a plastic opening tool into the slit on the side of controller.
- Wiggle the tool until the cover becomes loose.
- Repeat this on the other side of Controller.
- Go slow. Take your time removing the handle covers.
- Remove the faceplate.
- Repeat on the other side of the controller.
- Use a Phillips #000 screwdriver to remove four 20 mm screws from the controller's faceplate.
- Use a Phillips #000 screwdriver (a screwdriver bit extension may be needed) to remove the two 20 mm screws from the controllers faceplate.
- Screw extender should only be used to unscrew two of the six screws. Do not use for all six.
- Remove the faceplate of the controller by lifting it directly up from the backplate.
- Be gentle. The controllers backplate is still attached to the faceplate.
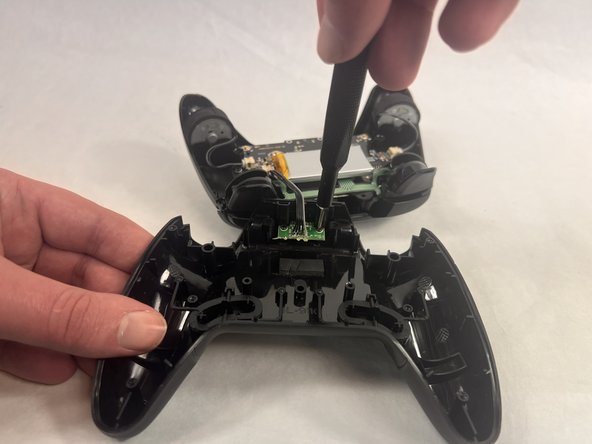
- Use a Phillips #000 screwdriver to remove the two 10 mm screws from the daughterboard off the backplate.
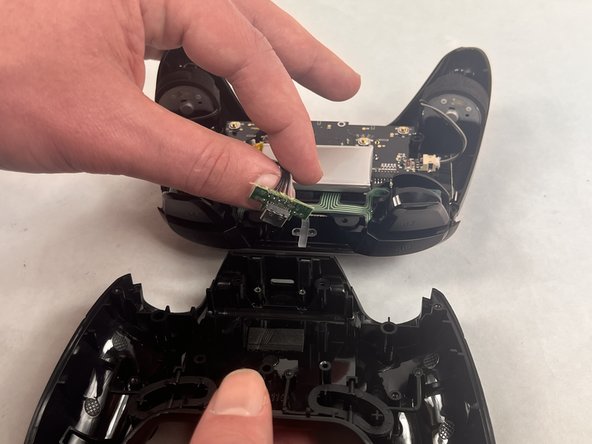
- Remove the daughterboard once screws are off.
- Be gentle when removing the daughterboard. The daughterboard is still attached to the faceplate.