Lenovo ThinkPad P1 Gen 7 Screen Replacement
ID: 173516
Description: Use this guide to replace a broken or cracked...
Steps:
- Shut down your laptop (don't just put it in sleep mode) and disconnect all cables.
- Flip the laptop upside-down, and rotate it so the screen hinge faces towards you.
- Use a Phillips screwdriver to loosen the six captive screws securing the base cover.
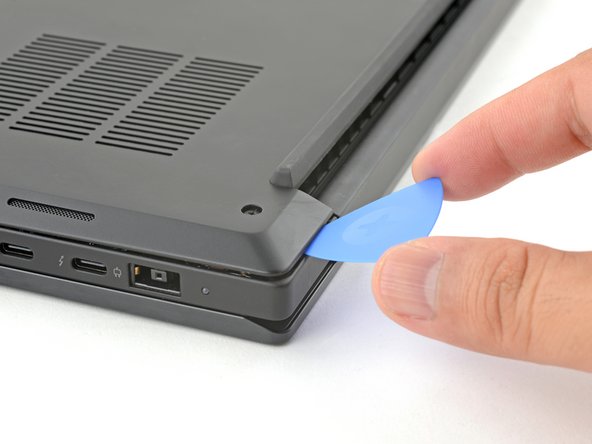
- Press the tip of an opening pick into the seam between the base cover and the bottom-left corner of the frame (near the screen hinge).
- It can be tricky to get the pick into the seam for the first time. Angle the pick vertically and press down with firm pressure.
- Pivot the pick down and slide it around the corner to release the clips.
- Slide the opening pick along the left edge to release the clips securing the cover.
- Press the tip of an opening pick into the seam between the base cover and the bottom-right corner of the frame (near the screen hinge).
- Pivot the pick down and slide it around the corner to release the clips.
- Slide the opening pick along the right edge to release the clips securing the cover.
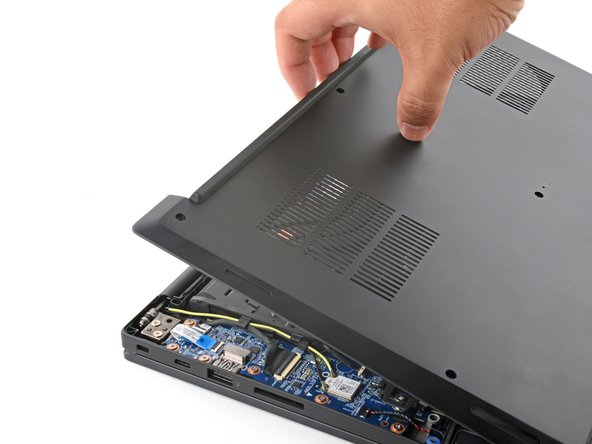
- Grasp the base cover along the screen hinge edge and pull up to loosen the cover.
- Lift and remove the base cover.
- Because of the battery connector's design, the only way to disconnect the battery is by physically removing it.
- Use a Phillips screwdriver to loosen the six captive screws securing the battery.
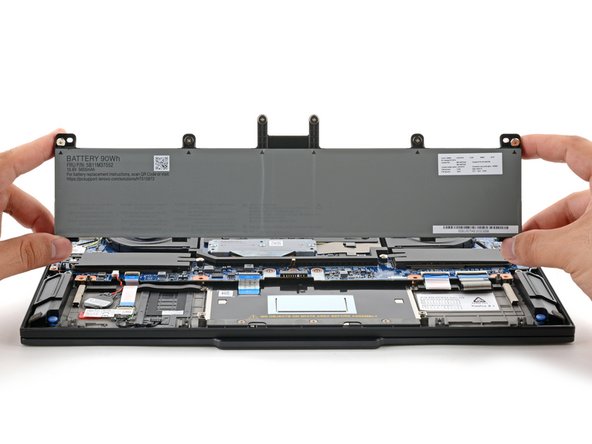
- Grasp the top edge of the battery and lift to disconnect it.
- You may feel a little resistance from the battery connector as it disconnects—that's normal.
- Lift and remove the battery.
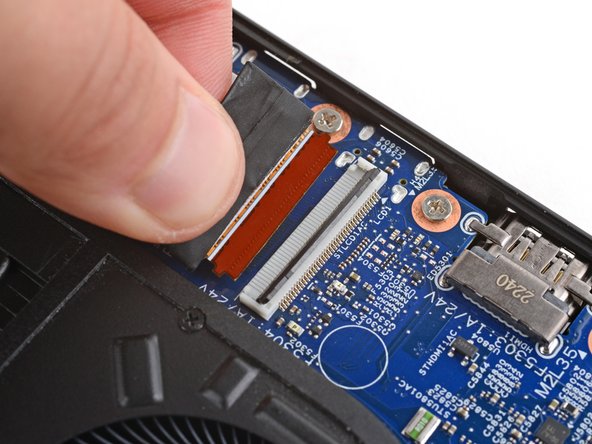
- Use the flat end of a spudger to lift the locking flap on the screen cable ZIF connector near the right edge of your laptop.
- Use your fingers to grip the screen cable and gently pull the connector out of its socket.
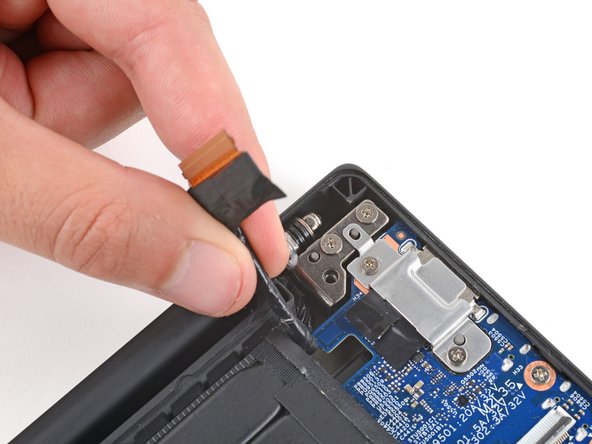
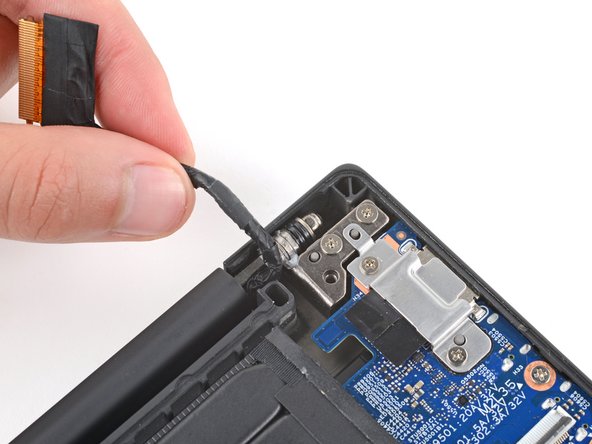
- Carefully guide the right screen-cable out from under its cutout in the motherboard, near the right hinge.
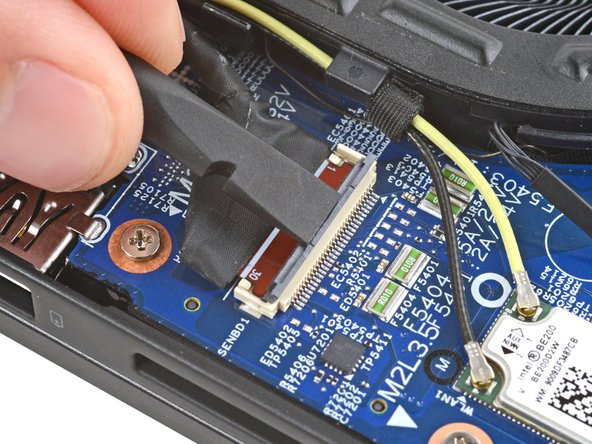
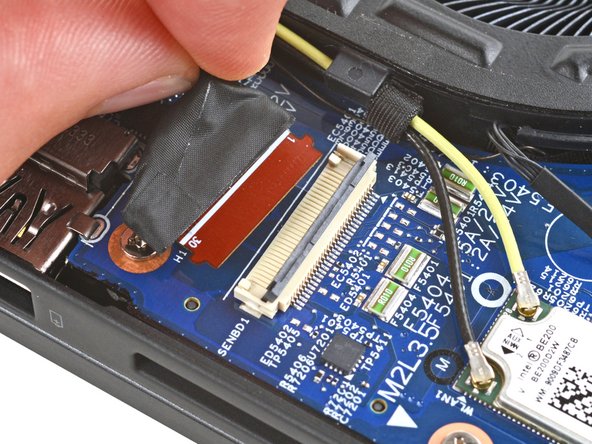
- Use the flat end of a spudger to lift the locking flap on the screen cable ZIF connector near the left edge of your laptop.
- Use your fingers to grip the screen cable and gently pull the connector out of its socket.
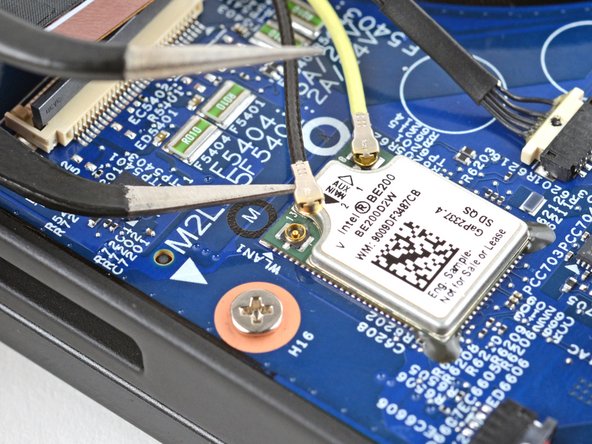
- Slide an arm of a pair of angled tweezers under the metal neck of one of the Wi‑Fi card coaxial connectors, just below the left screen-cable.
- Lift straight up to disconnect the cable.
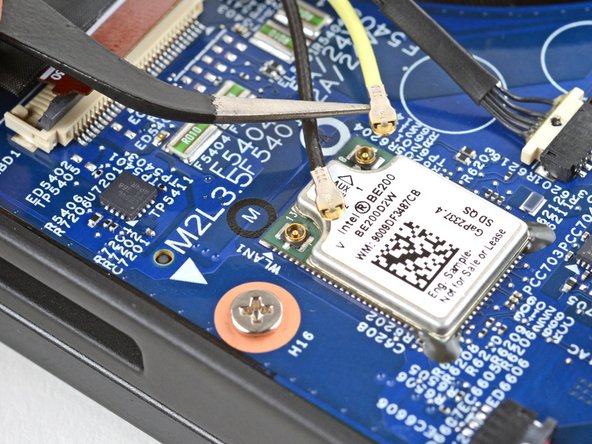
- Repeat the process to disconnect the other Wi‑Fi card cable.
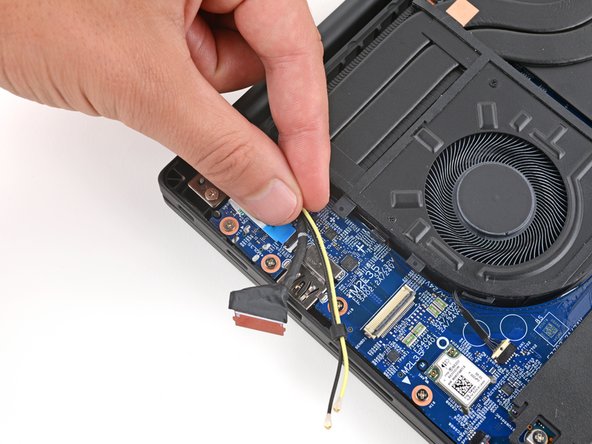
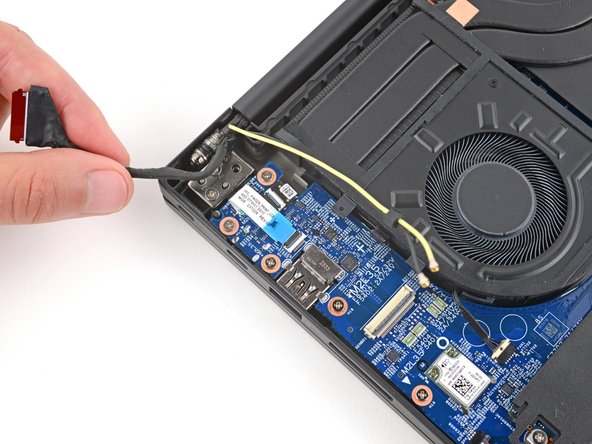
- Use a spudger or your fingers to gently guide the two thinner cables (black and yellow) and the screen cable out of their clips on the edge of the left fan.
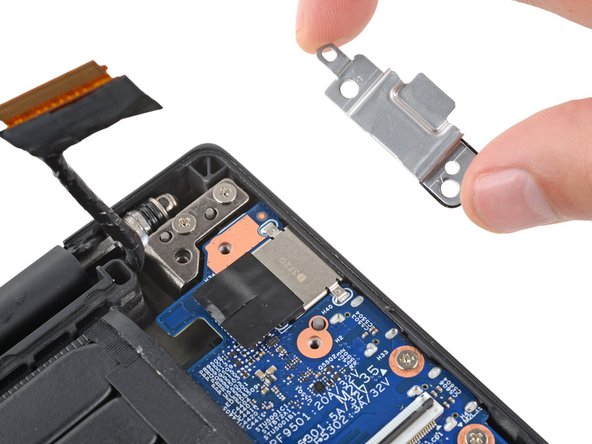
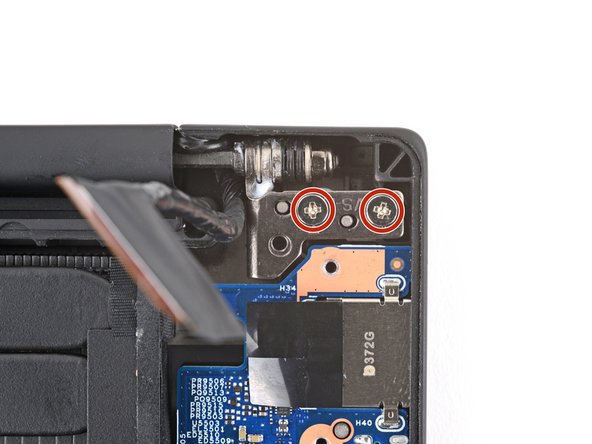
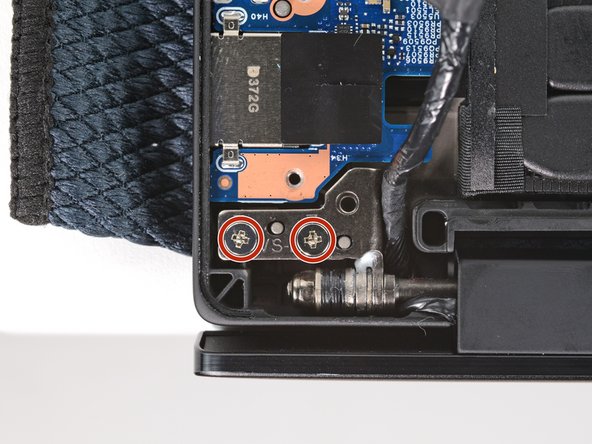
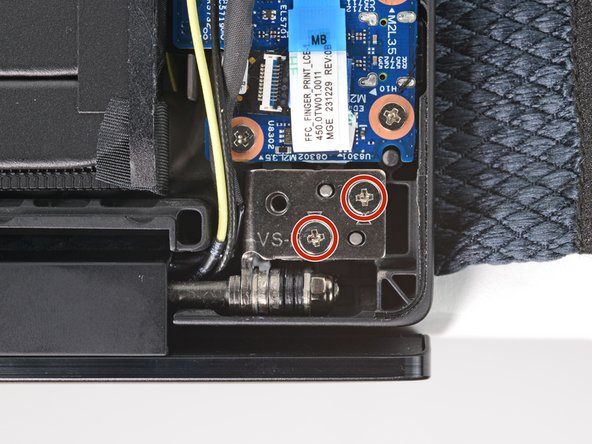
- Use a Phillips screwdriver to remove the two 4.6 mm‑long screws securing the charging port bracket.
- Remove the charging port bracket.
- Use a Phillips screwdriver to loosen (not remove) all four hinge screws.
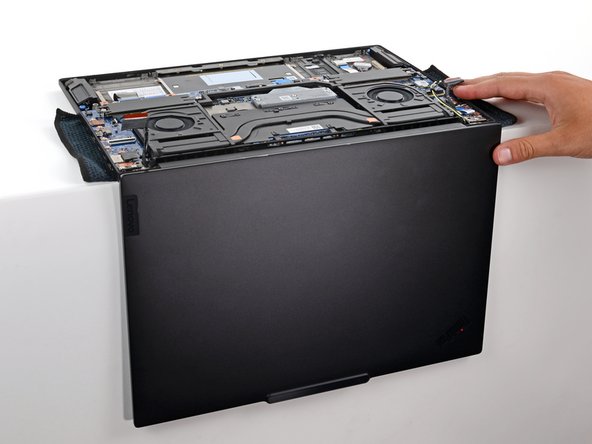
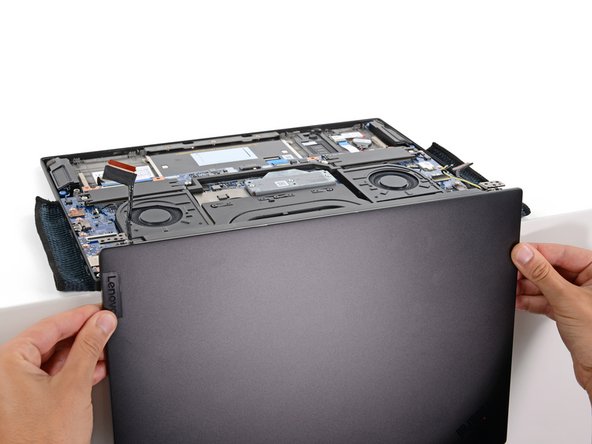
- Open your laptop 90 degrees and gently place it keyboard side down on a table, so the screen hangs over the edge.
- Optionally, you can place a soft cloth under your keyboard to protect it.
- Keep a firm grip on your laptop, as it can easily fall off the table.
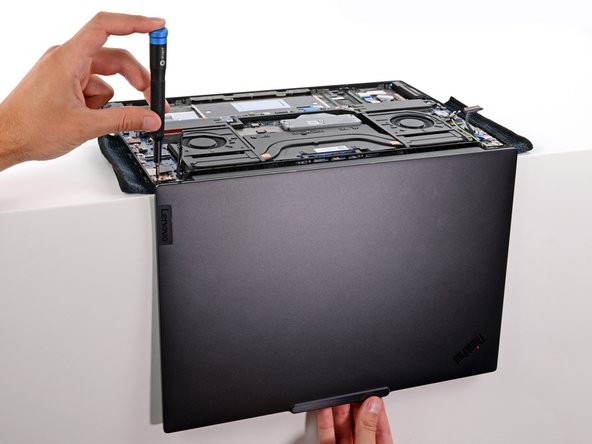
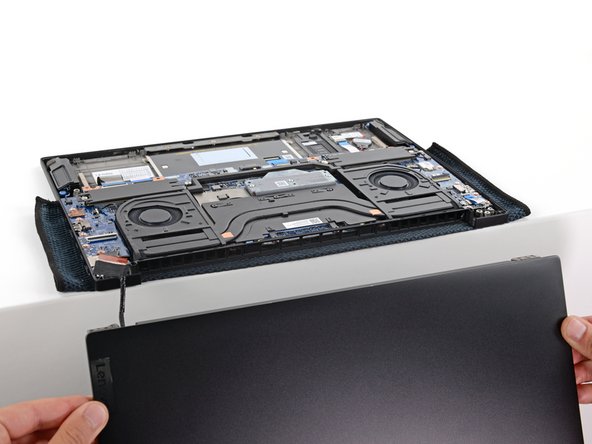
- Support the screen with one hand and use your free hand to remove the four 4.4 mm–long Phillips screws securing the hinges.
- Hold the screen with both hands and lift the hinges out of their recesses to remove the screen.
- During reassembly:
- Make sure the screen hinges are open 90 degrees and guide them into their recesses in the frame.
- Install and partially tighten the four hinge screws.
- Close your laptop and make sure the screen is properly aligned. If it clicks or snaps, readjust the alignment.
- Fully tighten the hinge screws.