Microsoft Surface Laptop 7 (13.8-inch) Trackpad Replacement
ID: 174598
Description: Follow this guide to replace a broken or...
Steps:
- Before starting this repair, allow your laptop's battery to drain below 25%. A charged battery may catch fire if damaged.
- Unplug all cables and fully shut down your laptop.
- Close your laptop and lay it down so the rubber feet are facing up.
- Gently slide one arm of your angled tweezers into the recess near the upper right edge of one of the feet.
- You can also use the point of a spudger. However, you're more likely to damage the foot, if you're reusing it.
- Use your tweezers to pry up and remove the foot.
- The feet may eject very quickly—be careful not to lose them.
- Repeat the process to remove the remaining feet.
- To install a foot, align the pegs on the bottom with their cutouts in the frame and press the foot into place.
- Throughout this repair, keep track of each screw and make sure it goes back exactly where it came from.
- While the Surface Laptop 7 uses Torx Plus screws, standard Torx bits work. Make sure to apply constant, downward force to prevent stripping.
- Use a Torx Plus 5IP screwdriver to remove the four 4.5 mm‑long screws (with washers) securing the lower case.
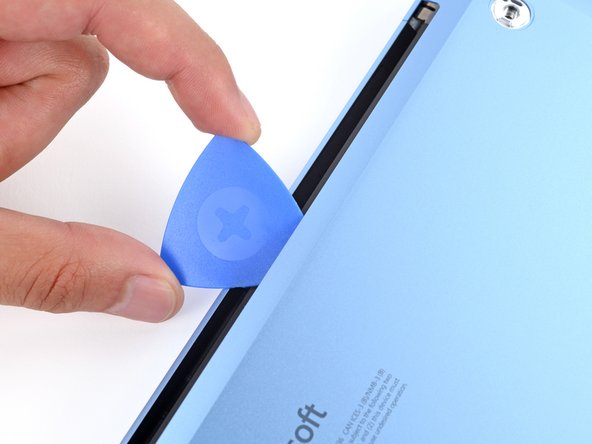
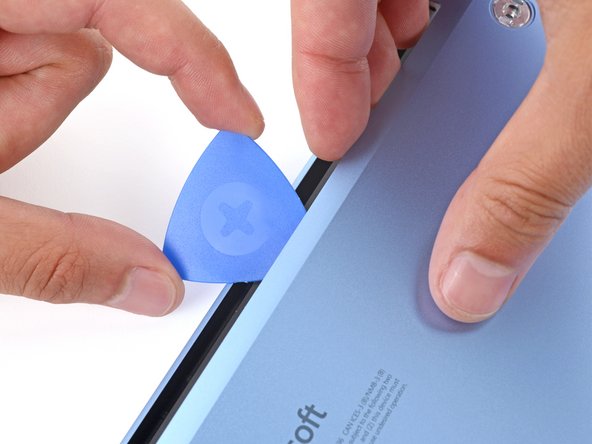
- Insert the tip of an opening pick under the top edge of the lower case, about an inch (2.5 cm) to the left or right of the Microsoft logo.
- Don't insert the pick near the outer edges or you'll damage the antenna bar.
- Twist the pick to lift the lower case enough that you can grip it with your hand.
- Lift the lower case and remove it.
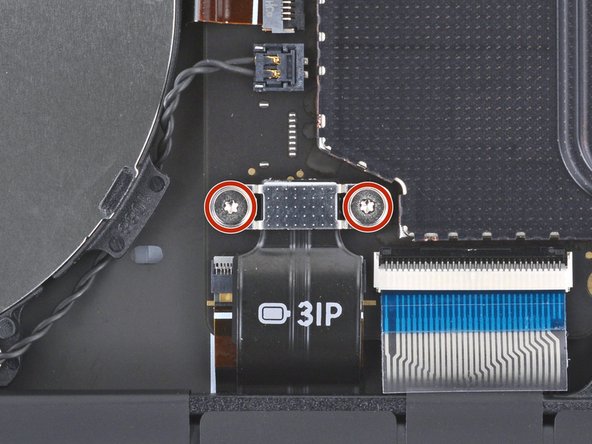
- Use a Torx Plus 3IP screwdriver to remove the two 2.3 mm‑long screws securing the battery connector cover.
- Use tweezers or your fingers to remove the battery connector cover.
- Insert the flat end of a spudger under the top edge of the battery press connector and pry up to disconnect it.
- To reconnect a press connector, align it over the socket and gently press down on one side until it clicks into place, then press down on the other side. It may take a few tries to align the connector—don't try to force it into place.
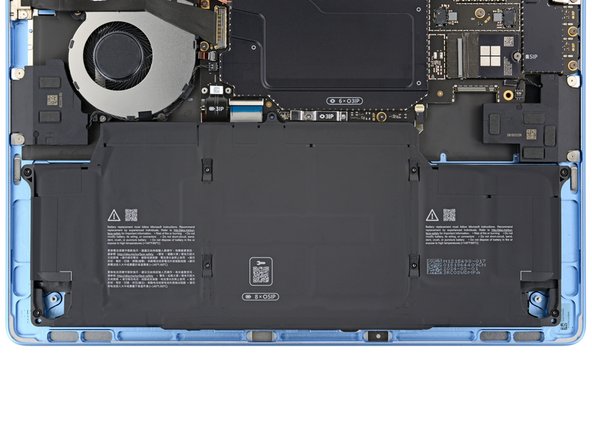
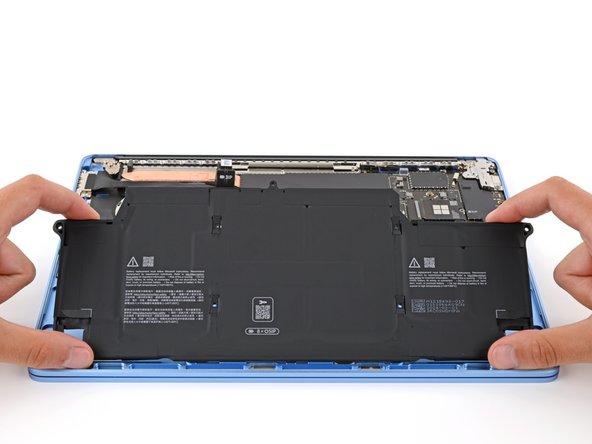
- Use a Torx Plus 5IP screwdriver to remove the eight 5.4 mm‑long screws securing the battery.
- Be very careful not to puncture the battery with your screwdriver.
- Lift the battery and remove it.
- If your battery is swollen, take appropriate precautions.
- Never reuse a deformed or damaged battery—it's a fire hazard. Replace it with a new battery.
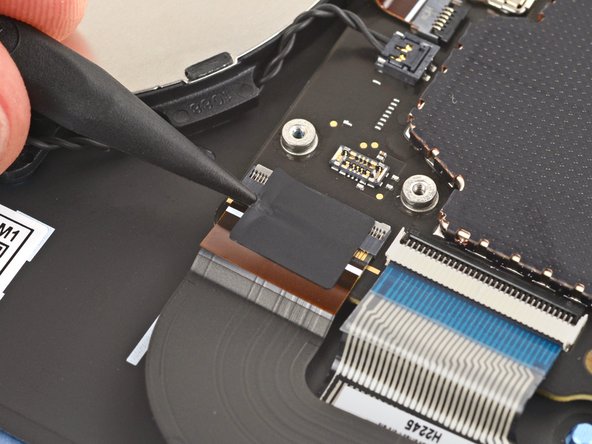
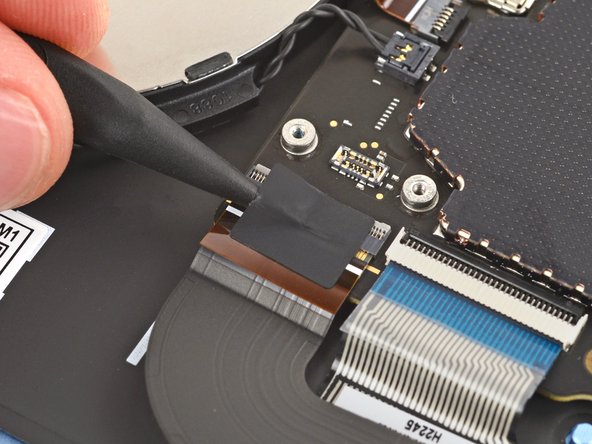
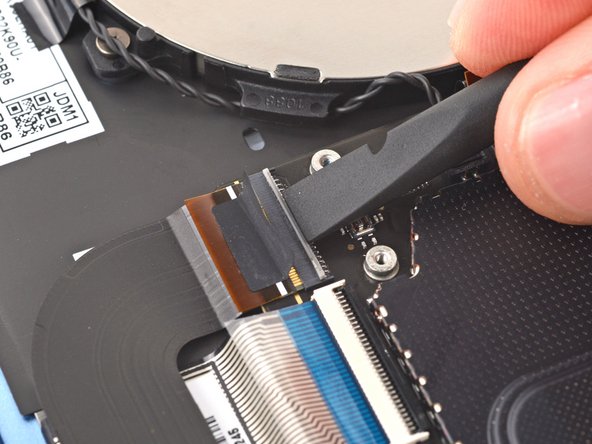
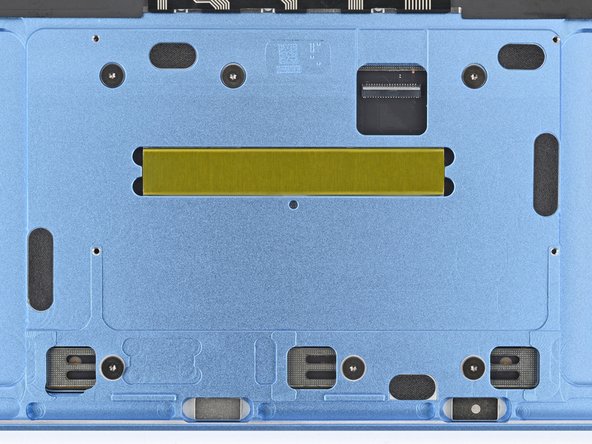
- Gently slide the point of a spudger under the piece of tape on the trackpad cable ZIF connector, near the bottom left corner of the motherboard.
- Use the spudger to lift the tape from the connector.
- You don't need to fully remove the tape, it just needs to be off the connector.
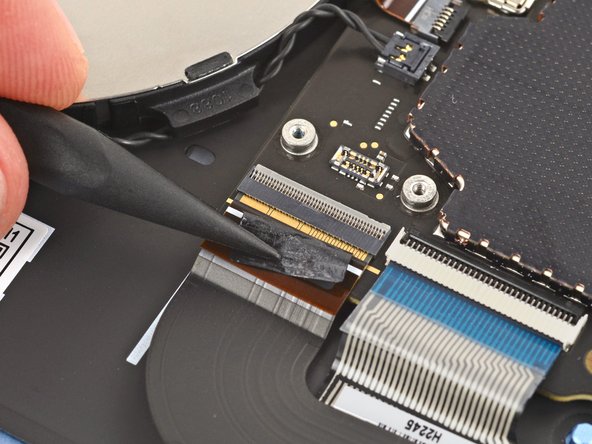
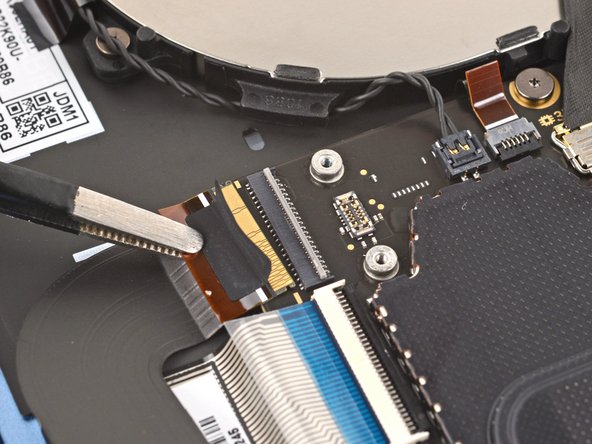
- Use the flat end of a spudger to lift the hinged locking flap on the trackpad cable ZIF connector.
- Use tweezers to grip the trackpad cable's plastic pull tab and slide the cable out of its socket.
- During reassembly, reconnect the trackpad cable to its ZIF connector on the motherboard. Then, press the right side of the cable firmly into place to secure it with the adhesive.
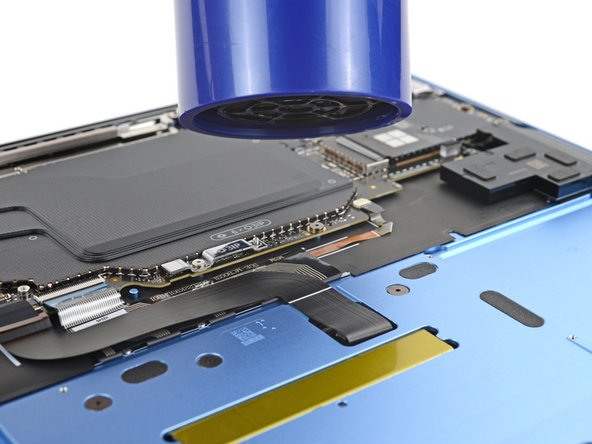
- The right side of the trackpad cable is secured with strong adhesive. Heating the cable softens the adhesive, making it easier to separate.
- Heat an iOpener and lay it on the trackpad cable for one minute to soften the adhesive.
- Alternatively, you can use a hair dryer or heat gun to heat the cable.
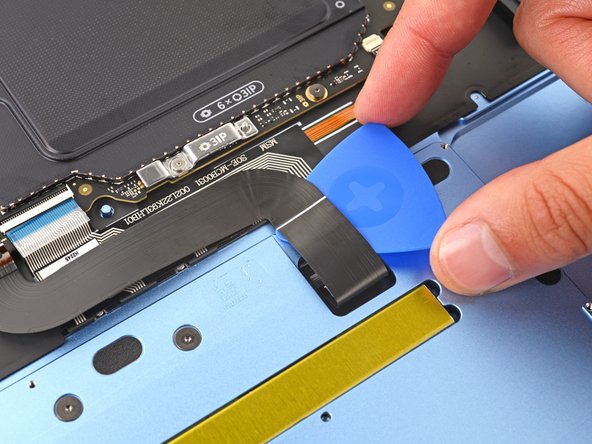
- Be very careful not to crease or damage the trackpad cable during the next few steps.
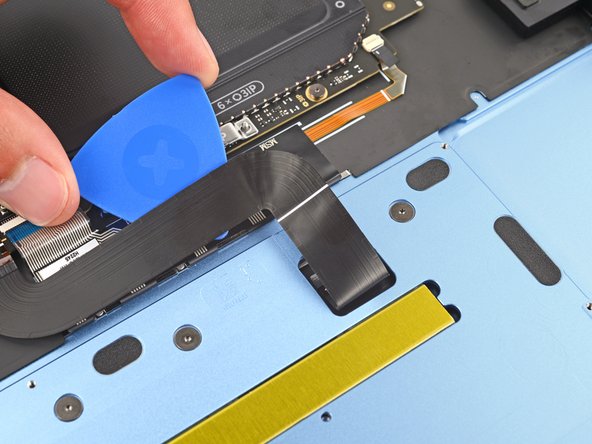
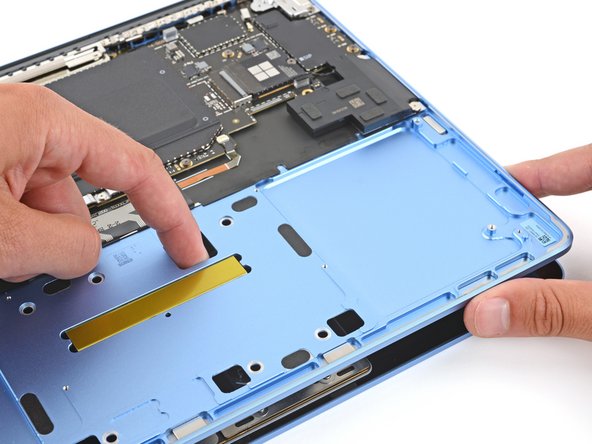
- Carefully slide an opening pick under the right side of the trackpad cable to separate the adhesive securing it to the frame.
- If you're having trouble, reheat the cable and try again.
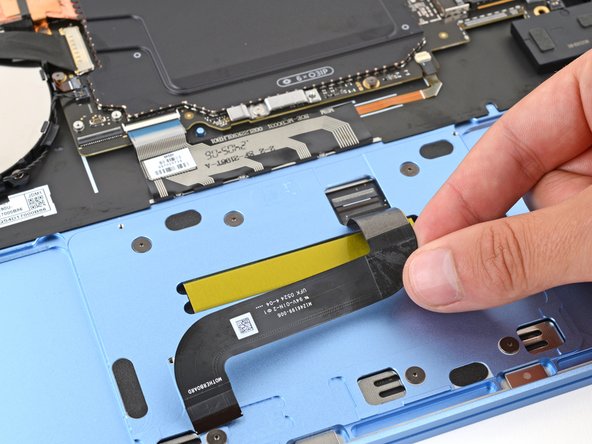
- Use your fingers to flip the trackpad cable towards the bottom of your laptop, so you can access the ZIF connector on the trackpad.
- During reassembly:
- Don't secure the trackpad cable with adhesive yet—wait until you've reconnected the other end. Otherwise, the cable may not reach its socket if positioned incorrectly.
- If you're using the original trackpad cable, the adhesive should be sticky enough to reuse.
- If you have a replacement trackpad cable with adhesive pre-installed, remove the liner.
- If your replacement cable doesn't have adhesive pre-installed, or if the adhesive isn't sticky enough, apply a strip of thin, double-sided tape to the bend on the right side of the cable.
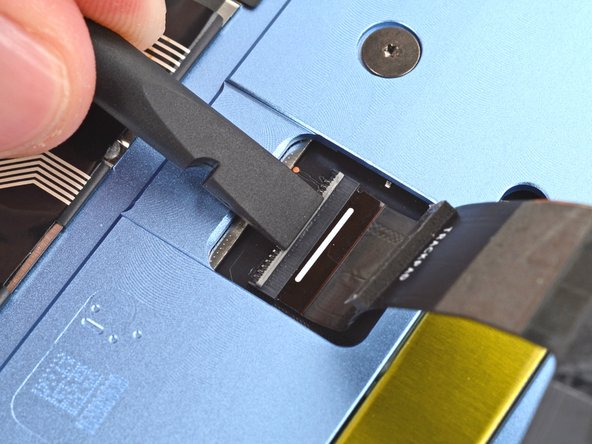
- Use the flat end of a spudger to lift the hinged locking flap on the trackpad cable ZIF connector, located on the trackpad itself.
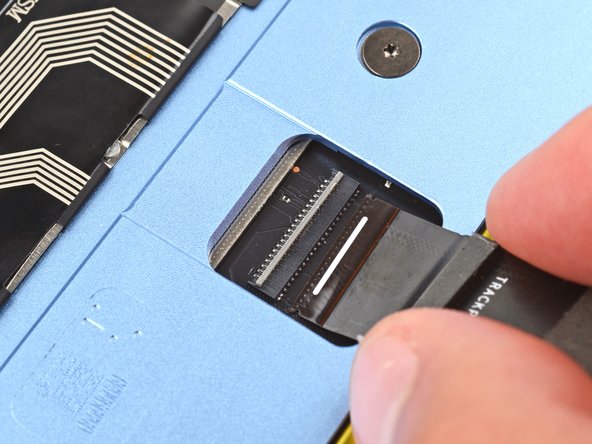
- Use your fingers to carefully grip the trackpad cable and slide it out of its socket.
- During reassembly, reconnect the end of the cable marked "TRACKPAD" to the ZIF connector on the trackpad, so the end of the cable with a white strip is facing up.
- Remove the trackpad cable.
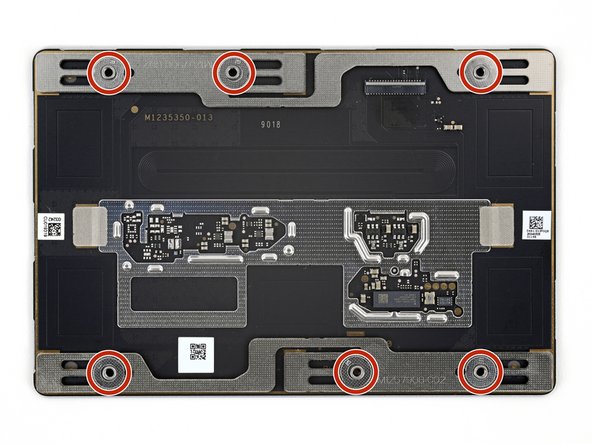
- These screws strip easily. Apply constant, downward force to prevent stripping.
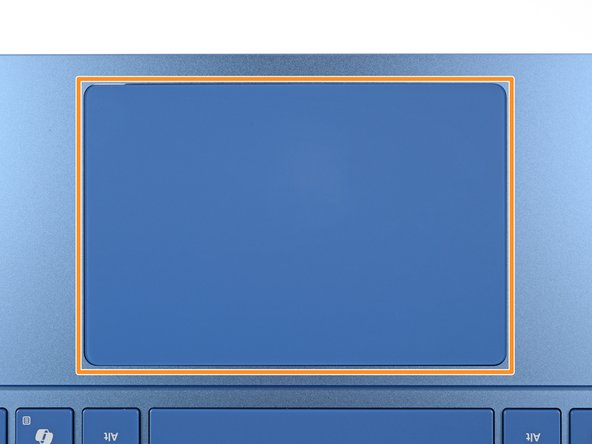
- Use a Torx Plus 5IP screwdriver to remove the six 2.1 mm‑long screws securing the trackpad.
- During reassembly:
- Partially tighten the six trackpad screws.
- Open your laptop and check the edges of the trackpad for any large gaps, repositioning it as necessary.
- Continue tightening the screws and checking the trackpad alignment until the screws are fully tightened.
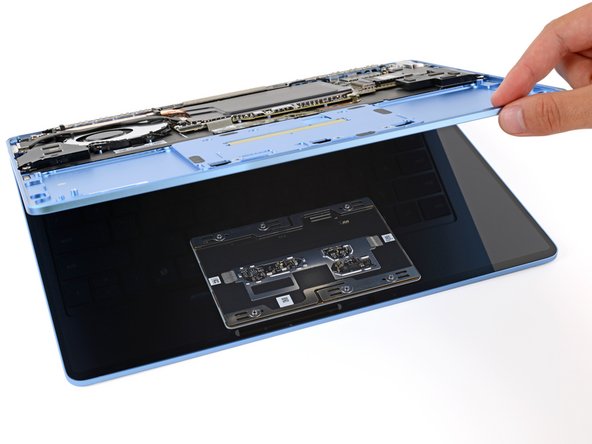
- During the next two steps be very careful not to lose the six washers resting on the trackpad's screw posts. Without them, your trackpad won't fit properly.
- Slowly lift the main body of your laptop until it stays up on its own—the trackpad will stay on the screen.
- During reassembly, carefully close your laptop with one hand while using your other hand to guide the trackpad into place. Use a finger to help position the trackpad through one of the cutouts in the frame.
- If your replacement trackpad comes with a new cable pre-installed, you'll need to carefully guide the cable through its cutout in the frame.
- Remove the trackpad, being very careful not to scratch the screen.
- During reassembly:
- Make sure all six washers are in place on the trackpad's screw posts.
- If any washers are missing, check the magnet in the trackpad well—they may have gotten stuck to it when removing the trackpad.
- Gently place the trackpad onto the screen so the screw posts line up with their cutouts and the edge with a ZIF connector is closest to the hinges
- Be very careful not to scratch the screen.