Samsung Older French Door Refrigerator Fresh Food Thermistor Replacement
ID: 175430
Description: Use this guide to replace your Samsung French...
Steps:
- Unplug your refrigerator before you begin your repair.
- If you are testing or repairing the following items, you may also need to shut off and disconnect the water supply:
- Condenser fan motor
- Compressor motor and thermal overload device
- Water supply valve assembly
- Lift the front edge of the shelf to release it from the shelf mounts.
- Lift the whole shelf and bring it toward the front of the refrigerator.
- Pull out the crisper drawers to the stop.
- Lift the front edge of the drawer and pull it the rest of the way out.
- Use a #2 Phillips driver to remove the screw securing the bracket to the shelf mount.
- Unlock the lower shelf by pressing in the locking tabs located on each side of the shelf right next to the crisper drawer wheels.
- Maintain a slight upward pressure on the shelf with your hands during this process so the tabs don't click back into place.
- Use both hands to lift the front of the shelf up.
- Pull the shelf towards you once it is lifted up enough to clear the retainers at the side shelf supports.
- You should now be able to see some of the screws which hold the rear panel in place.
- Use a screwdriver or spudger to insert into the bottom of the screw cover, then pry upward to loosen and remove it.. Remove the cover and set it aside.
- Use a #2 Phillips driver to remove the screws securing the evaporator cover to the rear wall of the fresh food compartment.
- Grasp the lower edge of the evaporator cover and pull it forward.
- Don't force the reposition of the evaporator cover. The cover is mainly foamed plastic, and can be broken if handled carelessly.
- If it doesn't want to release, check for ice buildup which may show up in the small vents.
- Once the lower edge is free pull the right edge free.
- Rotate the evaporator cover so it faces the left side of the fresh food compartment.
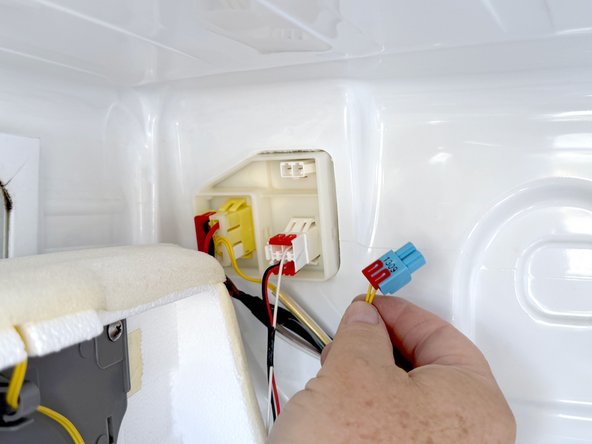
- Access the connectors on the left rear wall of the fresh food compartment.
- Disconnect the wires that lead to the evaporator cover, by squeezing the locking tab on each connector and pulling the connector toward you.
- Finish disconnecting the evaporator cover.
- Remove the evaporator cover from the fresh food compartment.
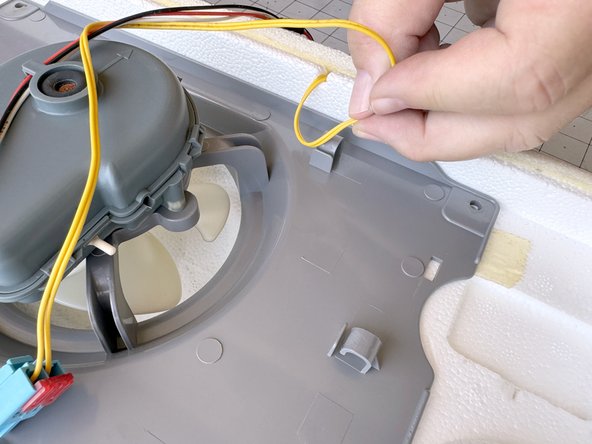
- Use a #2 Phillips driver to remove the screws securing the fresh food evaporator fan assembly to the evaporator cover.
- Unclip the thermistor wires and the wires to the evaporator fan from the evaporator fan assembly.
- Lift the evaporator fan assembly to separate it from the evaporator cover.
- Peel the tan masking tape on the left and right sides of the evaporator cover.
- Use your fingers to peel the sticky foam insulation back at the top edge.
- Lift the top edge of the plastic shell.
- Peel the tan masking tape to expose the wire channel for the thermistor leads.
- Peel back the sticky foam insulation to further expose the channel for the thermistor leads. This is usually near the center of the evaporator cover.
- Lift the thermistor free of its holder with your fingertips. You can use the leads gently to move it.
- Peel back the sticky foam further, and free the thermistor leads from the channel.
- Thread the thermistor leads under the sticky foam insulation along with the thermistor.
- Remove the thermistor completely.