Asus ROG Zephyrus G14 (2024) m.2 SSD Drive Replacement
ID: 175981
Description: I haven't seen a guide on upgrading the m.2 SSD...
Steps:
- IFIXIT Essential Electronics Toolkit
- Vantec M.2 NVMe SSD to USB 3.1 Gen 2x1 Type C Syncable RGB Enclosure
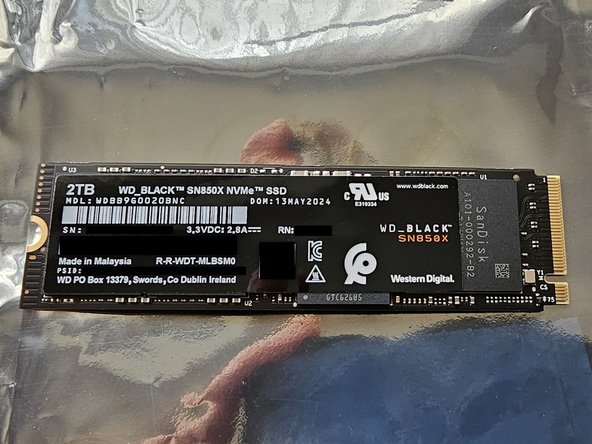
- WD_Black SN850x 2TB M.2 drive
- Acronis True Image for Western Digital software to make an exact copy of the existing drive onto the new drive
- After the clone process is complete go ahead and shut down the laptop and remove any usb drives, dongles, and power cord from the laptop.
- Flip the laptop over and put it on a soft work pad, I used the laptop sleeve to protect the lid from getting scratches on it.
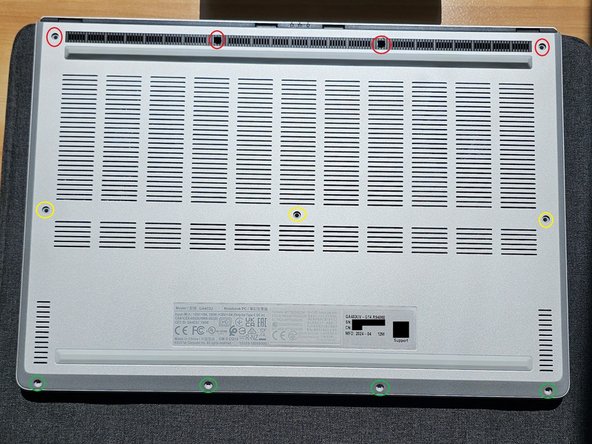
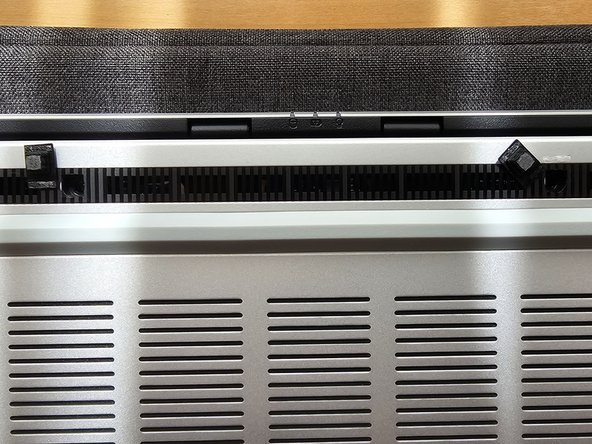
- Remove the 11 screws that fasten the bottom cover with the Torx 6 bit. There are 2 rubber stoppers that need to be removed to get access to 2 of the screws. I used the toolkit lid to keep the screws organized since there are a few different screw sizes.
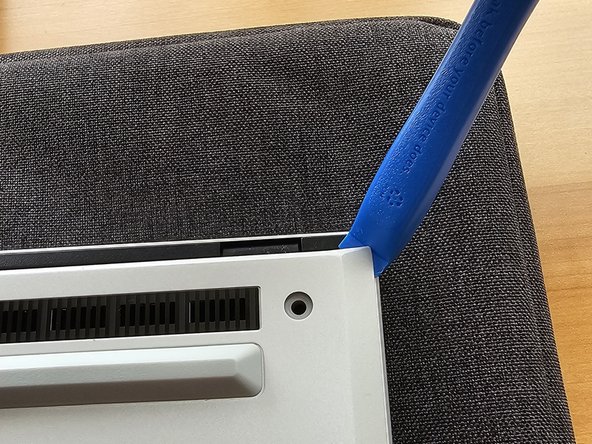
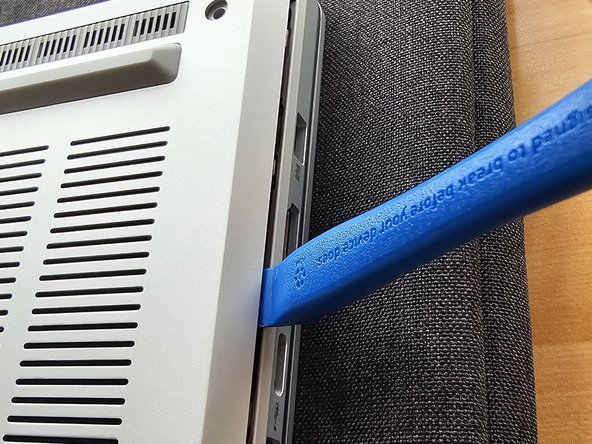
- After removing all 11 screws use the plastic Opening Tool to unclip the bottom cover
- I started from the top right corner and worked all the way around the cover to unclip it
- After the bottom cover is removed inspect the laptop internals, now is a good time to remove any dust that might have accumulated.
- If you are using compressed air be careful not to overspeed the fans, I usually keep a finger on the fan to keep it from spinning while air blasting it.
- Take a moment to admire/inspect the laptop for any lose wires or screws.
- Before removing the SSD unhook the battery from the main board
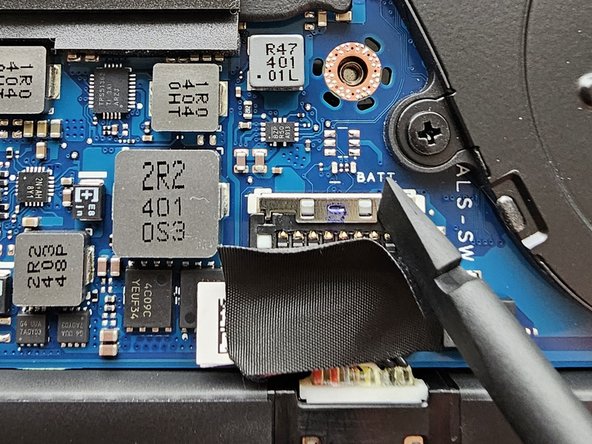
- Use the plastic Spudger Tool to remove the tape covering the battery connector
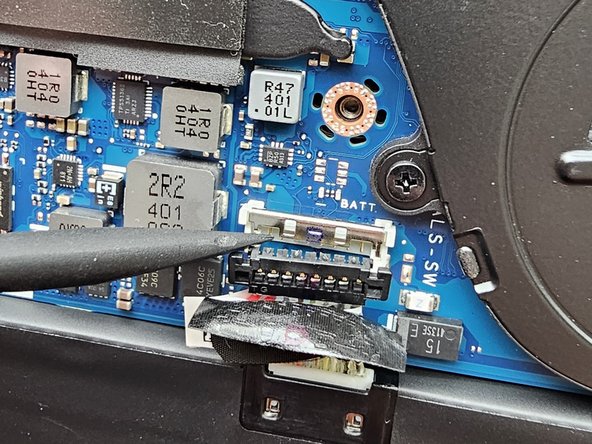
- The metal cover the holds down the battery connector will need to be moved up out of the way. Once that is done you can use that Spudger Tool to pop up the battery connector.
- I slid the metal cover back into position to keep the battery connector from coming in contact with the main board connection
- Once the power is removed from the main board you can start working on removing the existing SSD.
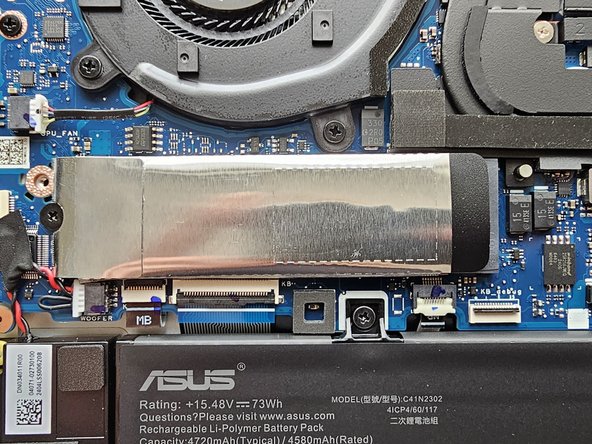
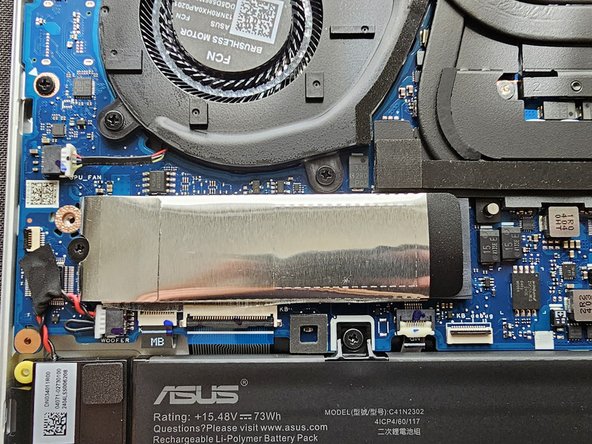
- Use the Phillips 1 bit to remove the single screw holding the SSD in place.
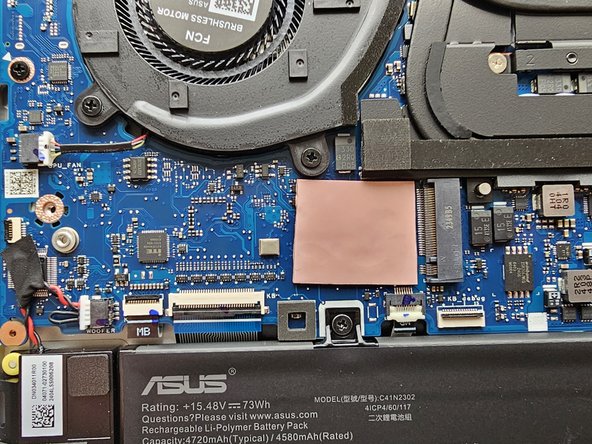
- Once the screw is removed lift up the end of the SSD and pull the drive out from the PCIe slot
- Once the existing drive is out simply slide the SSD out of the protective cover and slide it over the new drive
- Install the new drive into the PCIe slot and reinstall the single Phillips 1 screw to hold the SSD in place.
- Connect the battery back to the main board
- Reinstall the cover and make sure you reseat all the clips around the edge of the cover before reinstalling the 11 screws
- Finally reinstall the rubber bumpers on the bottom cover
- I hooked up the power cord to make sure the charge light came on before powering the laptop back on
- The laptop should boot up just fine if the clone process was successful, the only difference you should notice is a nice increase of storage space!
- Congratulations you just upgraded you ASUS ROG Zephyrus G14 laptop!