Whirlpool WED5100VQ1 Dryer Door Switch Replacement
ID: 177818
Description: If your Whirlpool dryer (model WED5100VQ1)...
Steps:
- Unplug the dryer's power cord.
- Open and remove the lint screen.
- Remove the screws next to the lint screen opening.
- From the front of the dryer, insert a prying tool in the seam where the locking tabs are located (about 2 inches away from a corner).
- Be sure the prying tool sits above the two legs of the locking tab.
- Press the tool to release the locking tab.
- Lift the top of the dryer.
- Caution: Forcing the top of the dryer to lift without fully releasing the locking tab could result in pinching, crushing, or shearing of your fingers and hands.
- Repeat the step on the opposite corner to fully release the top of the dryer.
- Lift the top of the dryer 90 degrees to lock it in place.
- If necessary, pull out the dryer until there's enough space for the top of the dryer to open 90 degrees.
- Open the dryer door.
- Remove the screws next to the door switch.
- The drier door switch should be located at the upper right corner of the door frame.
- From the top of the dryer, pinch and push down on the mounting tabs holding the dryer door switch to unplug them.
- Pull out and disconnect the door switch.
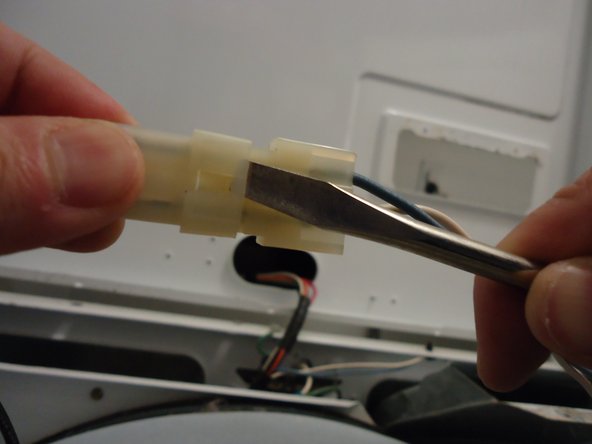
- If necessary, insert a prying tool into the door switch’s push-in connector to disconnect.
- Grab and align the new door switch’s connector with the wire harness.
- Insert the new door switch's connector into the wire harness until snug.
- Place the door switch to its original location.
- Ensure the door switch’s screw sockets align with the dryer's screw holes.
- From the front, hold the door switch in place
- Continue to hold the door switch in place until the screws are in place and fully tightened.
- Hand-tighten the screws to secure the door switch.
- Finish tightening the screws using a screwdriver.
- On the top side of the dryer, plug the switch’s mounting tab back in place.
- Close the dryer door.
- Close the top of the dryer.
- Press down the top of the dryer to lock it in place.
- On the lint screen opening, put the two screws back in place.
- Close and/or return the lint screen.
- Plug the dryer's power cord back in.
- If you pulled the dryer out earlier, push it back to the original location first.
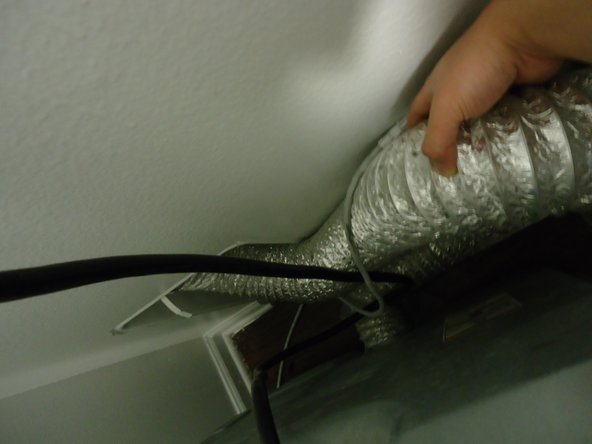
- Adjust the dryer vent as needed to avoid crushing it while pushing back the dryer to its original location.