Panasonic PT-DW640US Lamps Replacement
ID: 178182
Description: As projectors are used frequently, lamps will...
Steps:
- Remove the 31.8 mm screw from the front of the projector using a Phillips #1 screwdriver.
- Remove the front cover of the projector by pulling it towards you and to the left with two hands.
- The front cover has a notch on the top so you must move side to side as you pull to remove it properly.
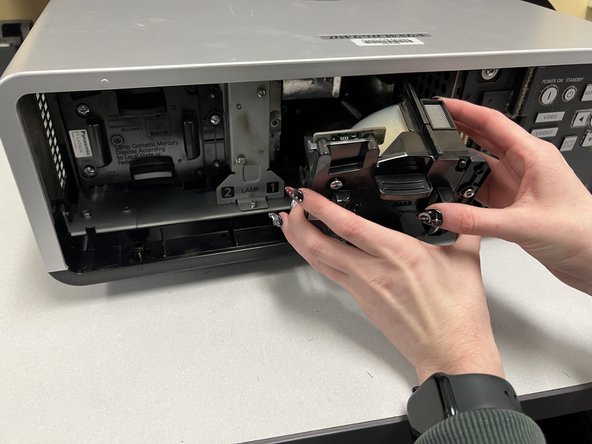
- Remove the six 31.8 mm screws from the inside using a Phillips #1 screwdriver.
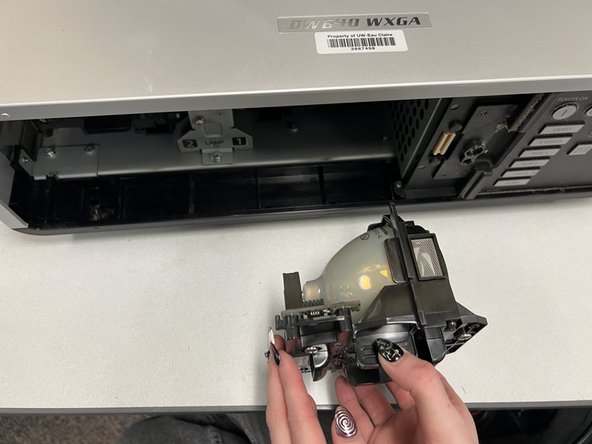
- Reach into the inside and carefully pull out the left and right projector lamps.
- It will require a bit of force in order to pull them out, but there should not be resistance after you first move them.
- Caution: Be sure that the lamps are not dropped as the mercury contained within them is very harmful.
- After disposing of the old lamps properly, gather your new lamps and remove them from the packaging they came in.
- The new lamps will come with screws to attach the parts.
- Place the new lamps into the projector.
- The wide section of each lamp should face outwards with the screws towards you.
- Secure the lamps using the six 31.8 mm screws that came with the new lamps using a Phillips #1 screwdriver.
- Place the cover back on.
- Ensure that the notch is on the top left of the cover when you place it.
- Screw the single 31.8 mm screw back in using a Phillips #1 screwdriver.