Lenovo ThinkPad X280 Power Jack Replacement
ID: 178579
Description: This, guide will show you how to replace the...
Steps:
- To begin, ensure that the device is completely powered off and not connected to an energy supply.
- Close the device and flip it over to expose the back panel.
- Use a Phillips #1 screwdriver to unscrew the five captive screws on the back panel until a small pop is heard.
- These are captive screws and do not come out completely.
- Gently wedge an opening tool or spudger under the back panel, and loosen the clips around the perimeter until the back panel comes off.
- Remove the back cover.
- Using the Phillips #1 screwdriver, remove the four 5 mm screws that are holding the battery down.
- Remove the battery.
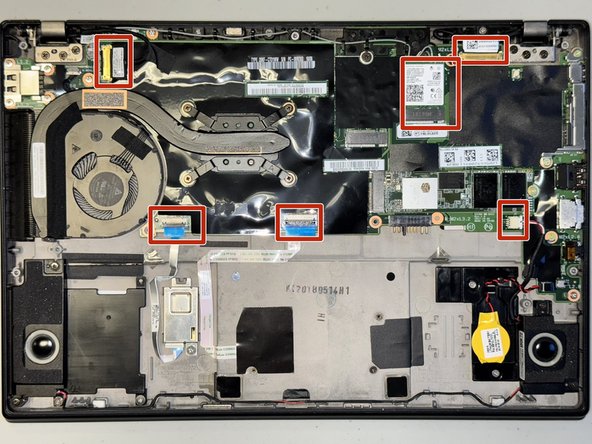
- Disconnect all six ribbon cables connected to the motherboard by gently with a screwdriver or your fingers.
- Flip up the locking flaps before disconnecting the cables where pertinent.
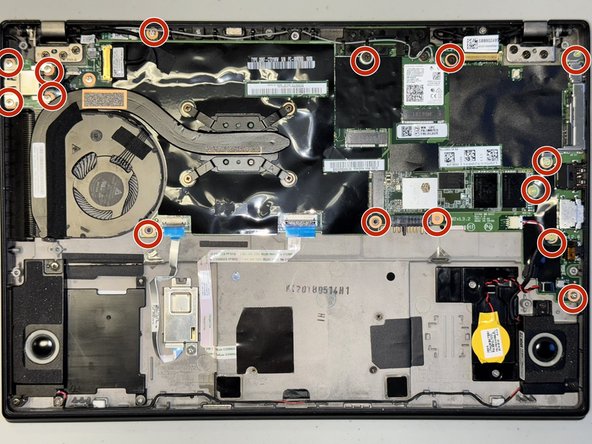
- Remove the two 5.4 mm screws securing the metal bracket with a Phillips #1 screwdriver.
- Remove the two 5.4 mm screws securing the plastic bracket with a Phillips #1 screwdriver.
- Remove all fifteen 3.4 mm screws securing the motherboard with a Phillips #1 screwdriver.
- Lift out the mother board to access the power jack to replace it with a new one.
- The power jack will have to be desoldered and then the replacement resoldered. Check out this handy guide to help guide you.