OnePlus 8 Rear Camera Replacement
ID: 178922
Description: This guide provides step-by-step instructions...
Steps:
- Power off your phone and unplug any cables.
- Heat an iOpener and apply it to the rear glass for two minutes.
- You can also use a hair dryer, heat gun, or hot plate—but extreme heat can damage the display and internal battery, so proceed with care.
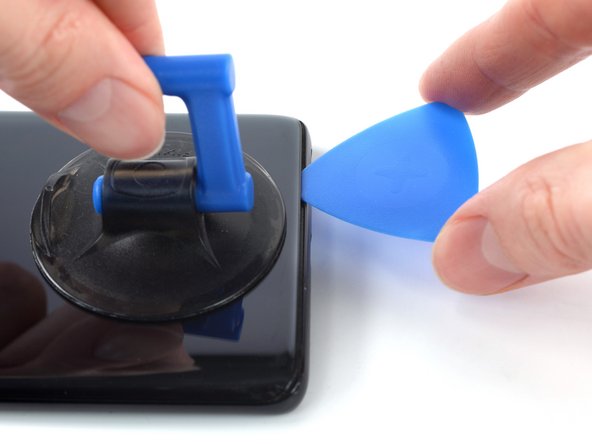
- Apply a suction handle to the center of the bottom edge of the rear glass, as close to the edge as possible.
- If your display is badly cracked, cover it with a layer of clear packing tape to help the suction cup adhere. Alternatively, you can pull using very strong tape instead of a suction cup. If all else fails, try supergluing the suction cup to the broken screen.
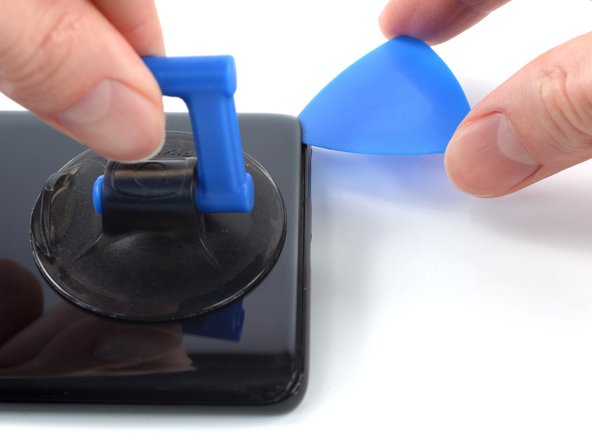
- Pull up on the suction handle with strong, steady force to create a gap between the rear glass and frame.
- Insert an opening pick into the gap.
- Slide the opening pick to the bottom right corner to slice the adhesive securing the rear glass.
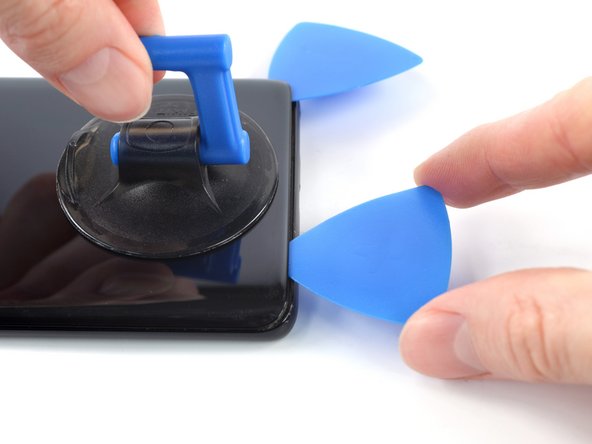
- Leave the opening pick in the bottom right corner to prevent the adhesive from resealing.
- Insert a second opening pick under the bottom edge of the rear glass, into the gap you just created.
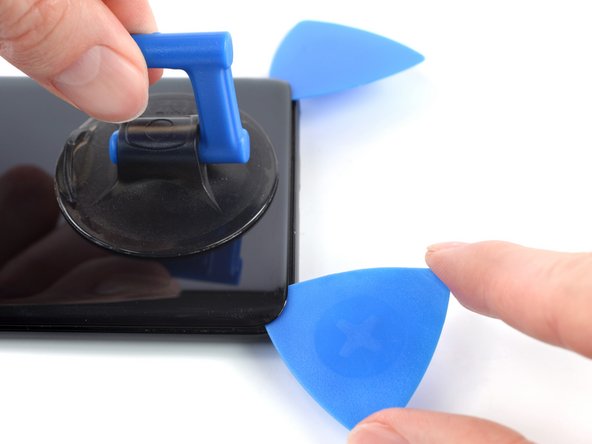
- Slide the opening pick to the bottom left corner to slice the adhesive.
- Leave the opening pick in the bottom left corner to prevent the adhesive from resealing.
- If you have trouble slicing, reheat the iOpener and apply it to the edge for two minutes to soften the adhesive.
- Insert a third opening pick under the bottom left corner of the rear glass.
- Slide the opening pick up the left edge to slice the adhesive.
- Leave the opening pick in the top left corner to prevent the adhesive from resealing.
- Insert a fourth opening pick under the top left corner of the rear glass.
- Slide the opening pick along the top edge to slice the adhesive.
- Leave the opening pick in the top right corner to prevent the adhesive from resealing.
- Insert a fifth opening pick under the top right corner of the rear glass.
- Slide the opening pick down the right edge to slice the remaining adhesive.
- Remove the rear glass.
- If the rear glass still feels stuck to the frame, slide an opening pick around the entire perimeter until the rear glass separates completely.
- During reassembly:
- Secure the rear glass with pre-cut adhesive or double-sided adhesive tape.
- After installing the rear glass, apply strong, steady pressure to your phone for several minutes to help the adhesive form a good bond.
- A white sticker may cover a screw on the right edge of the motherboard cover. Pierce through it with the tip of your screwdriver or use tweezers to remove it.
- Use a Phillips screwdriver to remove the eleven 3.3 mm-long screws securing the motherboard cover.
- The motherboard cover is secured by tight clips.
- Insert the flat end of a spudger under the center of the motherboard cover's bottom edge.
- Twist the spudger to release the clips.
- Lever the motherboard cover up until you can grip it with your fingers.
- Remove the motherboard cover.
- Use a spudger to disconnect the battery cable by prying the connector straight up from its socket on the bottom left corner of the motherboard.
- To re-attach press connectors like this one, carefully align and press down on one side until it clicks into place, then repeat on the other side. Don't press down in the middle. If the connector is misaligned, the pins can bend and cause permanent damage.
- Disconnect the antenna cable connector on the right, using tweezers.
- Disconnect the antenna cable connector on the left using tweezers.
- Use an opening tool to gently pry and disconnect the three camera press connectors.
- Remove the rear camera.