ASUS G713RC RAM Replacement
ID: 178977
Description: In this guide, I will show you how to replace a...
Steps:
- Warning: Do not touch any other components inside if you don't have to. It may result in damage and can destroy your laptop.
- Remove the seven large screws using a Phillips #00 screwdriver.
- Remove the four small screws using a Phillips #00 screwdriver.
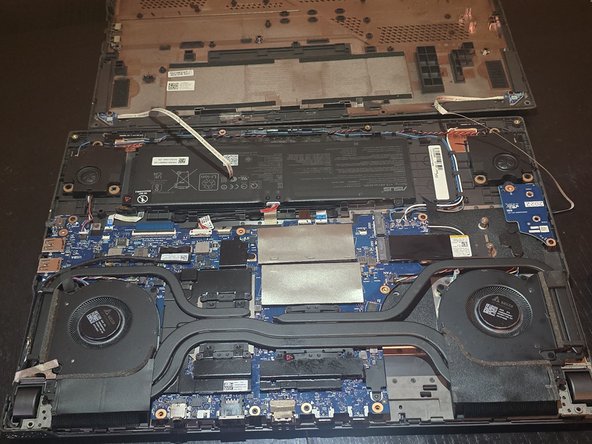
- Carefully lift the lid, being careful of the two cables connected to the laptop.
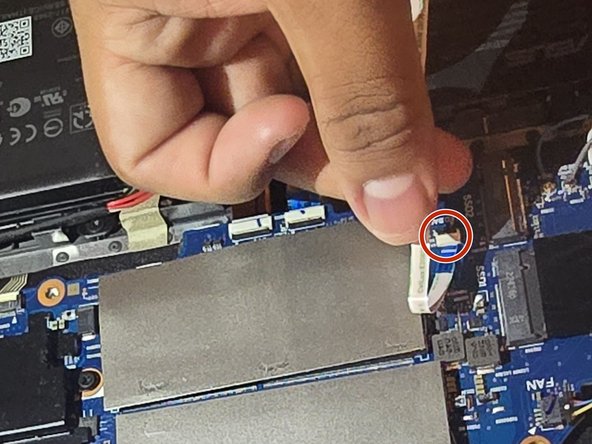
- Carefully detach the two white cables that are connected to the lid.
- Set aside the lid.
- Carefully lift up each gray bar.
- It is important that you don't completely remove the gray bar.
- Remove the RAM.
- Insert each RAM stick under the gray bar. Push until you hear a click.
- Hold down the gray bar to make sure it is flat and secure.
- It might be a bit bumpy, but it is nothing to worry about.
- It is important that you don't completely remove the gray bar.
- Reattach the lid by connecting the white wires to the base.
- Plug in the white wires on both sides. You want to plug them in thoroughly, otherwise, your laptop won't turn on.
- Line up the lid to the laptop.
- Tighten the seven large screws using a Phillips #00 screwdriver.
- Tighten the four small screws using a Phillips #00 screwdriver.