iPhone 16 Pro Charging Port Removal
ID: 181233
Description: Prerequisite guide to remove the USB-C charging...
Steps:
- Allow the phone's battery to drain below 25%, as a charged lithium-ion battery is a potential safety hazard.
- Unplug any cables from the phone.
- Hold the power and either volume buttons and slide to power off the phone.
- If the screen or back glass is badly cracked, lay overlapping strips of packing tape over the glass to protect yourself and make disassembly easier.
- Make sure there's a smooth area near the bottom edge that's big enough for a suction cup to stick to.
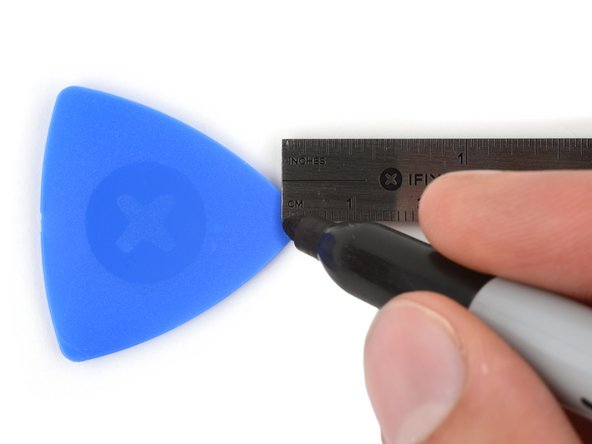
- If inserted too far, an opening pick can damage your device. Follow this step to mark your pick and prevent damage.
- Measure 3 mm from the tip and mark the opening pick with a permanent marker.
- You can also mark the other corners of the pick with different measurements.
- Alternatively, tape a coin to a pick 3 mm from the tip.
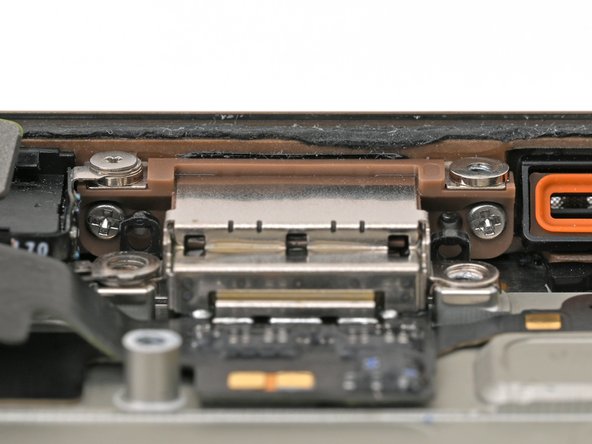
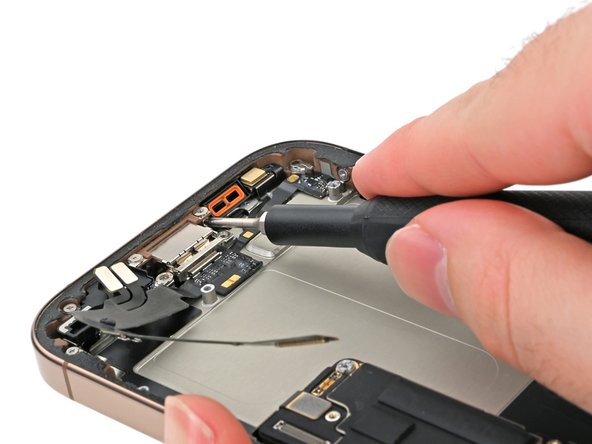
- Use a P2 pentalobe screwdriver to remove the two 7.4 mm‑long screws on either side of the USB-C port.
- Use a standoff screwdriver to remove the 3.6 mm‑long screw securing the charging port to the frame.
- Use a Phillips screwdriver to remove the two 3.4 mm‑long screws securing the charging port to the frame.
- These screws are tight and can be difficult to reach. Angle your screwdriver at as shallow of an angle as you can.
- Use a tri-point Y000 screwdriver to remove the 1.3 mm‑long screw securing the charging port to the frame.
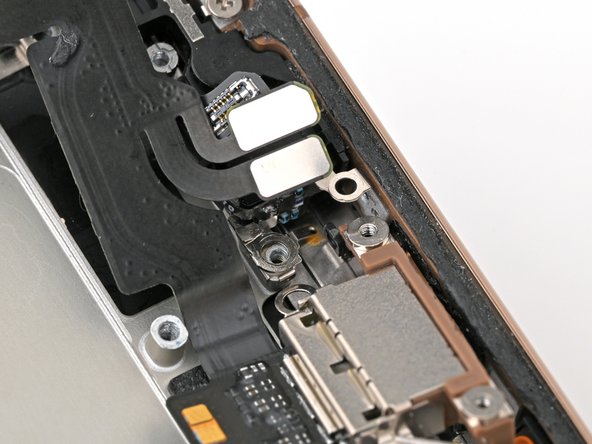
- The charging port has an adhesive gasket that seals it against the bottom and edge of the frame. It's also tucked behind two prongs, which prevents you from pulling the port away from the frame.
- Insert the point of a spudger under one side of the charging port.
- Pry up gently to separate the gasket and lift the port up.
- Don't pull the port directly away from its cut-out in the frame. There are two prongs holding it in place.
- Pull the charging port away from the microphone.
- Remove the charging port.