HP Chromebook 14-SMB SSD Replacement
ID: 186155
Description: The SSD is where a computer stores information,...
Steps:
- Remove the eleven Phillips screws securing the lower case.
- Remove the two rubber stoppers, then remove the two Phillips screws hidden underneath.
- Flip the laptop over and open the lid.
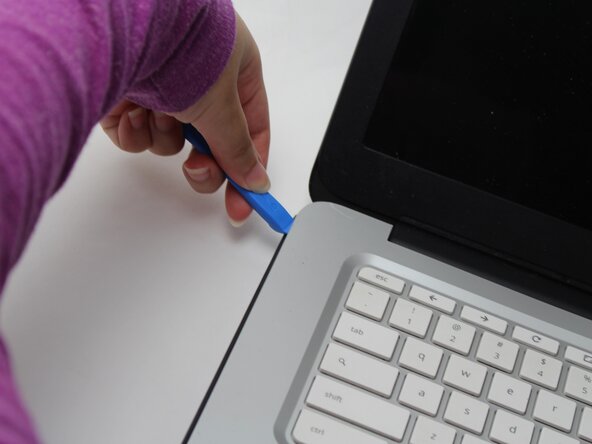
- Insert an opening pick into the seam between the keyboard assembly and chassis.
- Slide the pick along the edge to release the plastic clips, then use an opening tool to pry around the entire perimeter until the keyboard assembly fully releases.
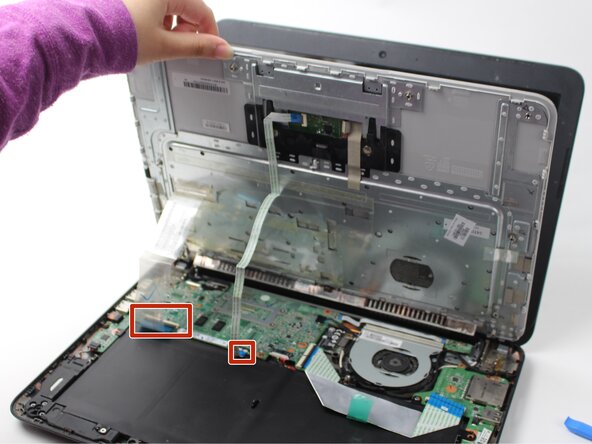
- Do not pull the keyboard assembly fully away from the laptop yet; it is still connected by fragile ribbon cables.
- Lift the keyboard perpendicular to the laptop.
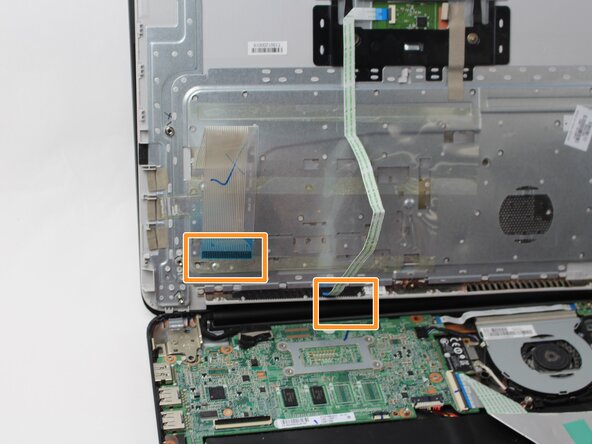
- Flip up each of the two black ZIF locking flaps that secure the keyboard and trackpad ribbon cables to their motherboard sockets.
- Disconnect the keyboard and trackpad ribbon cables.
- Remove the keyboard.
- Use your fingernail or the flat end of a spudger to gently disconnect the battery connector from its motherboard connector.
- Use a Phillips #0 screwdriver to remove the three screws that secure the battery.
- Lift the battery up and out of the chassis.
- Take care not to scratch or damage the battery. Lithium-Ion batteries can be dangerous if punctured.
- Remove the three Phillips screws that secure the motherboard.
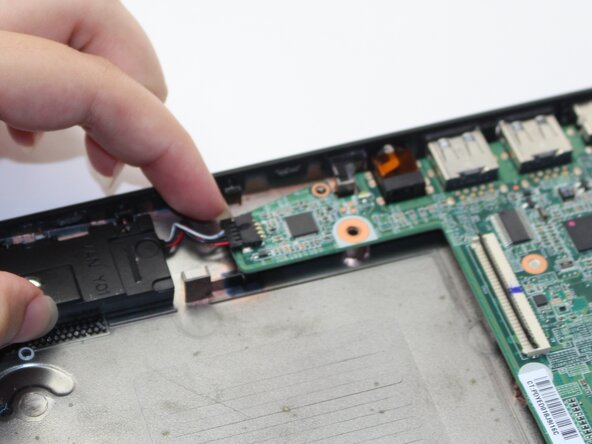
- Use your fingernails or the flat end of a spudger to disconnect the speaker and fan connectors from their motherboard sockets.
- Flip up the black ZIF locking flaps of any ribbon cables connected to the motherboard.
- Disconnect the ribbon cables.
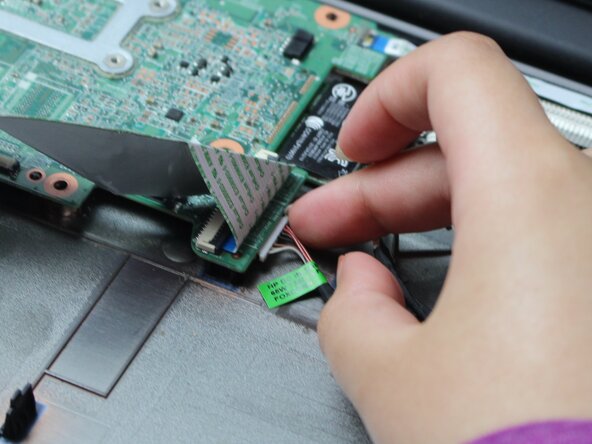
- Use your fingernails to disconnect the white connector on the underside of the motherboard.
- Disconnect the two wireless card antenna cables.
- Pull the wireless card directly out of its motherboard port.
- Pull the motherboard a few millimeters to the right to unseat the ports from the chassis.
- Turn the motherboard over.
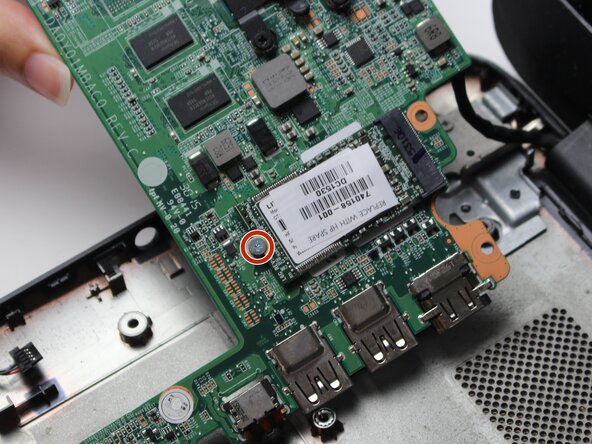
- Remove the single Phillips screw that secures the SSD.
- The SSD will flip up a few millimeters after removing the screw. This is normal.
- Pull the SSD directly out of its motherboard port.