Fluid Change and Brake Bleeding
ID: 18868
Description: Use this guide to replace the fluid in and...
Steps:
- Remove the wheel of the calipers you are going to bleed, and remove the brake pads.
- Install Avid® brake block.
- You can substitute a 10mm wide block, such as a hex key, if necessary.
- Levers set for a long reach may have the reservoir closed and will not permit bleeding.
- Measure from the center of handlebar to the tip of brake lever. The distance should be no more than 80 mm.
- If present, set the volume of the caliper system with the adjusting knobs on the lever.
- On the right-hand lever, turn knob completely counterclockwise, then back clockwise one turn.
- On the left-hand lever: turn knob completely clockwise, then back counter-clockwise one turn.
- Rotate the bike and brake levers as necessary to ensure an upward flow from the caliper to the lever bleed screw.
- Loosen brake lever bolts just enough to allow you to rotate levers to different angles.
- Install Avid® caliper piston block.
- This keeps the pistons in position. If pistons were to move, the system would overfill with brake fluid.
- If no block is available. substitute a 10 mm hex key.
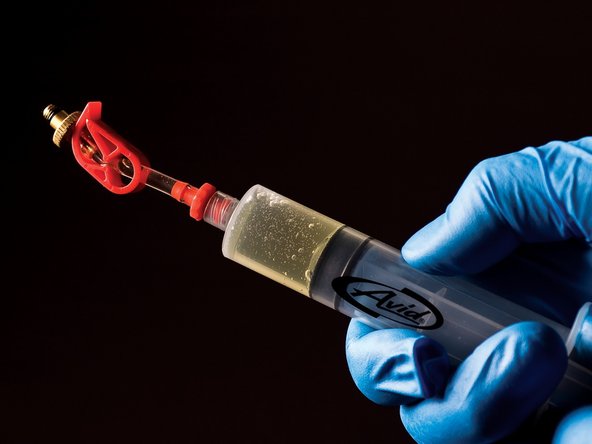
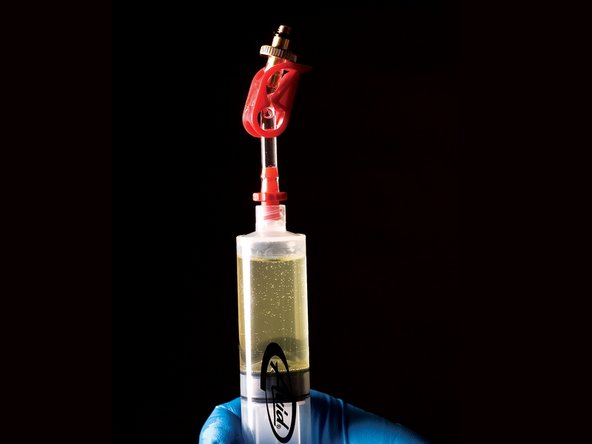
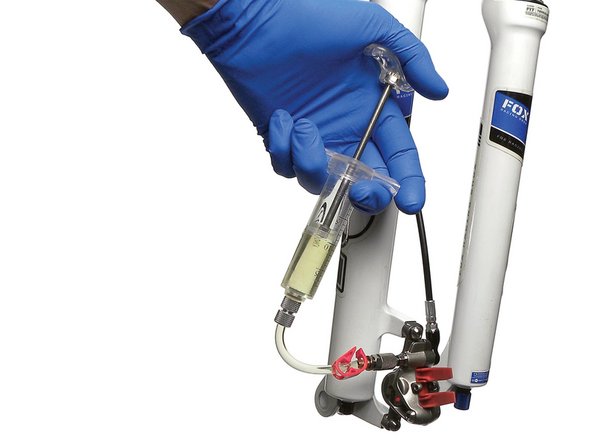
- Check to make sure the half-full syringe is free of bubbles and that the tubing clip is closed.
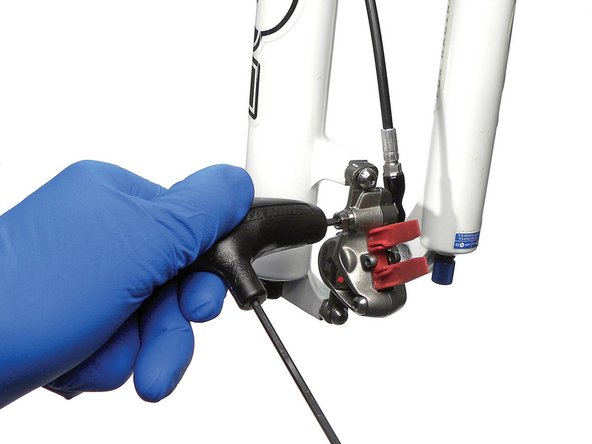
- At the caliper, remove bleed port screw using a T10 Torx driver.
- Screw is located in the center of the banjo bolt that attaches the hose to the caliper.
- Remove port screw and insert the syringe into the fitting.
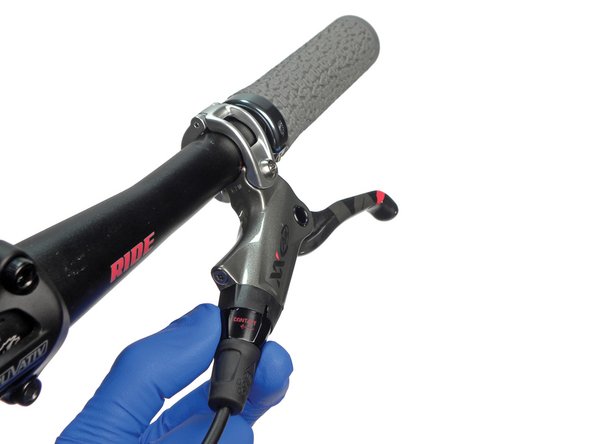
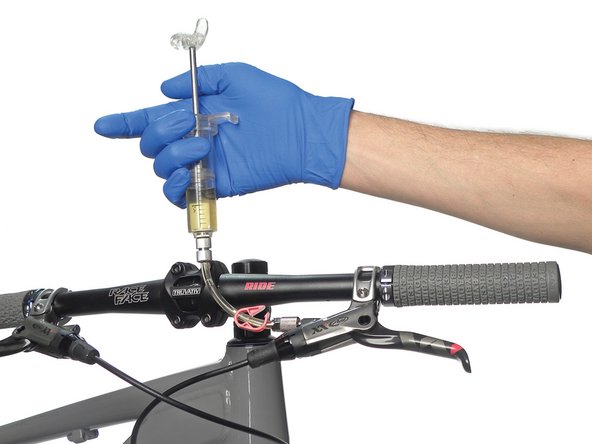
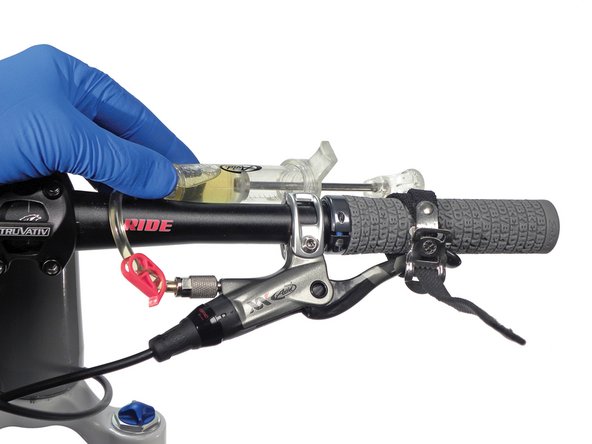
- Remove screw front the bleed port near the brake lever.
- Thread in the quarter-full bleed syringe.
- This syringe will accept the overflow from the caliper syringe during the bleeding process.
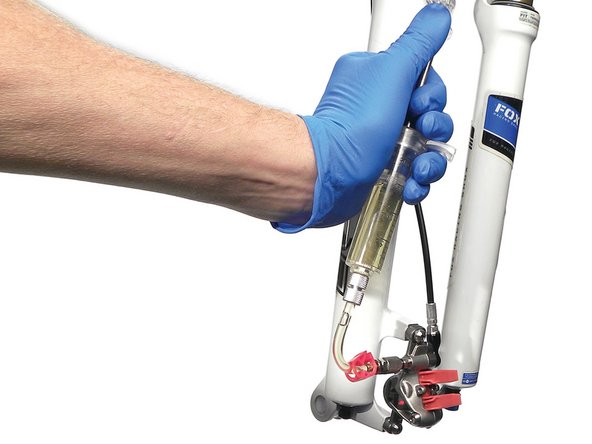
- Open tubing clamp clips on both syringes.
- Hold the lower syringe to help prevent any air from entering the caliper body.
- Push the lower syringe plunger to move fluid through the system and out into the lever syringe.
- Inspect for air bubbles.
- Inspect for dirty or contaminated fluid
- Push lower syringe plunger until mostly empty of fluid.
- Do not fully empty syringe.
- Close tubing clip on lever syringe.
- Leave caliper syringe tubing clip open.
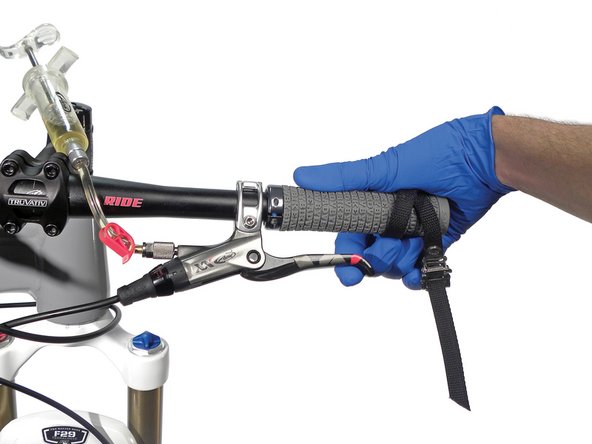
- Pull brake lever against the handlebar.
- Secure to the lever to the bar with a toe strap or rubber band.
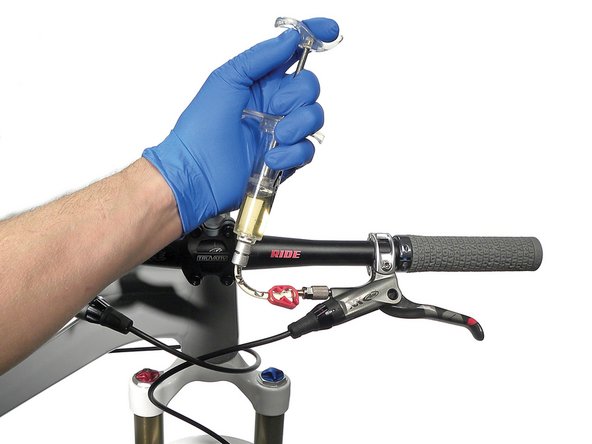
- At lower caliper syringe, push plunger gently to pressurize the system, and then pull back on the plunger.
- Repeat this process three or four times to pressurize and then apply a vacuum to the caliper.
- Inspect for any air coming back into syringe.
- Leave caliper syringe open.
- Remove the strap holding lever, but hold it against the bar with your hand.
- Push caliper syringe plunger and allow the lever to slowly move away from the bar as fluid flows to the caliper.
- Close the tubing clip at caliper syringe.
- Unthread caliper syringe and reinstall bleed port screw.
- Clean off any fluid with alcohol or soapy water.
- Open tubing clamp of syringe at lever.
- Pull back on the plunger to create a vacuum, then push the plunger down.
- Pull the brake lever slightly and allow it to snap back to help purge any bubbles remaining in lever body.
- Repeat this process 10 times, or until no more bubbles appear in the tubing.
- Push the plunger gently as lever syringe is unthreaded from lever.
- Remove the syringe and install the bleed port screw.
- Clean up any spilled fluid with alcohol or soapy water.
- Reinstall brake pads and wheel.
- Pull the brake lever to bring the pistons to the rotor.
- Lever should feel firm when pulled with force.
- Repeat bleed if necessary.
- Empty the syringes into an appropriate container and store them with their clamps open.